
We're excited to announce Data Layer for Components, a powerful new feature that makes building and customizing layouts simpler than ever. This update brings our Layout & Design tool in line with industry standards, making it faster and more intuitive for developers and designers to create exactly what they need.
What's new?
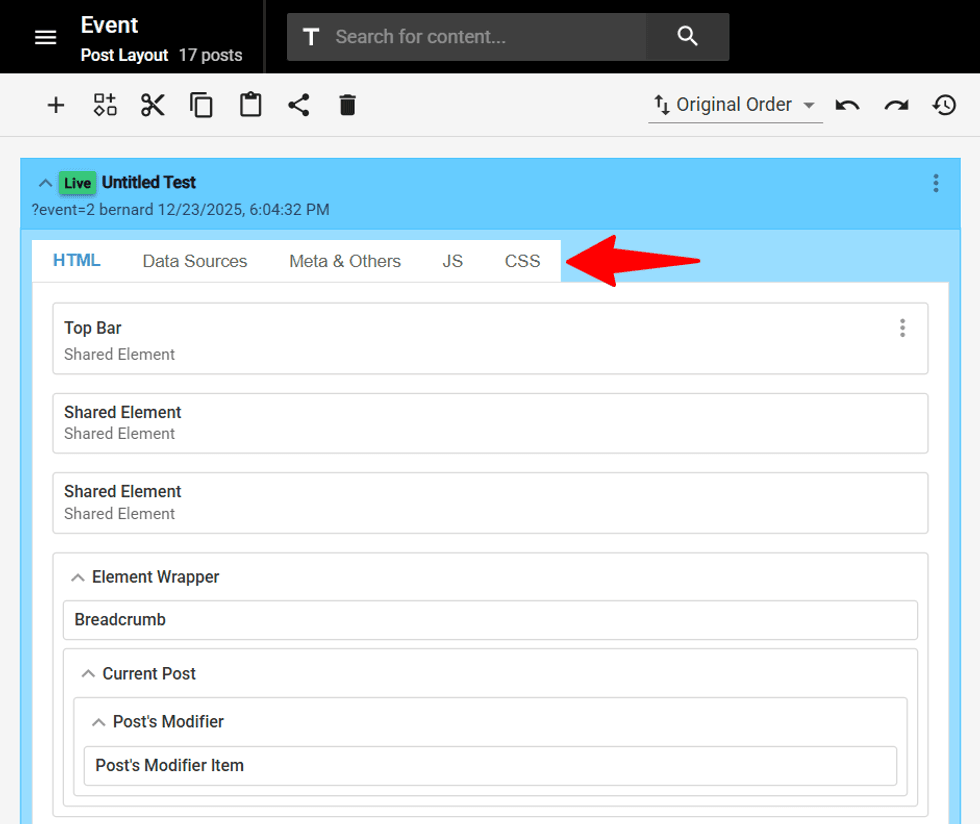
We've reorganized how you work with layouts. Instead of navigating through multiple scattered settings, everything is now consolidated into five clear tabs:
- HTML - Structure your component or layout markup
- Data Sources - Control the content on your page
- Meta & Others - Manage metadata and SEO settings
- JS - Add custom JavaScript functionality
- CSS - Style your components and layouts
The standout feature is the Data Sources tab, which gives you full control over where your content is pulled from and how that data is selected. Whether you're showing Featured posts, blog posts, product listings, or custom content, you can now easily configure what appears, in what order, and how it's organized all from one place.
How to Add Data Sources for your Layout?
Follow these three simple steps to add a data source to your layout:
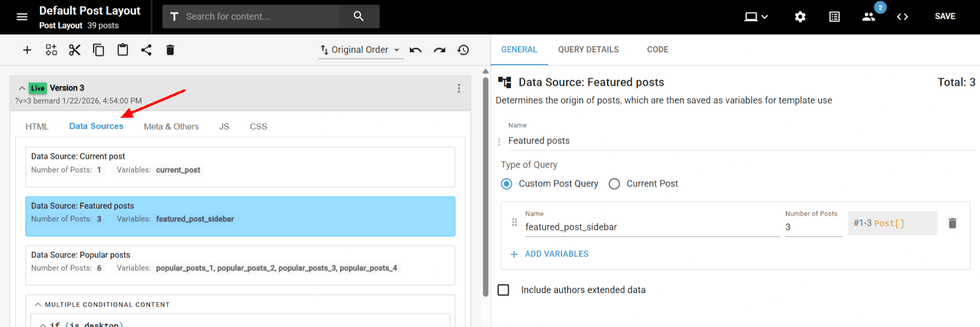
Step 1: Choose Your Query Type
You'll see two options:
- Custom Post Query - You can use this for all layouts except individual post pages.
- Current Post - Use this only when designing Post layouts.
For most cases, you'll select Custom Post Query.
Step 2: Finalize Your Settings
- Name - Give your data source a descriptive name for easy reference
- Number of posts - Specify how many posts you want to display
The system will show you exactly #number [order of posts] will appear based on your filters.
Step 3: Configure Your Filters
Navigate to the Query Details page and set your filters. These filters determine which content appears in your layout. All filters you configure are fetched by the Custom Post Query you selected in Step 1.
How to Connect the Data Source?
Once you've created your data source, follow these steps to connect it to your layout:
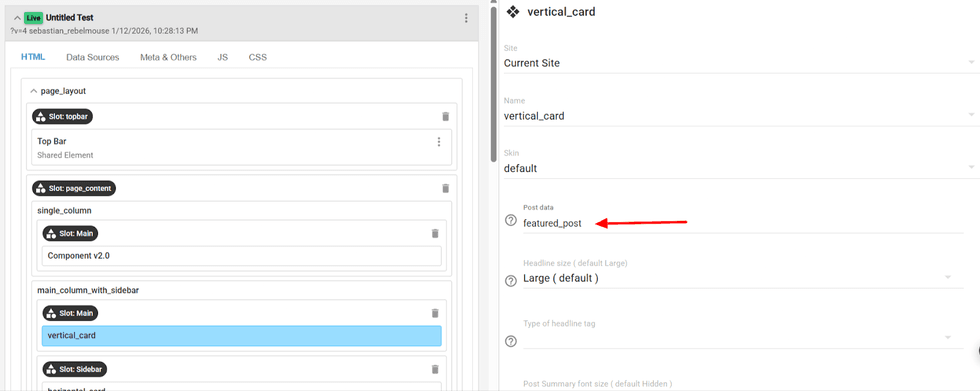
- Step 1: Navigate to the HTML tab where you can see all available slots in your component layout.
- Step 2: Find the slot where you want your content to appear.
- Step 3: Click on the component in the slot, locate the Post Data dropdown. Select the data source you created earlier from the list.
That's it! Your content will now display in that slot with all the filters and settings you configured.
Components Preview
We've redesigned the Component to give you a clearer, more organized workflow. The components are now structured into three tabs:
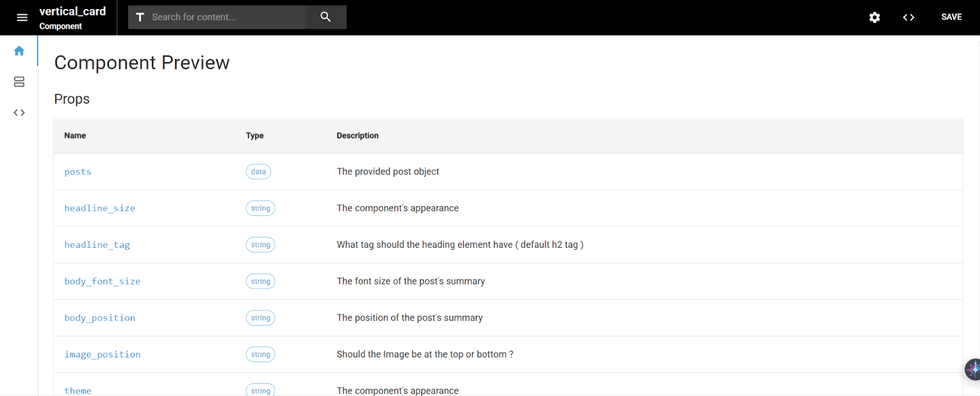
Tab 1: This tab provides a complete introduction to your component, displaying:
- Props table with three columns:
- Name - The property identifier
- Type - The data type (dropdown, text, number, etc.)
- Description - What the property controls
- Slots at the bottom
Tab 2: Here's where you Set Props - Define each property and specify its possible values
Tab 3: This tab lets you build a single component skin with three sub-tabs: HTML, JS and CSS.
Smart Suggestions and Real-Time Validations in HTML
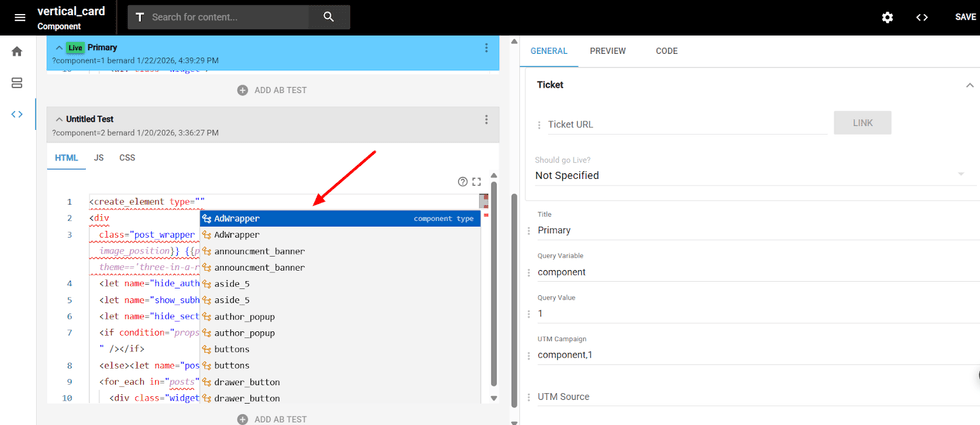
The HTML tab now includes intelligent coding assistance to help you build components faster and with fewer errors. As you write your HTML, you'll see:
- Component and slot suggestions - A dropdown list showing all available RebelMouse and HTML slots
- Auto-complete - Start typing and select from suggested options to speed up your workflow
- Component properties and slots - When you begin adding a component, see all its available properties and slots with detailed information on hover
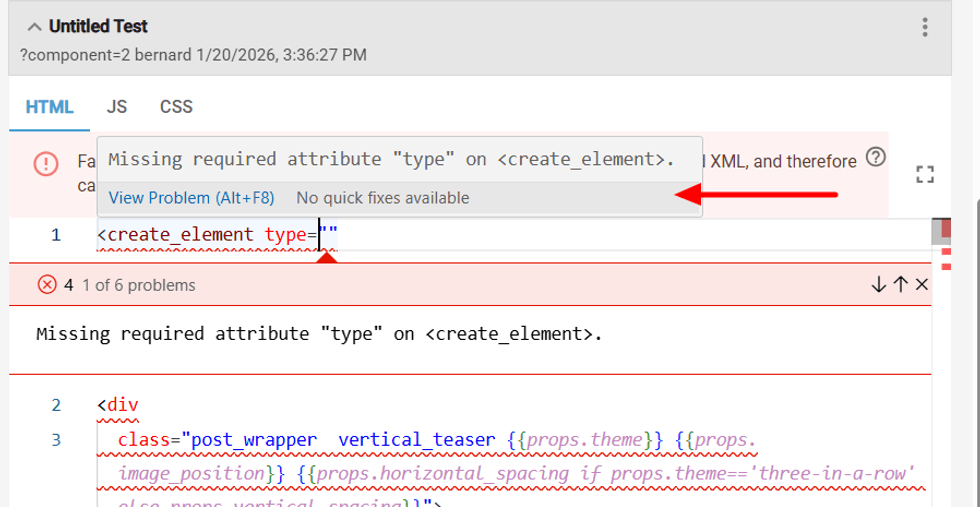
- The editor actively monitors your code and alerts you with instant tooltip notifications when required elements are missing or error indications if there are any problems as you type.
View Data Transaction Guide
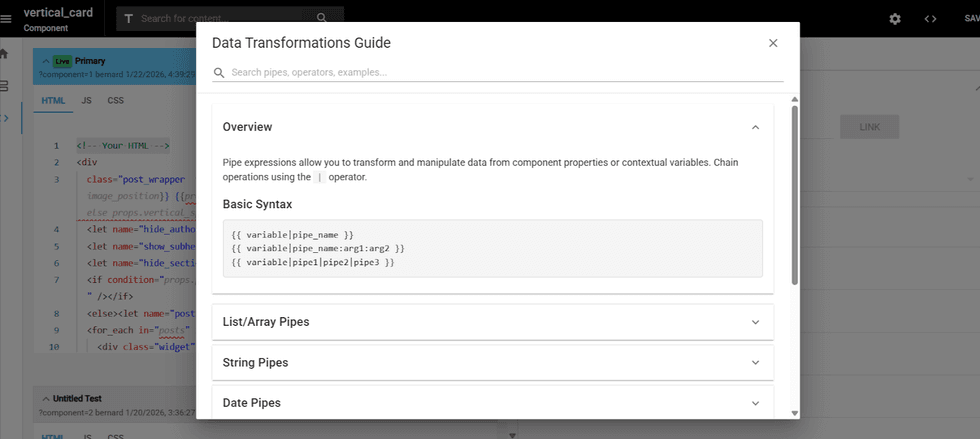
This built-in reference guide keeps everything you need at your fingertips without leaving your workspace.
Click the ? (View Data Transaction Guide) button in the top-right corner of the panel, where you can search for specific data operations and view usage examples and documentation.
Table of Contents


© 2026 RebelMouse. All rights reserved.
Comments Moderation Tools