
Get ready for a smarter content ecosystem. We’re enhancing the RebelMouse Tag system, transforming tags from simple labels into objects.
Key Benefits:
- Unified content organization - Tags will work similarly to sections, allowing for more powerful management
- Extended fields - Support for head image, description, custom fields, etc.
- Enhanced control - Set them as public, hidden or private just like sections.
This is the Tags Dashboard, where you will be able to manage all your tags: yourdomain.com/r/dashboard/tags.

How to Create New Tags on the Dashboard
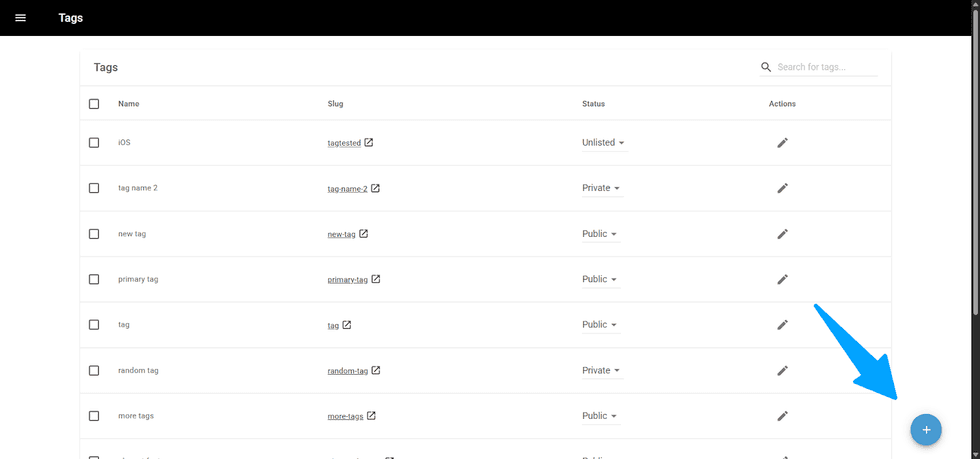
To create a new tag, you can click on the + button in the bottom left corner of the page.
A new pop-up will appear showing the required and optional fields that can be fulfilled for your new tag.
Tag Creation Fields
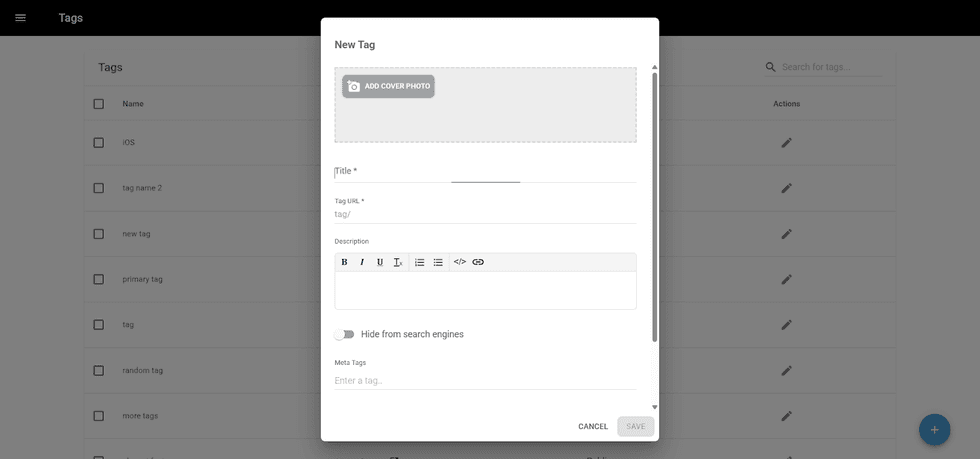
The fields are:
- Cover Image: Header Image for the Tag Page
- Title: Tag name (Required)
- Tag URL: the URL slug for the tag page (Required)
- Description: description to be shown on the tag page
- Hide from search engines: enable it to prevent your tag page from being indexed by search engines, such as Google
- Meta Tags: Any meta tags you would like to add to your tag page
- Meta Title: The Title to be shown and indexed on the search engines.
After fulfilling at least the required ones, you will be able to “Save” this new tag, and it will be created.
Dashboard Overview
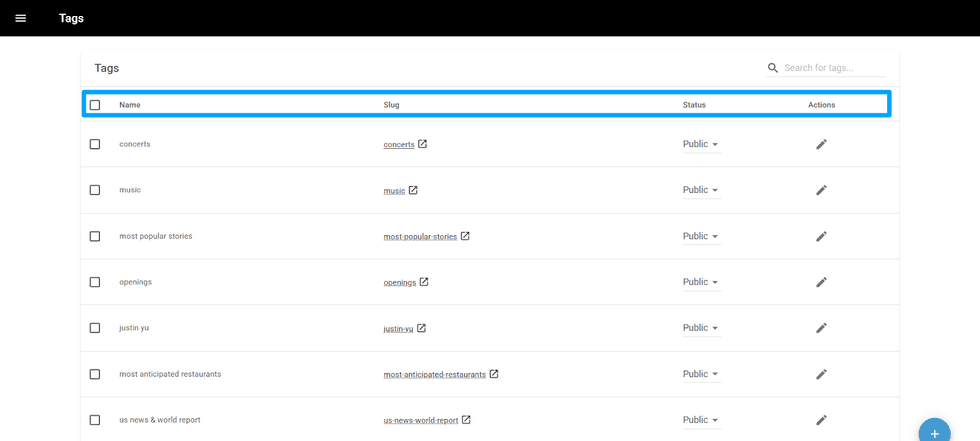
Similar to the Sections Dashboard, you will see different columns.
- Select: You can mark the check boxes to select multiple tags in the dashboard. For now, you can only bulk delete tags.
- Name: Tag name defined in the creation
- Slug: Tag page URL. It will redirect you to the Tag page once clicked
- Status: Status of the Tag page. Can be adjusted to the following statuses:
- Public: everyone can access the page.
- Private: the page is hidden from the end-users. Only logged-in people can access the page.
- Unlisted: only those who have the URL can access the page.
- Actions: It shows a pen icon to edit your tag.
Search Fields on Tag Dashboard
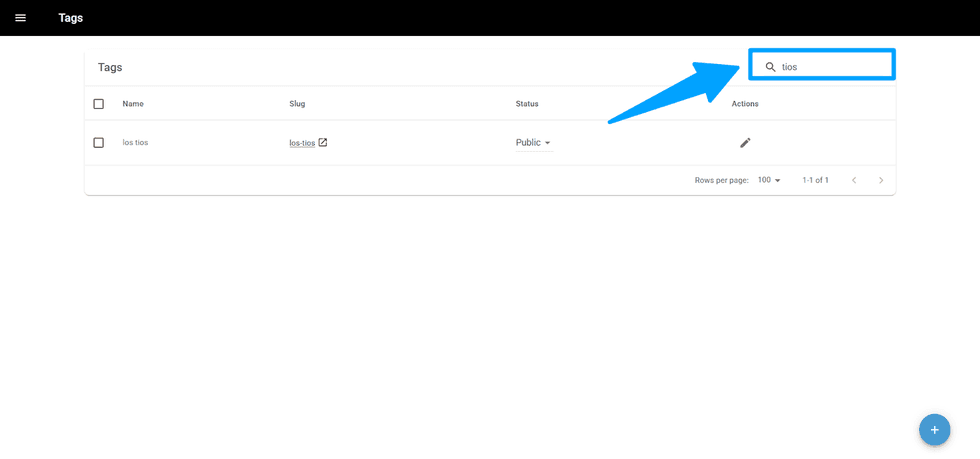
In addition to those options, you can use the Search field to find any tags.
Adding Tags on Entry Editor
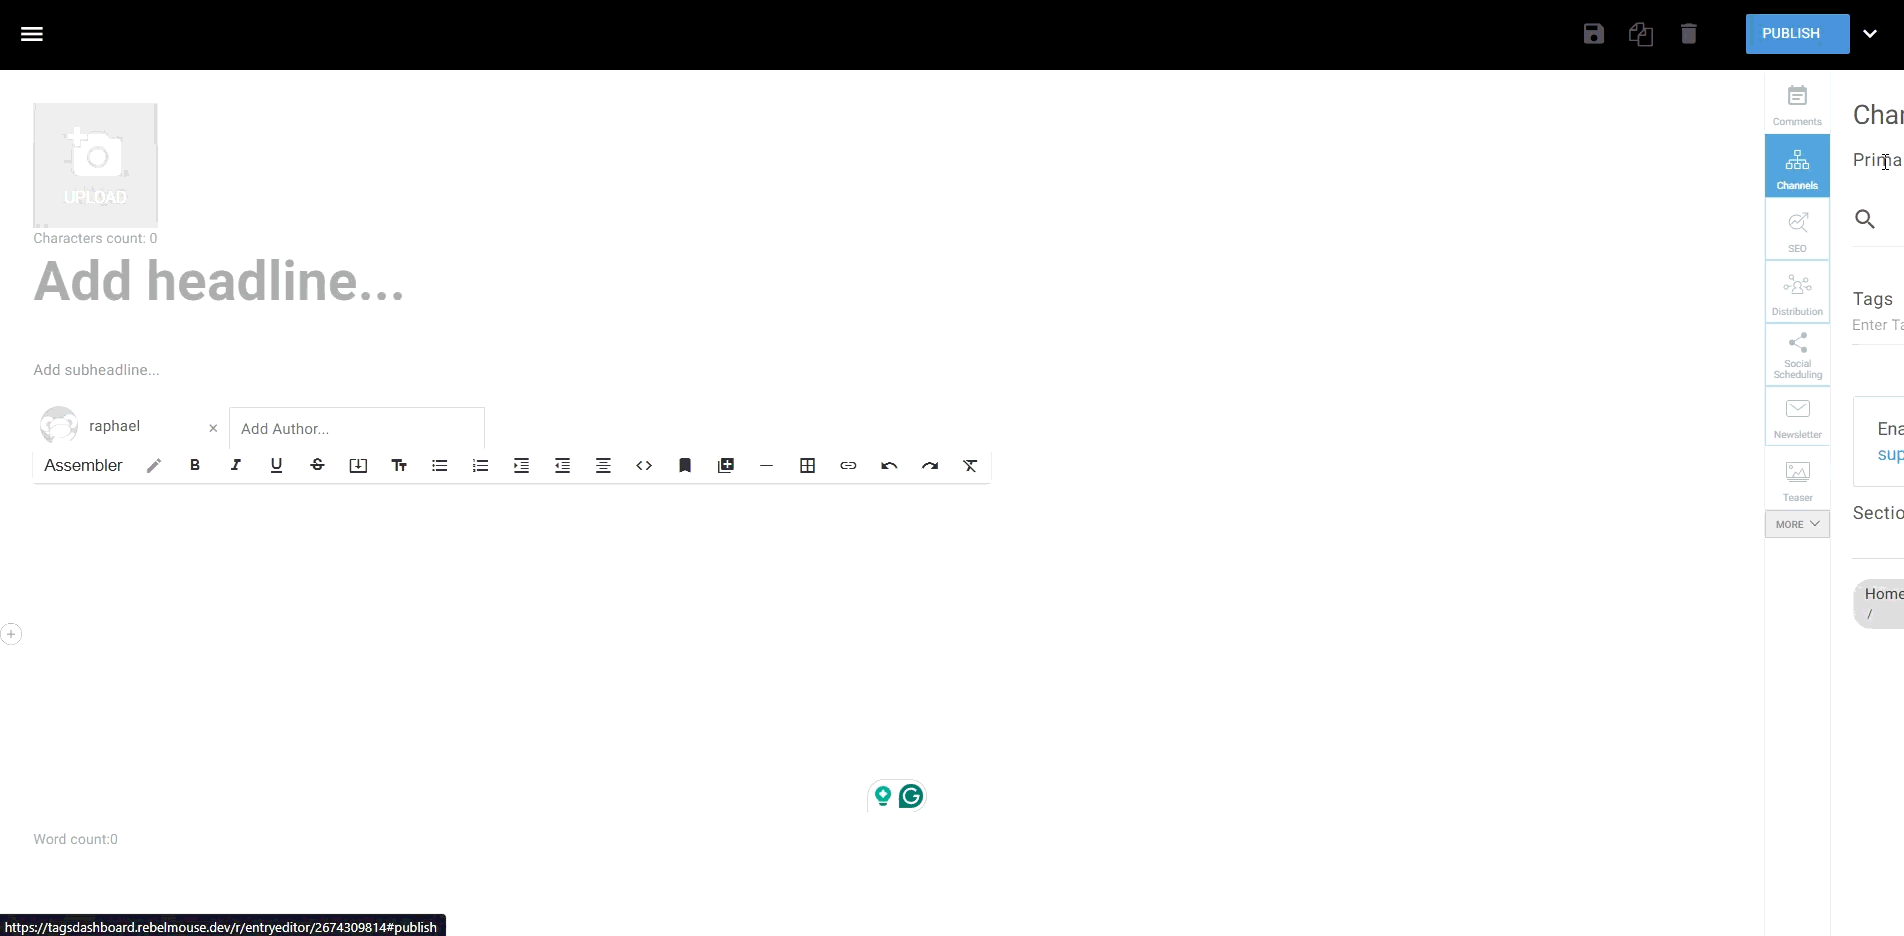
You will still be able to add tags in the Entry Editor, as before. On the Channels Tab, you will see a Tags field.
You can type a new tag and press "Enter" to add it, or click the dropdown to see all existing tags if you’d like to reuse one.
Adding Tags through Media

When adding media from YouTube, Instagram, or other platforms, a dialog will appear showing tags related to the content that may be relevant. You can select any of these tags and click “ADD” to include them in your article.
Exporting tags
Inside the Tags Dashboard, you can export all posts — either individually or in bulk — in XML or CSV format. There are several ways to export your tags, and we will explain each of them below.
Exporting All Tags
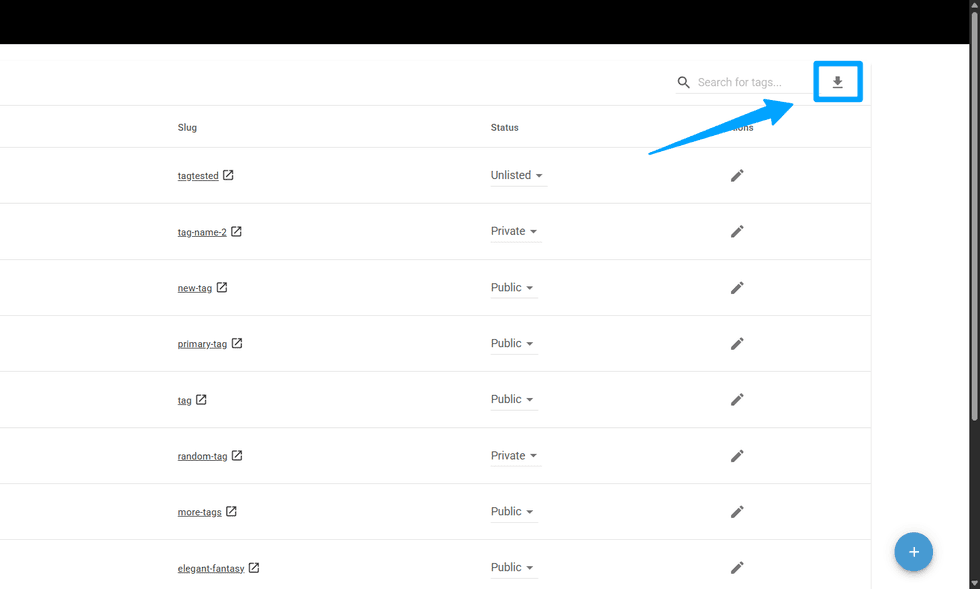
To export all tags and their information in XML or CSV format, click the Export button in the top-right corner of the dashboard.
Exporting Selected tags
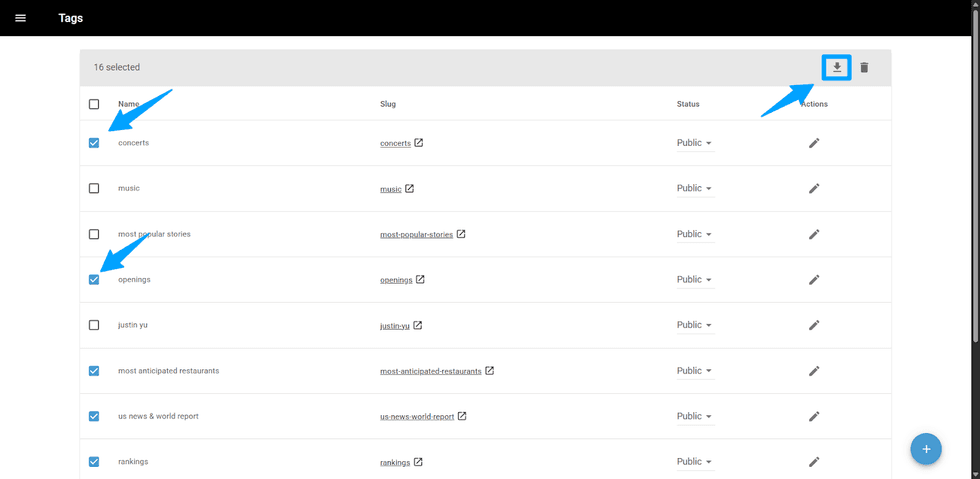
If you don’t need to export all tags, you can select only the ones you want by marking their checkboxes. After making your selection, click the Export button.
Exporting Searched Tags
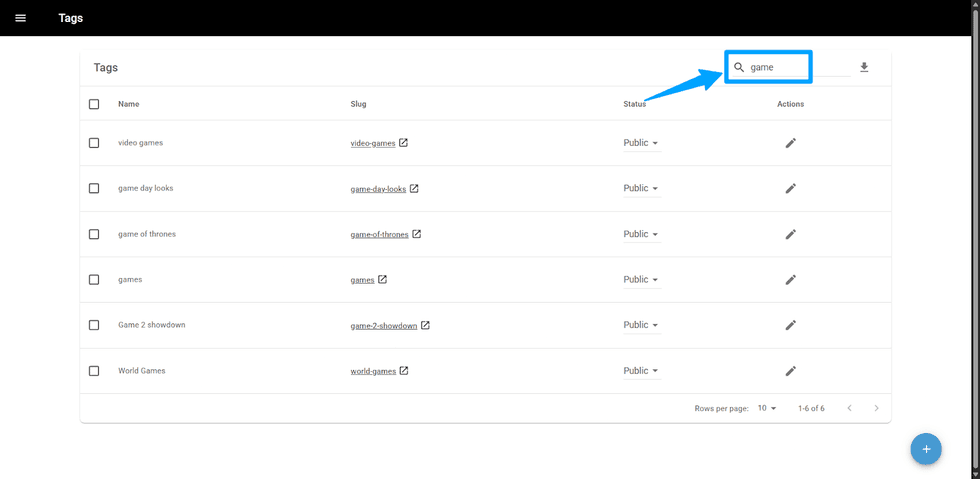
If you need a more specific export, you can use the search field to look for a common term and export only the matching results. After entering the term in the search box, simply click the Export button.
Export Attributes

After choosing the type of export you want to perform, clicking the Export button will open a wizard dialog. There, you can set your preferences for the final CSV file, including field separators, list separators, and date format.
Before exporting, you can also choose which fields you want to include. All fields are selected by default, but you can adjust them as needed.
Finally, after configuring your preferences, you will see three options: Cancel, Export as XML, and Export as CSV. Once you select a file type, the system will generate the file and send it to your email inbox.
L&D Custom Tag Field

You can also add new custom fields to the Tag creation wizard dialog. This can be done in the Layout & Design Tool under the Global Settings option.
Once there, search for Tag and look for Extra Tag Fields in the results. To add a new field, click the “+” button to add an element, then select the Custom Field element.
These are the types of information you can add as a custom field for tags:
Key | Sample Value |
id | 2284632397 |
path | tagtested |
slug | tagtested |
title | tag_test |
url | tagtested |
full_url | tagtested |
type | 0 |
parent_id | 0 |
order | 0 |
created_ts | 1759813322 |
page_settings | {'open_in_new_tab': False, 'allow_community_posts': False, 'hide_from_entry_editor': False, 'lock_posts_after_publishing': False, 'hide_from_search_engines': False} |
extras | {} |
about_html | '' |
meta_title | None |
header_image_id | None |
primary_posts_count | 0 |
regular_posts_count | 0 |
site_id | 27349684 |
status | 3 |
tags | () |
meta_tags | () |
breadcrumb_title | None |
fb_author_name | None |
url_header_image | '' |
isPublic | False |
isPrivate | False |
isUnlisted | True |
parents | [] |
is_restricted_for_reading | False |
extras | {'name': 'value'} |
linkout | False |
original_url | tagtested |
href | |
absolute_url |
After making the desired changes, click Save in the top-right corner of the L&D page, and then click Confirm to apply them.
Context Variables
Old | New |
{{tag}} context variable | {{page.tag}} |
{{tag_title}} | {{page.tag.title|lower}} |
{{tag_title_seo}} | {{page.tag.title}} |
{{tag_name}} | {{page.tag.slug}} |
{{tag_slug}} | {{page.tag.slug}} |
Table of Contents
- How to Create New Tags on the Dashboard
- Tag Creation Fields
- Dashboard Overview
- Search Fields on Tag Dashboard
- Adding Tags on Entry Editor
- Adding Tags through Media
- Exporting tags
- Exporting All Tags
- Exporting Selected tags
- Exporting Searched Tags
- Export Attributes
- L&D Custom Tag Field
- Context Variables


© 2026 RebelMouse. All rights reserved.
Comments Moderation Tools