
This guide will walk you through the steps to renew your Facebook token when it has expired.
Token Expiration Email Notification
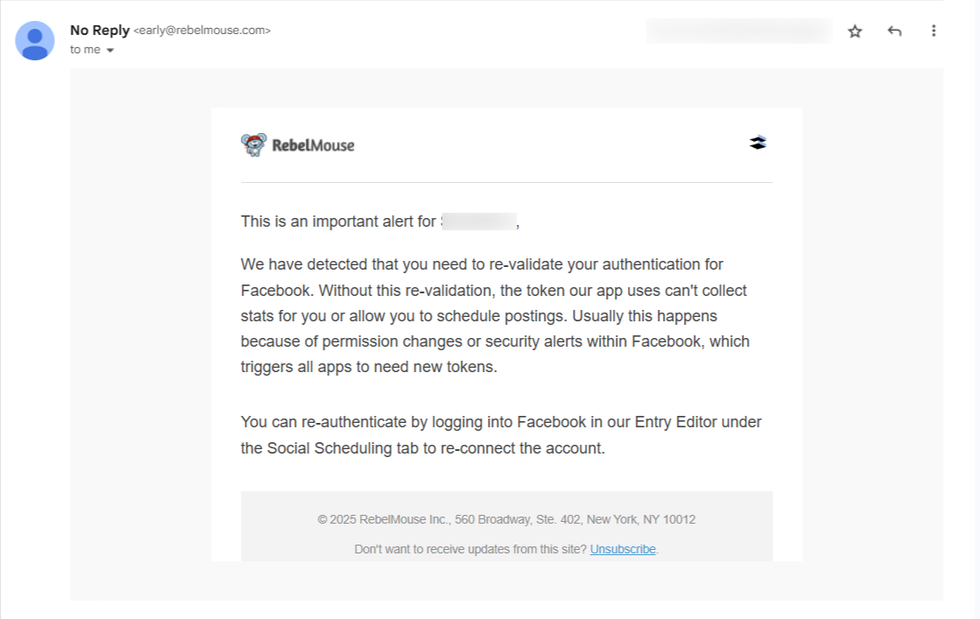
Once your token has expired, you will receive an email from early@rebelmouse.com, with the message above.
How to Renew Your Facebook Token?
Step 1: When editing an article in the Entry Editor, go to the Social Scheduling tab.

If you see a yellow warning banner, it means your Facebook token needs to be renewed.
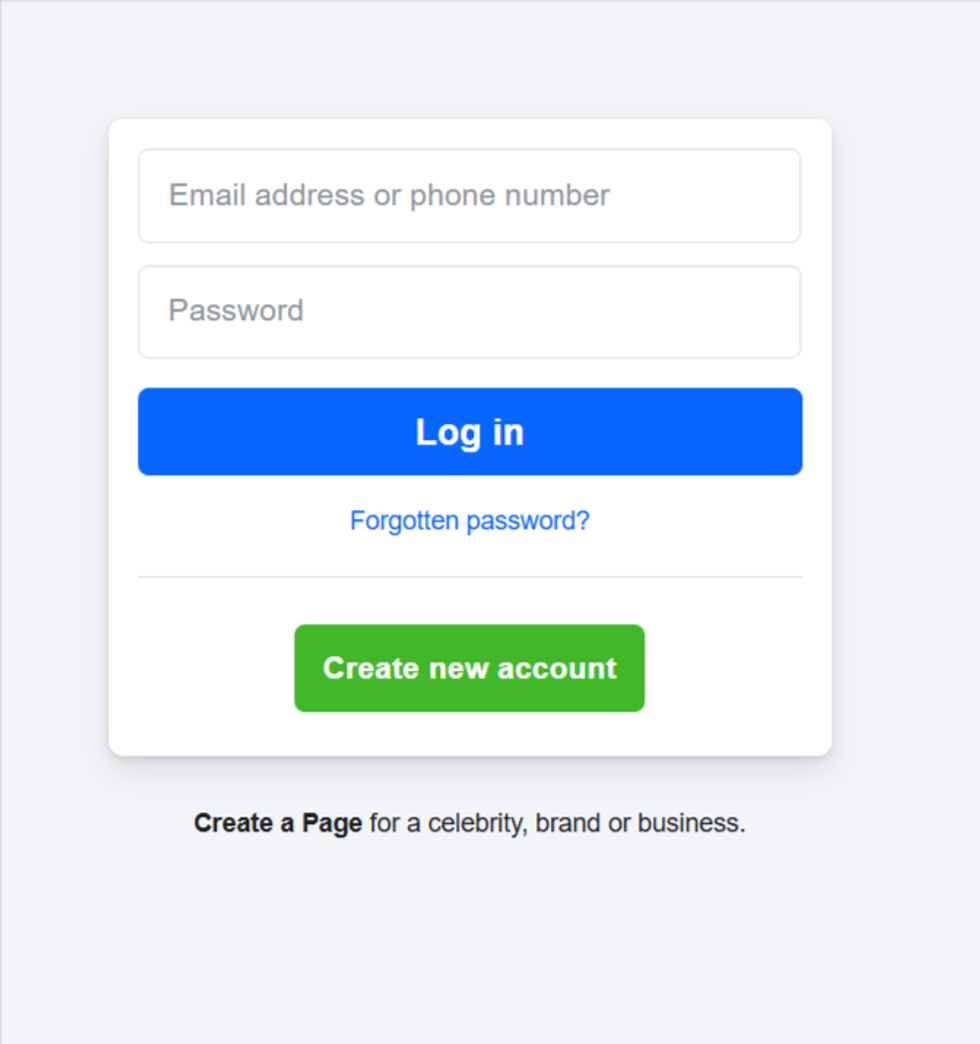
Step 2: Open a new tab in your browser and log in to your Facebook account.
Important notes:
- The token will not be renewed if you're not an admin of the Facebook page.
- The admin account must have two-factor authentication enabled.
Step 3: After successfully logging into Facebook, return to the previous tab in the same browser where you have the Entry Editor open.

Then, click on the yellow warning bar that says: "Please renew your token to use this feature."
The following step may vary slightly depending on the version of the Facebook app you're using — please read carefully and follow the option that applies to you.
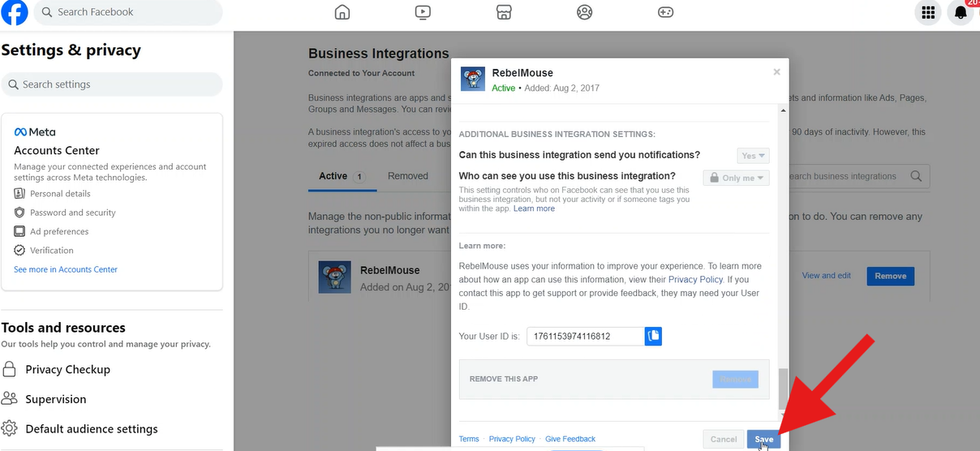
Step 4.1: Using the older Facebook app.
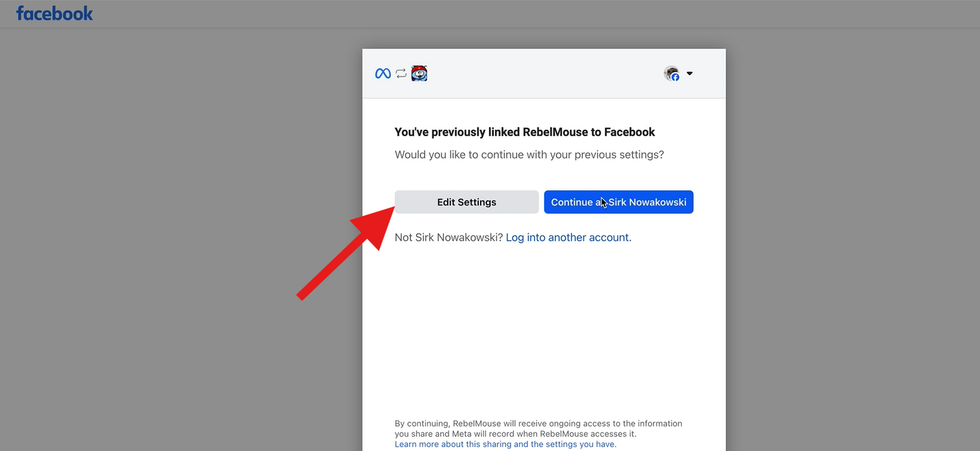
You’ll see an "Edit Settings" button in the Facebook popup. Click this to review and update your settings.
This step may vary slightly depending on the version of the Facebook app you're using — please read carefully and follow the option that applies to you:
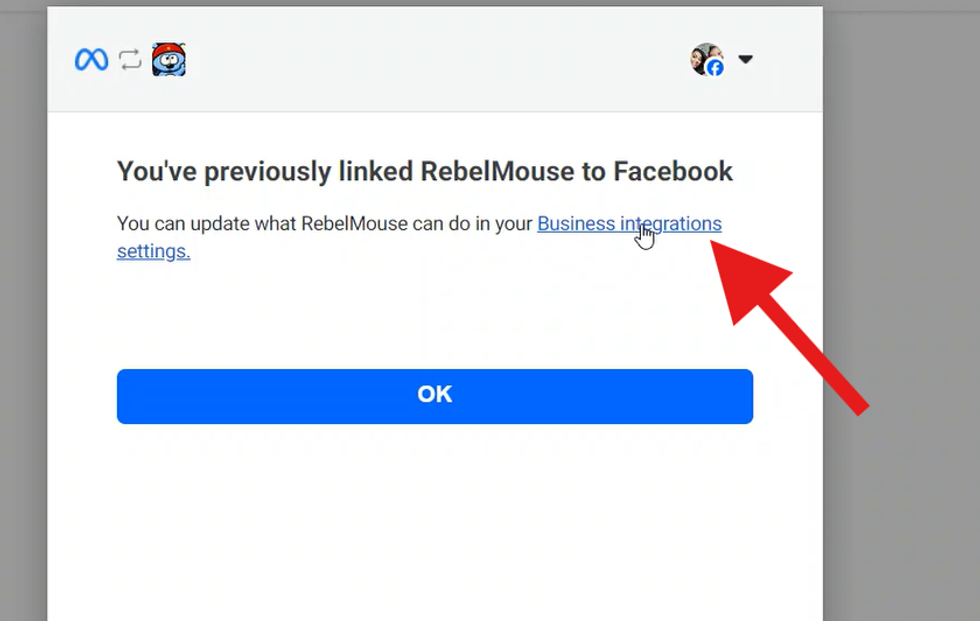
Step 4.2: Using the newer Facebook app
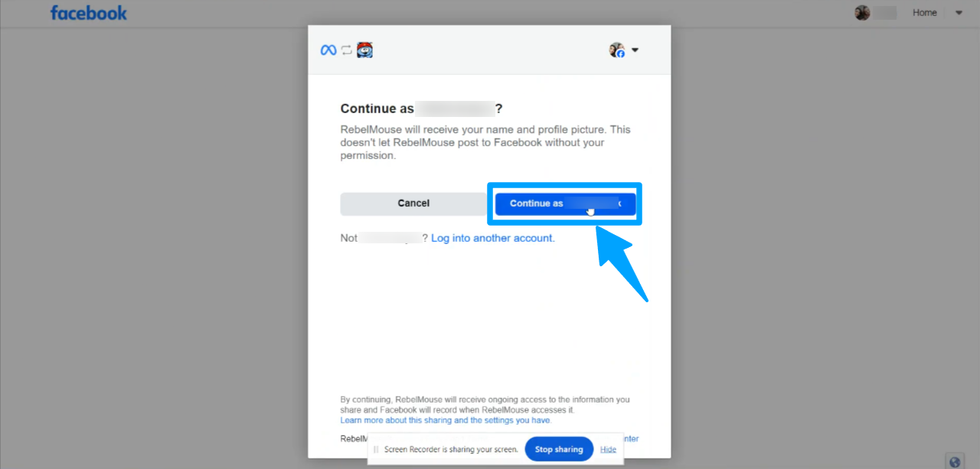
You may not see the "Edit Settings" option. In that case, click “Continue as [your username]”, and on the next screen, click the “Business Integration Settings” link to proceed.
4.2 - Business Integration Settings
Step 5: Select Your Pages
5.1: Old Facebook App
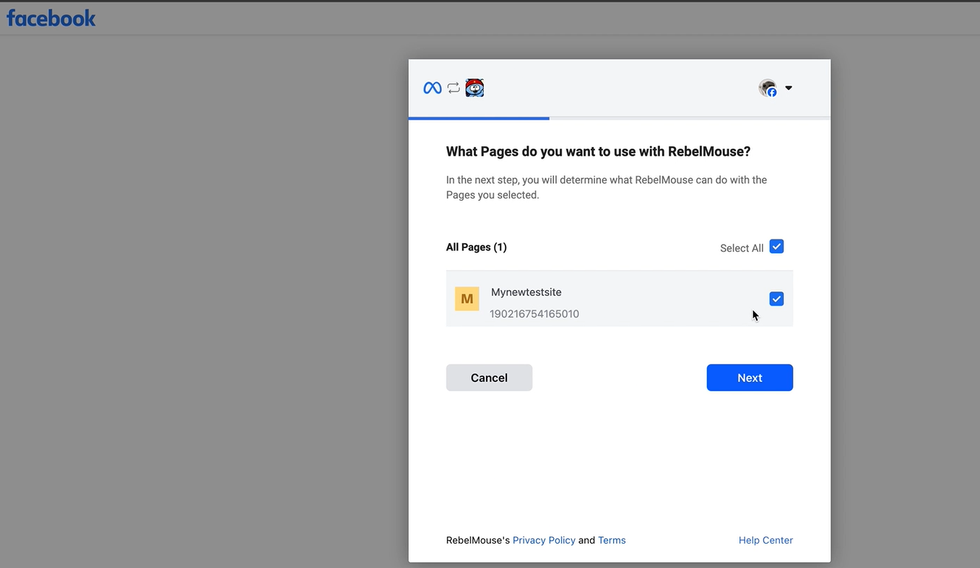
Choose the Facebook page you want to connect. Ensure the correct pages are checked and you are the administrator of those pages (not administrator of the Meta Business account), and then click the "Next" button.
5.2: New Facebook App
You will be redirected to a Facebook page where you can edit the pages.
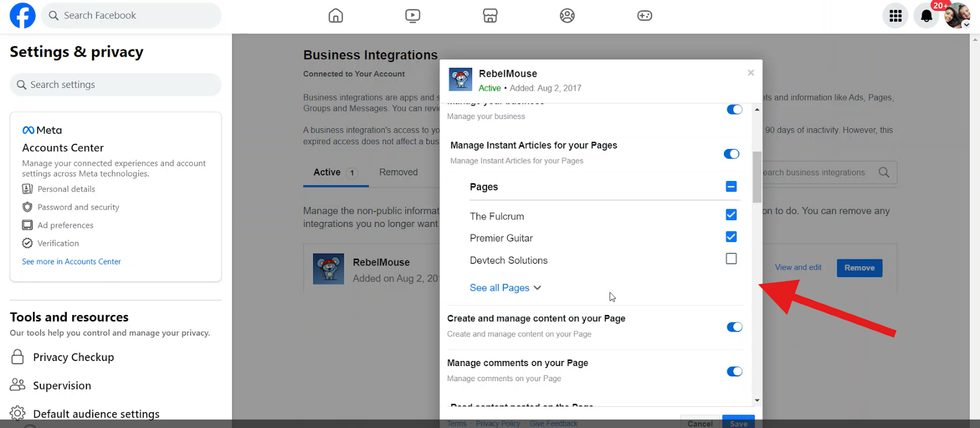
Step 6: Confirm all checkboxes for your page to grant all necessary permissions.
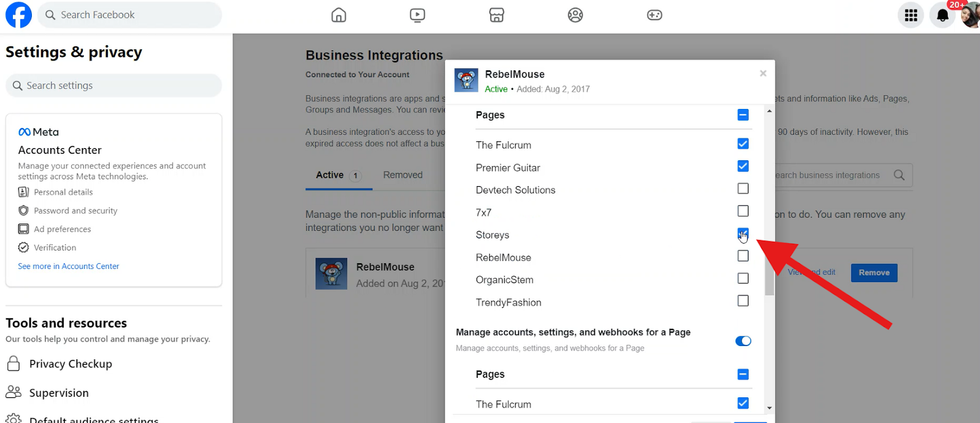
- You will be asked to grant permission to RebelMouse. Make sure all of the following options are toggled to "Yes", and check your page for all the permissions below:
- Receive your email address
- Access your page and app insights
- Create and manage content on your page
- Manage comments on your page
- Read the content posted on the page
- Read user content on your page
- Show a list of the pages you manage
Step 7: After confirming all permissions are enabled, click "Save”
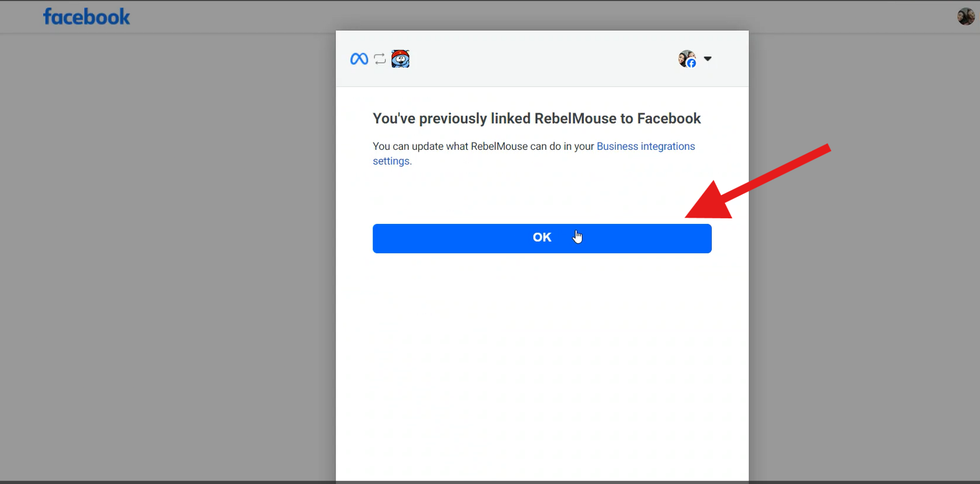
Step 8: After updating the settings and selecting the appropriate Facebook page(s), return to the previous tab.
Step 9: Click on “OK” button present in the final confirmation pop-up.
Step 10: On Entry Editor check for the dropdown list for Facebook.
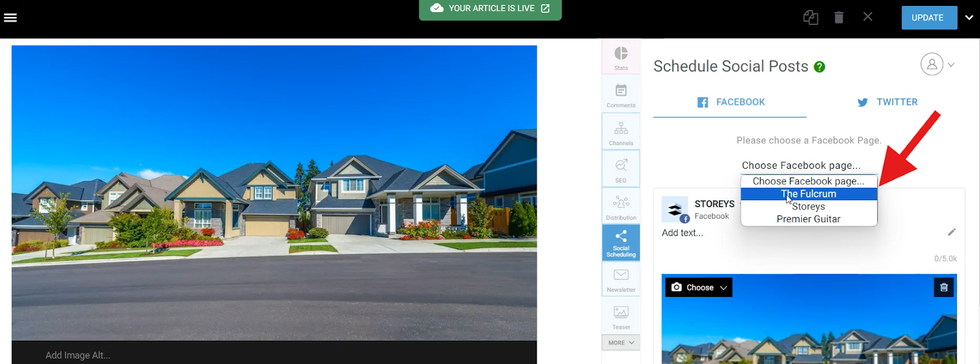
After clicking "OK", you’ll be redirected back to the Entry Editor with the Social Scheduling tab opened. There, you’ll see a dropdown menu listing all the active Facebook pages where you're an admin. Simply select the correct page from the dropdown.
Step 11: Confirm if the yellow warning message disappear.
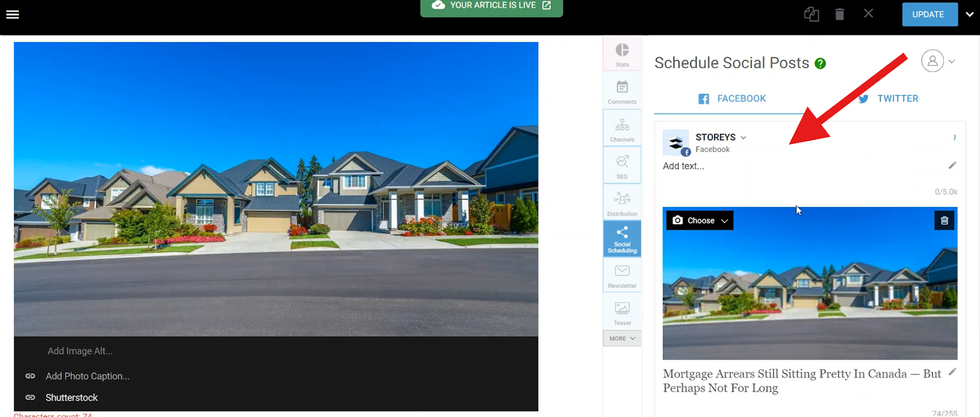
Once you select your Facebook page, it will connect to the Social Scheduling tab, and the yellow warning message will disappear.
Why can't I see the dropdown to select my Facebook page during the token renewal process? Why isn't the renewal working?
This often happens when you are an admin on the page via a Meta Business Account, but not directly added as an admin to the specific Facebook page itself. The token renewal requires direct access to the page.
What do I do if I'm an admin via a Meta account but can't renew the token?
You need to be added as an admin directly to the specific Facebook page. You - or someone who can grant this access - can do this by visiting this link: https://www.facebook.com/settings/?tab=profile_access
Table of Contents
- Token Expiration Email Notification
- How to Renew Your Facebook Token?
- Step 1: When editing an article in the Entry Editor, go to the Social Scheduling tab.
- Step 2: Open a new tab in your browser and log in to your Facebook account.
- Step 3: After successfully logging into Facebook, return to the previous tab in the same browser where you have the Entry Editor open.
- Step 4.1: Using the older Facebook app.
- Step 4.2: Using the newer Facebook app
- 4.2 - Business Integration Settings
- Step 5: Select Your Pages
- 5.1: Old Facebook App
- 5.2: New Facebook App
- Step 6: Confirm all checkboxes for your page to grant all necessary permissions.
- Step 7: After confirming all permissions are enabled, click "Save”
- Step 8: After updating the settings and selecting the appropriate Facebook page(s), return to the previous tab.
- Step 9: Click on “OK” button present in the final confirmation pop-up.
- Step 10: On Entry Editor check for the dropdown list for Facebook.
- Step 11: Confirm if the yellow warning message disappear.
- Why can't I see the dropdown to select my Facebook page during the token renewal process? Why isn't the renewal working?
- What do I do if I'm an admin via a Meta account but can't renew the token?


© 2026 RebelMouse. All rights reserved.
Comments Moderation Tools