
Overview

The Independent Layouts update separates key pages of your site into different Layouts, each with dedicated AB Tests. The pages that became independent are divided between Entry Editor, Layouts (which involves Section Pages, Tag Pages, and Profile Pages), and Web & Landing Pages, which encompasses all custom pages.
How layouts are organized on the left panel
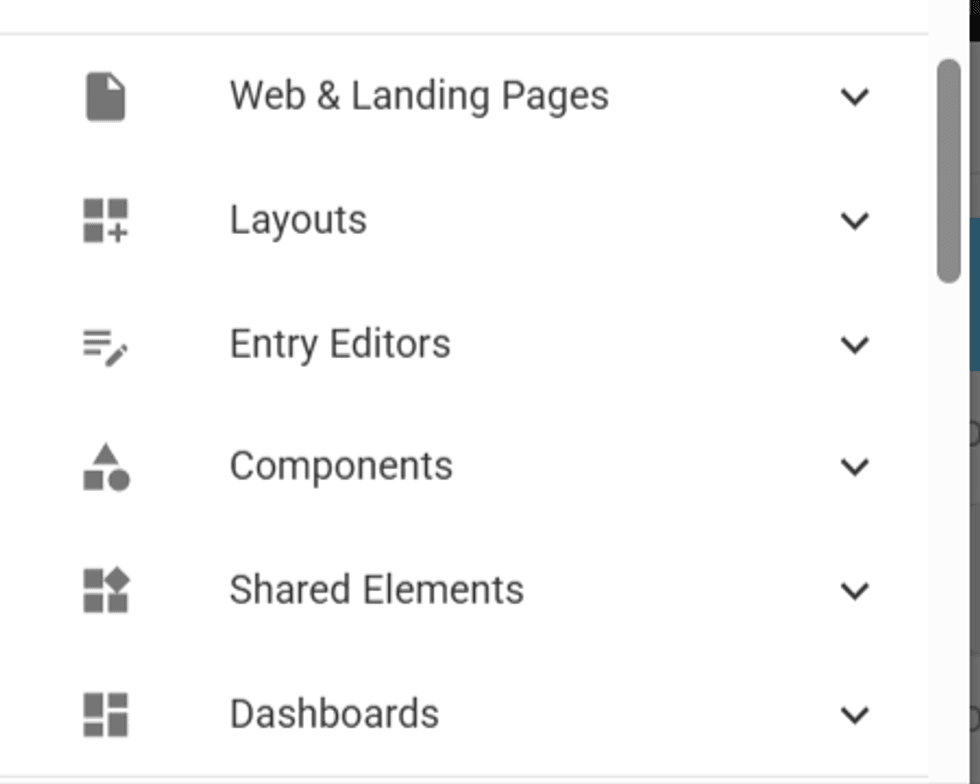
The pages created will be available under each respective segment.
Once clicked in the Create option when expanding the dropdown, you will be able to choose a name for this new page layout, and if you would like to clone its structure from another existing layout.
After that, you can edit the elements within this layout and create as many B-Tests as you want, in the same way on other pages.
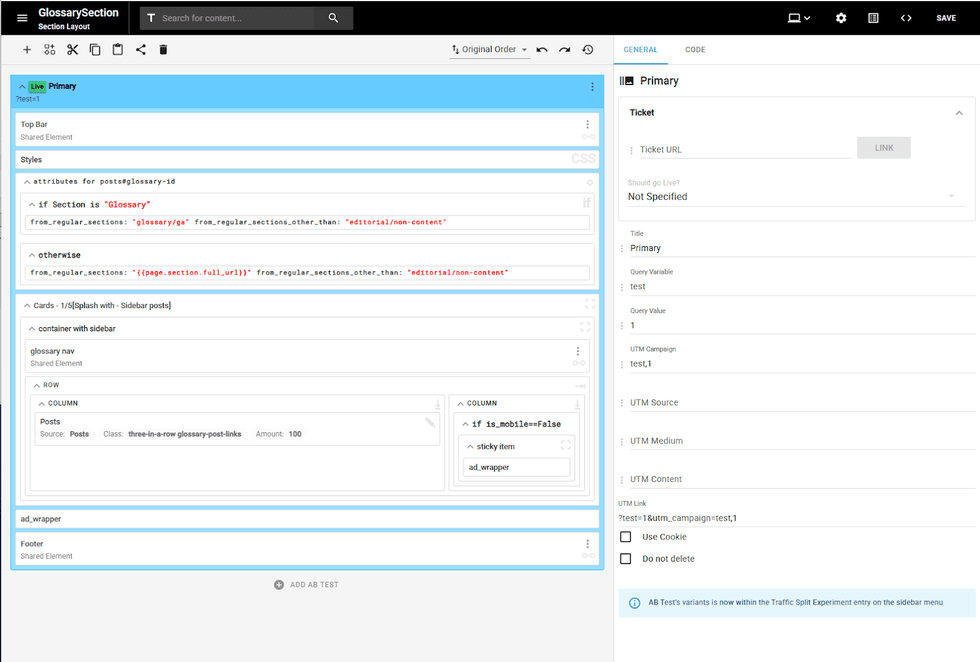
Page Edit overview
In the page edit layout, the layout type appears directly below the page name/title. For example, if you create a new Entry Editor Layout, right under the title (“Event EE” in the example), it will show Entry Editor.

For other pages, it will show as this:
- Tag Pages > Tag Layout
- Section Pages > Section Layout
- Profile Pages > Profile Layout
- Post Pages > Post Layout
- This one also indicates how many posts are using this layout

Conditionals Update on L&D
With dedicated Layouts, all Section Layouts created will now appear in a new dropdown on the Sections Dashboard, allowing you to select which layout you want for some section groups and add those sections as conditionals to your Section Layout.

If you have access to the Tags Dashboard, this update also applies to your tags. This same Layout field will appear when creating and editing your tags, and it will add those tags as conditionals in the Layout selected in the L&D tool.

Entry Editor B-Test URL changes
Prior to this change, all custom Entry Editor B-Tests URLs followed the pattern below:
Community Entry Editor B-Test: {site_domain}/core/community/add_post?btest={query_param}:{query_value}
Editor Entry Editor B-Test: {site_domain}/r/entryeditor/add_post?btest={query_param}:{query_value}
Example: https://www.yourdomain.com/r/entryeditor/add_post?btest=layout:further
Now, the custom entry editor’s URL will follow this new pattern, which will always end with “::” as this is a separator for the entry editor and its ab-tests:
Community Entry Editor Layout: {site_domain}/core/community/add_post?btest={EE_Layout_Name}::
Editor Entry Editor Layout: {site_domain}/r/entryeditor/add_post?btest={EE_Layout_Name}::
Example: https://www.yourdomain.com/r/entryeditor/add_post?btest=Product_Review_EE:
If there is a need to expose a specific EE ab-test that is not the live version, the URL should follow this pattern:
Editor Entry Editor B-Test: {site_domain}/r/entryeditor/add_post?btest={EE_Layout_Name}::{query_param}:{query_value}
Example: https://www.yourdomain.com/r/entryeditor/add_post?btest=Product_Review_EE::test:1


© 2026 RebelMouse. All rights reserved.
Comments Moderation Tools