

RebelMouse's Particle Assembler is designed to break down articles into micro pieces of content, which we call "particles." Individual particles in an article can be styled, shared, converted to slideshows, and now, take specific CSS styling to make them pop, when you want them to pop.
By adding some simple (or complex!) CSS to your Entry Editor via Layout & Design Tool, you can have a preset template for side quotes, warnings, or just places where you want something to stand out a bit.
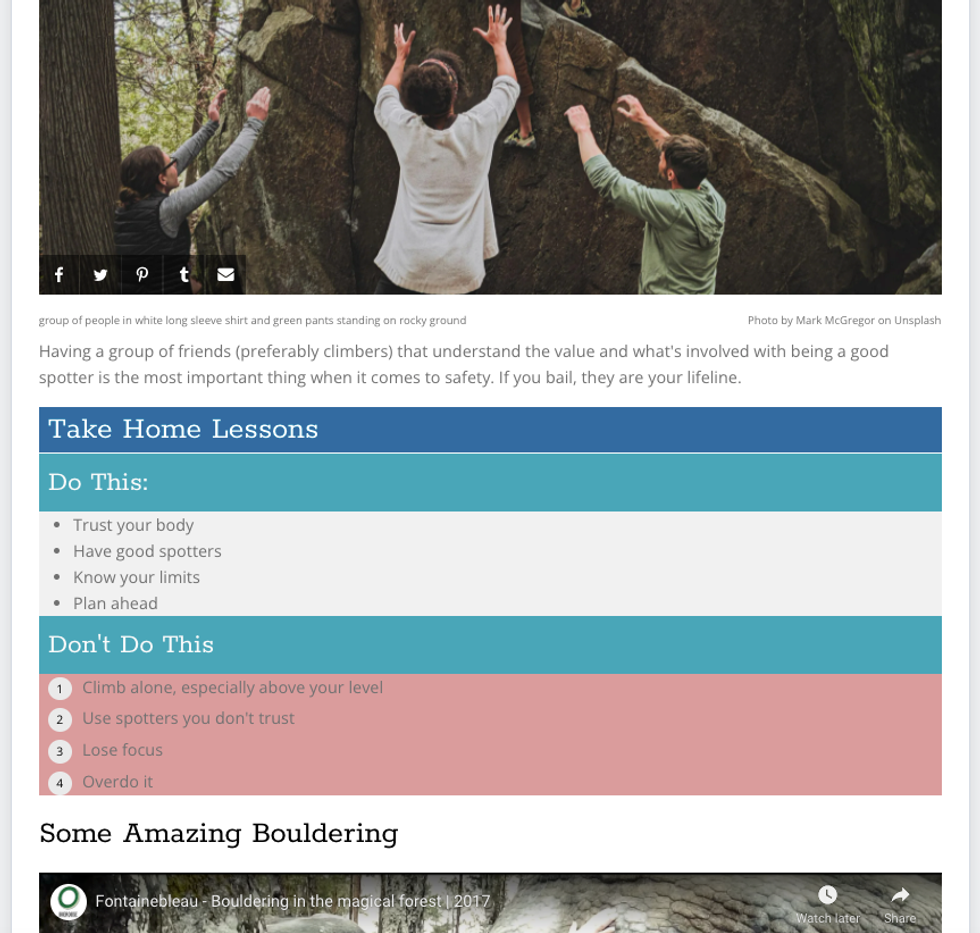
For example, in the screenshot below, we have a section in our article for Do's and Don'ts. We wanted this section to stand out from the particles before and after it, so we styled it with some colors to make it unique:
How to Select a Custom HTML Class in Entry Editor
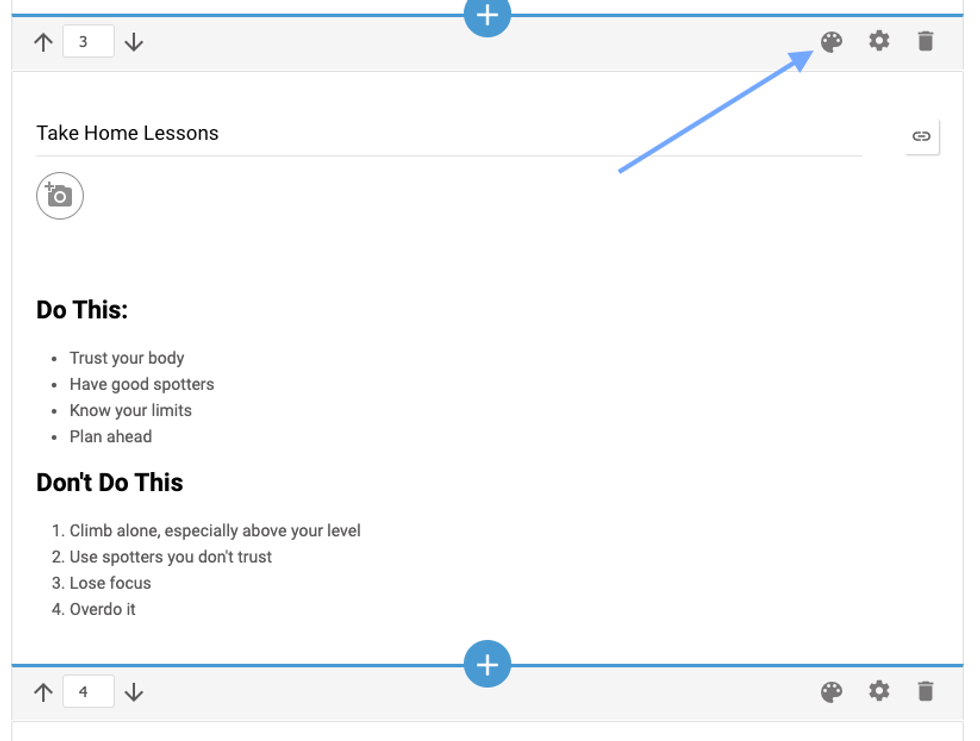
For a writer or an editor, this requires nothing more than clicking on a drop-down menu and selecting the correct HTML class. Let's look at how this is done in Entry Editor. At the top of an individual particle, you will see a small artist's palette icon:
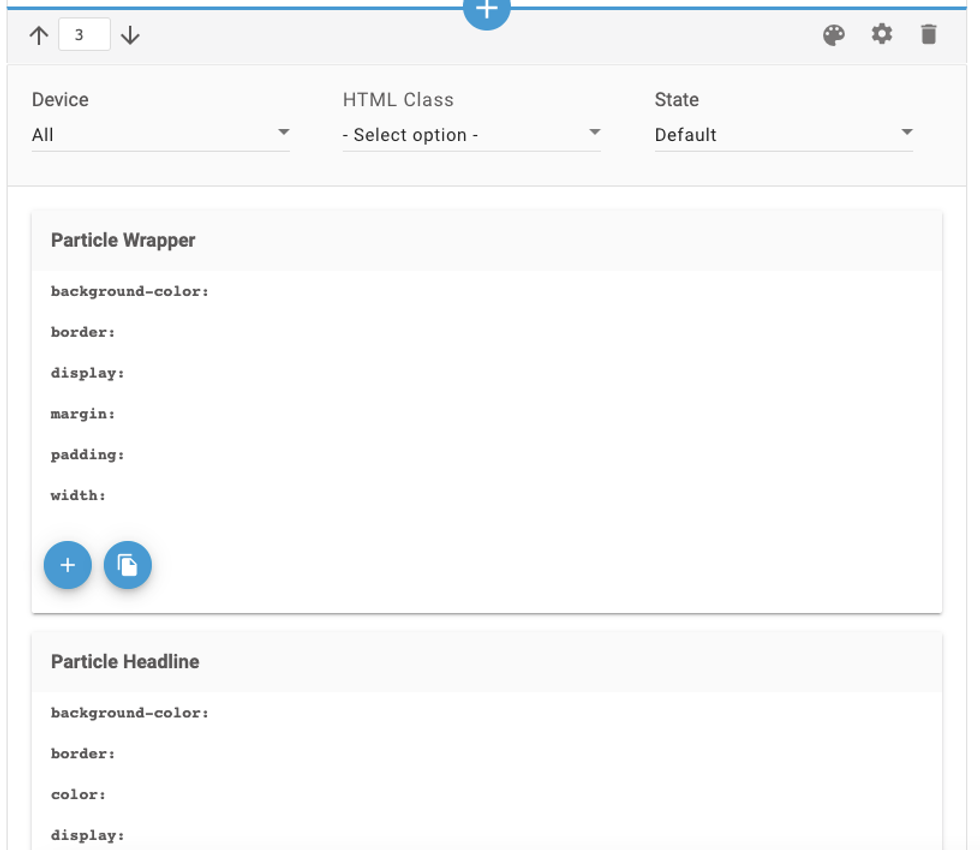
Clicking on that icon will open up the CSS section for styling that individual particle:

If you're not a developer and are perhaps a bit scared looking at the prospect of having to write code, don't fear! The code can be written in Layout & Design Tool by either your development team or RebelMouse's developers. All you have to do as a writer or an editor is click on the drop-down menu underneath "HTML Class":
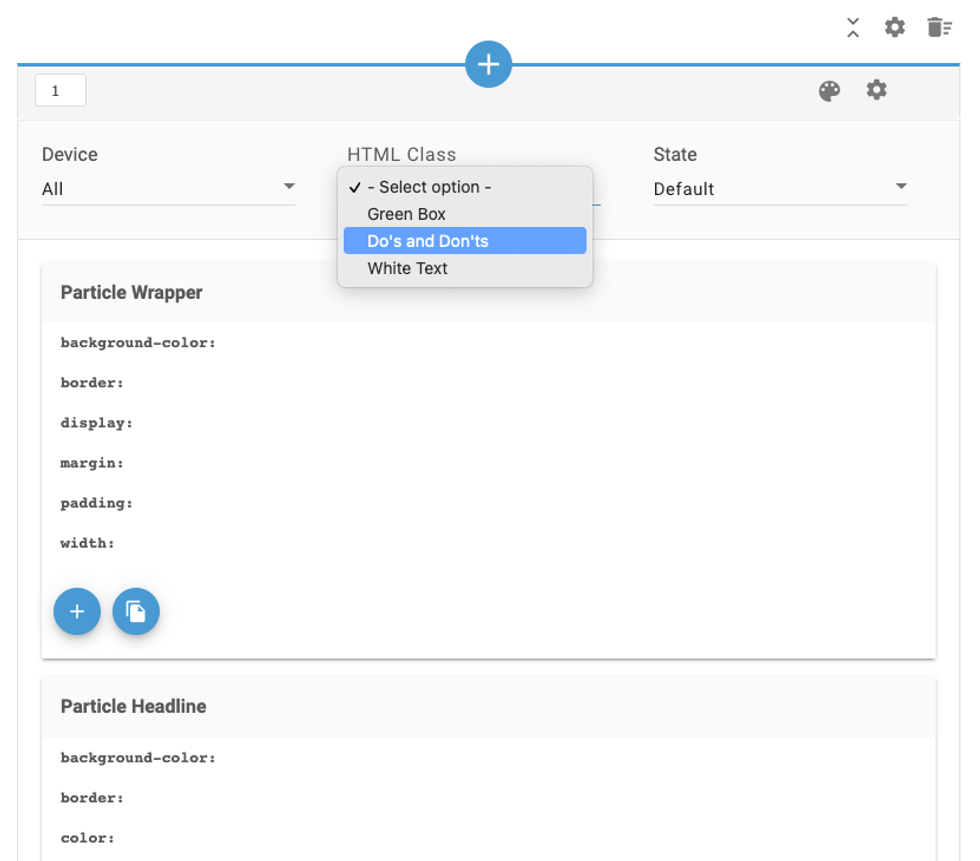
The drop-down menu will reveal the different options that you have to select from:
In this example, we are selecting the "Do's and Don'ts" option. The styling that we put in place (as you saw in the image at the beginning of this article) changes the particle headline to white over a blue background, the H3s to white over a green background, the bullet list under "Do This" to have a gray background, and the ordered list under "Don't Do This" to have a red background.
This of course is just one example! There is no limit to the styling you can set with HTML classes. Let's learn how to create the classes now.
How to Create Custom Classes in Layout & Design Tool
There are several steps to creating custom classes to be used in your particles. The first is to set up Assembler custom classes in Layout & Design Tool for Entry Editor.
Setting up Assembler Custom Classes
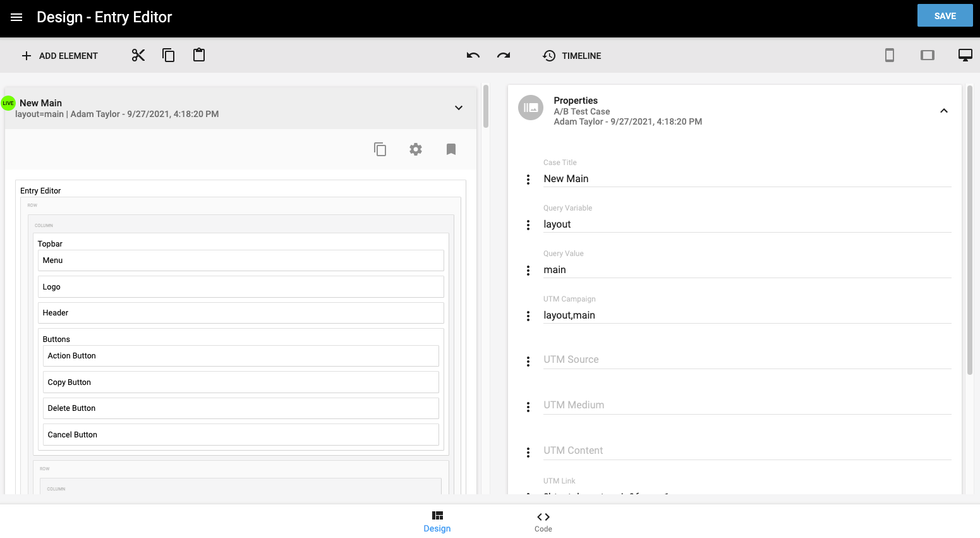
First you need to click on the hamburger menu (☰) in the top-left corner and select Layout & Design Tool. This will take you to the Global Settings page, where you will again click the hamburger menu and then scroll down until you see Entry Editor. Click on Entry Editor to open up the Entry Editor view in Layout & Design Tool:
Please note that you are not allowed to edit the live version of Entry Editor. This is to ensure that any mistakes made will not affect the current content creation process for your writers. You must first create a B test of your live Entry Editor. Only then can you safely make any number of changes that won't affect your active content creation process. After you are comfortable with your updates, you can take the new B test live and delete the previous version (or you can hang onto the old version as a possible restore point).
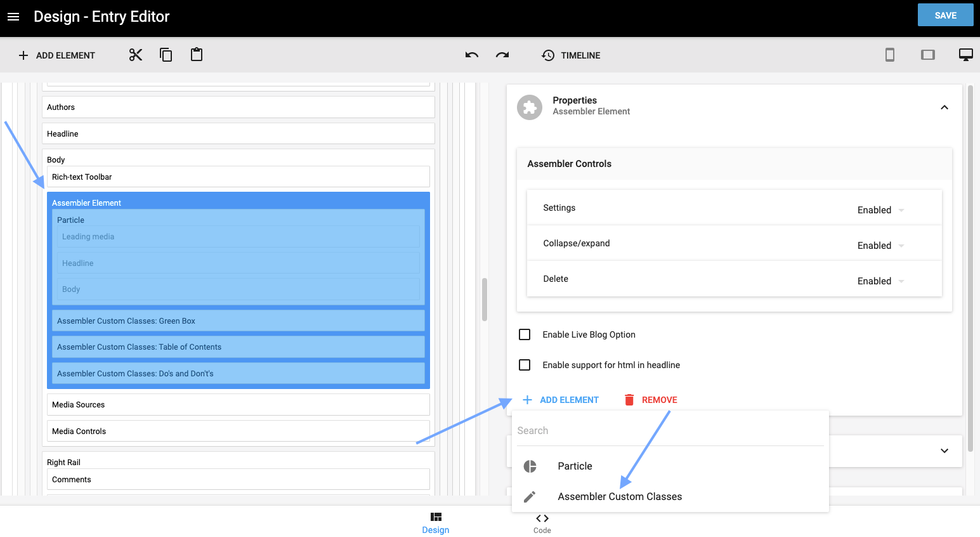
Once you have your B test ready for customization, the first thing to do is scroll down until you see the column that contains your Body element. Click Assembler Element (thus highlighting the entire section) to activate it for editing. Next, you will see on the right in the Properties card an option to add an element. Click + Add Element and select Assembler Custom Classes:
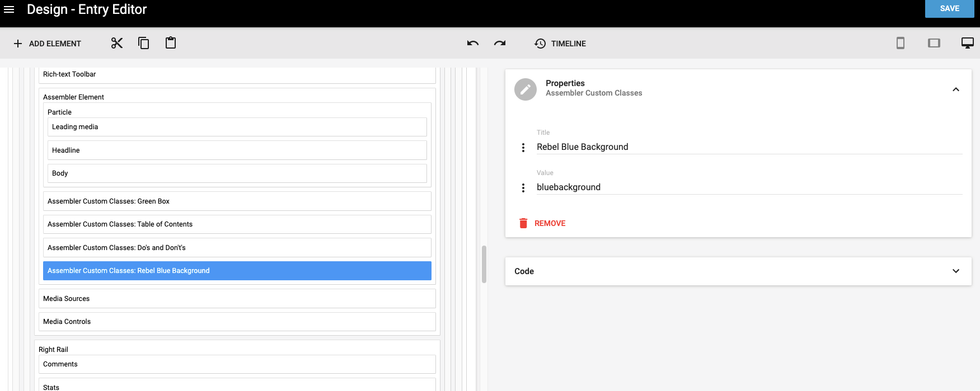
Simply add a name and value for your new custom class. You'll want to make sure this is something that will make sense to your writers and editors to select. For our example, we'll say that we want a particle's background color to be RebelMouse blue. Let's call the custom class "Rebel Blue Background":
The value will later be used to specify your CSS styling for this custom class.
That's the last step here. Click Save in the top-right corner, enter the details of what you updated on the layout for the save history, and you are ready to move on to the next step: styling the custom class(es).
Styling HTML Custom Classes
Styling HTML custom classes is as easy as styling any other element on your site. You can simply add CSS to your Top Bar's Styles element, or create a new Styles element specifically for your HTML classes.
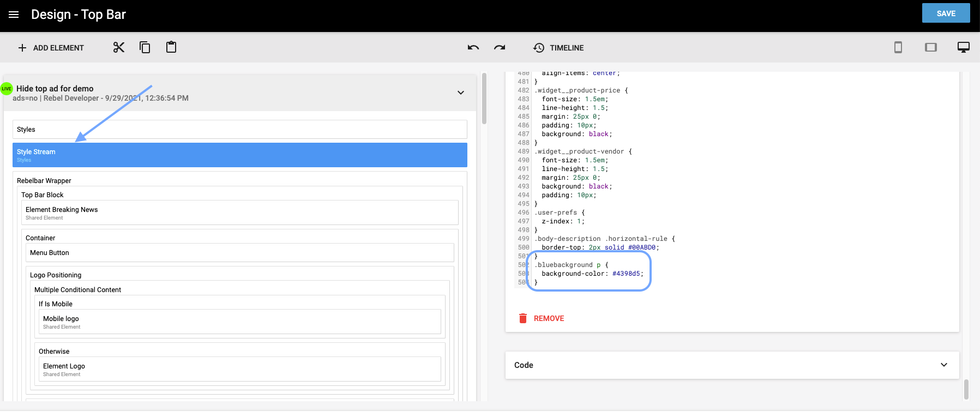
For the first option, you simply navigate to the Top Bar element in Layout & Design Tool and locate your site's Styles element. From there, add the CSS that will style your classes how you want them. For our example, we will add a simple blue background to a paragraph. In Layout & Design Tool, our example looks like this:
Now we can save this and test it out on a new article!
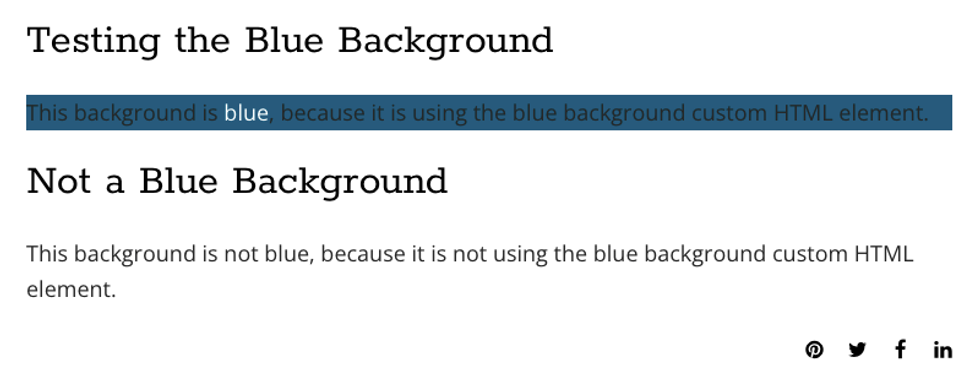
The steps are the same as described above. We simply create an article, open up an Assembler listicle item (particle), and select the appropriate HTML class. For illustrative purposes, I've created an article and used the "Rebel Blue Background" custom class in the first particle and not in the second particle. You can see how the background color is blue in the first paragraph, but not in the second:
This is clearly a very simple example, where we've added a background color to a <p> element. If you are using custom HTML classes regularly, you will certainly have much more styling to do. You can absolutely add all the styling you want to the Styles element in your Top Bar, but you may want to keep the code for your HTML classes separated.
To do so, you'll add a new Styles element to your Top Bar, name it "Assembler Classes CSS" (or whatever is memorable for you), and then add the required CSS for each of your classes there.
If you want to take it another step further, you can also create a Shared element that you can add all of your CSS to, and then add that Shared element to any page type (home, post, section, etc.) where you wish to have those styles available.
Have fun creating custom HTML classes and helping your writers and editors make your articles really pop!
And, as always, if you have any questions about this feature, please contact support@rebelmouse.com or your account manager today.
Not on RebelMouse yet? Let's talk!


