This article will guide you in bulk creating redirects to your site on the RebelMouse CMS Platform.
1.Visit the External Content Sync dashboard
To visit this dashboard, you can append the r/dashboard/external_content_sync URL to your domain, like: https://yourdomain.com/r/dashboard/external_content_sync.
2.Click on LOCAL DATA
3.Select UPLOAD FILE
4.Review your redirects file format
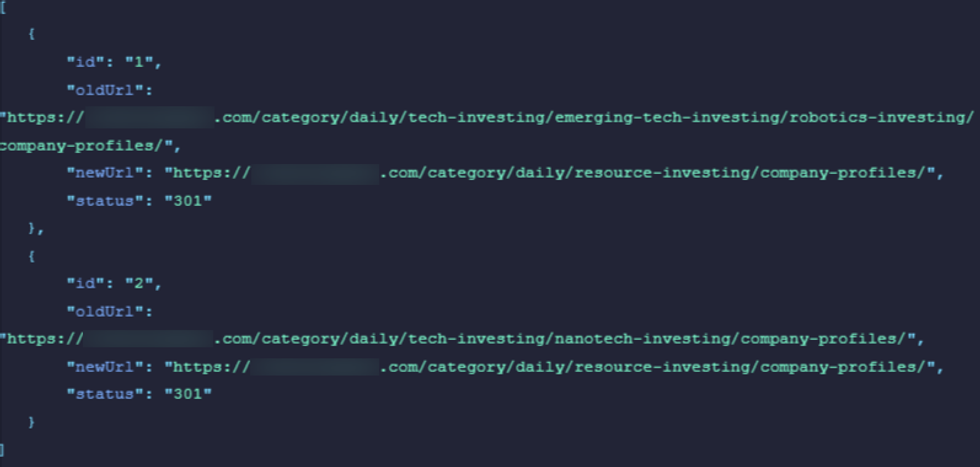
The correct format, which matches what the client backend microservice expects, is the following example structure:
- id: the unique identification of each redirect
- oldUrl: old URL that needs to be redirected
- newUrl: the final URL destination
- status: the status of this redirect. Add 301 if you want to point this URL as moved permanently, and add 302 if you want to point this redirect as moved temporarily.
Using this format, you’ll be able to run it easily with our current setup. If you want to modify the JSON format, it is important to inform your account manager or reach us at support@rebelmouse.com. Then we will be able to help adapt the client backend and process the new JSON format correctly.
5.Fill the upload form
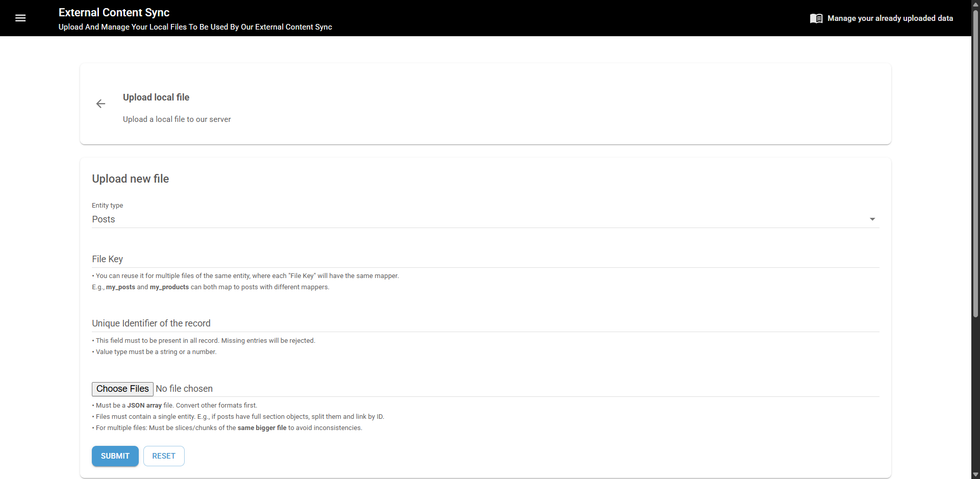
After clicking on 'Upload File' (Step 3), you will be presented with a form to fill out. Here are some explanations of the fields present there:
- Entity Type: This is a dropdown menu to select the type of content you want to upload. To this guide, you will select 'Redirects'
- File Key: It is a name for your identifier. For this example, you can use new_redirects. An identifier allows you to reuse mappings across multiple files of the same entity.
- Unique Identifier of the Record: You will fill in the unique identifier of the redirects. In this example, it is id. This helps identify the records internally.
- Choose File: Select the local JSON file for import.
Once all required fields are filled and the data is successfully added, click the 'Submit' button to begin processing the import.
6.Go to CLOUD DATA
After successfully uploading the file, step back to the 'External Content Sync' dashboard and click on 'Cloud Data' to process the data.
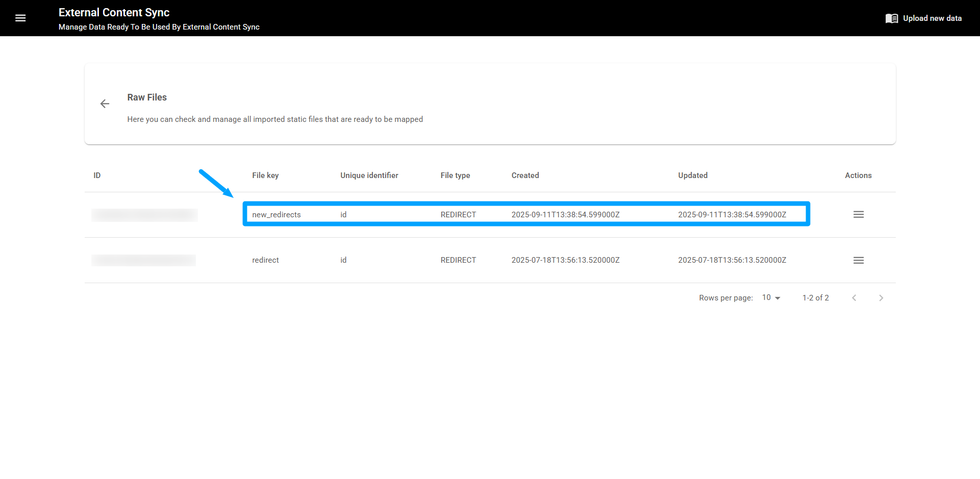
7.Click on MANAGE RAW FILES
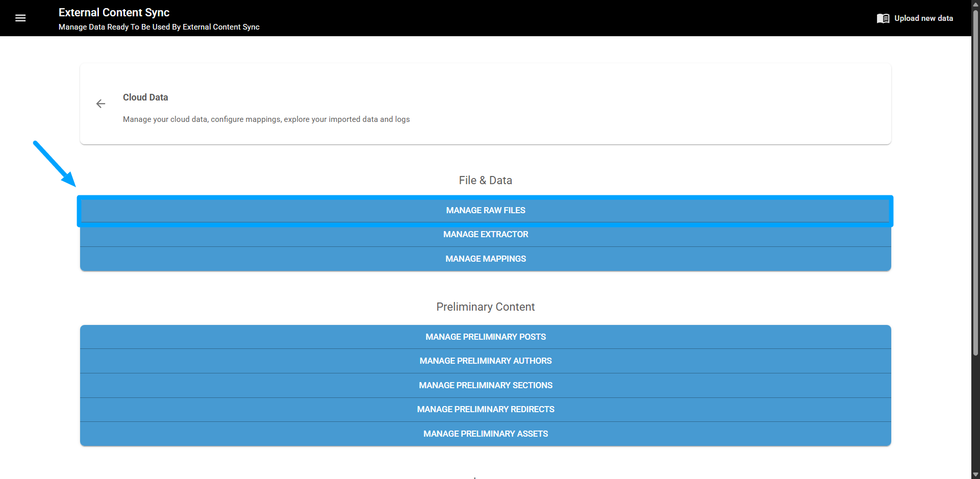
On 'Manage Raw Files' you can check the recent uploaded data.
8.Confirm if your file was successfully uploaded
9.Go to MANAGE MAPPINGS

Step back to 'Cloud Data' and click on 'Manage Mappings'.
10.Fill the mapping form
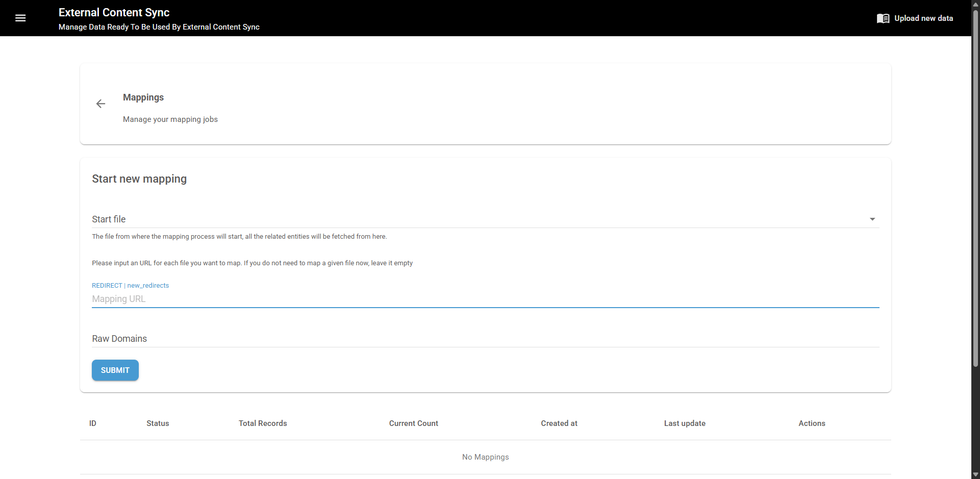
Now you will be presented with another form to fill out. Here are some explanations of the fields present there:
- Start file: Shows a dropdown with the files uploaded. In the example, you will select 'REDIRECT | new_redirects'
- Mapping URL: Here, you will insert the Client Backends URL that will do the mapping. If you have any doubts regarding this, please reach us at support@rebelmouse.com
- Raw Domains: It is needed in case you create redirects with old URLs from external domains. In this example, this field will remain empty
Then, click 'Submit' to start mapping. Once the mapping is ready, you can also visit 'Manage Preliminary Redirects' to see the new mapped data.
11.Go to MANAGE EXTRACTOR
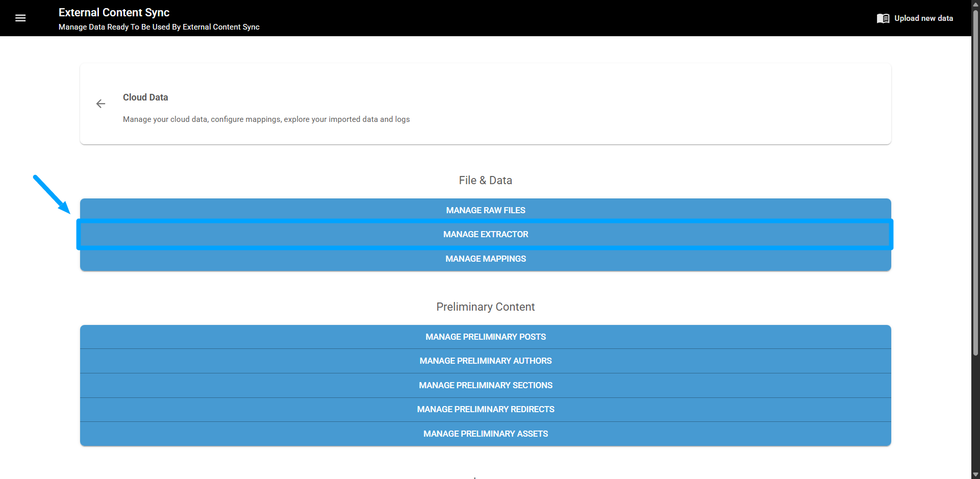
Step back to 'Cloud Data' and click on 'Manage Extractor'.
12.Fill the extractor form
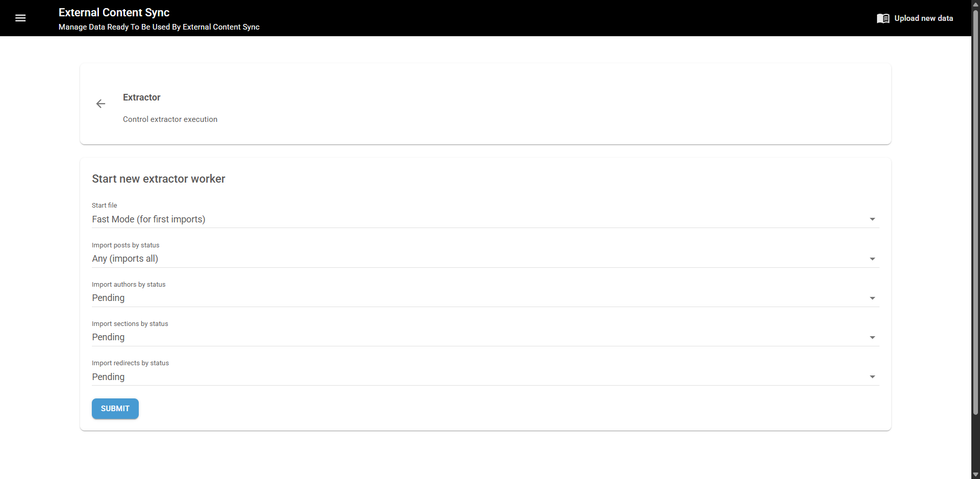
Here are some explanations of the fields present there:
- Start file: you can choose 'Fast Mode', if this was the first import you did, or 'Normal mode' to make updates for previous imports.
- Import posts by status: You will select the status of posts you imported. To this guide, it is not relevant, so we will choose Omit.
- Import authors by status: You will select the status of the authors you imported. To this guide, it is not relevant, so we will choose Omit.
- Import sections by status: You will select the status of the sections you imported. To this guide, it is not relevant, so we will choose Omit.
- Import redirects by status: This is the one we want. Since the redirects were not created yet, we will select the Pending status. You can also check the status of your redirects on 'Manage Preliminary Redirects'.
Click 'Submit' and your redirects will be created.
Table of Contents
- 1. Visit the External Content Sync dashboard
- 2. Click on LOCAL DATA
- 3. Select UPLOAD FILE
- 4. Review your redirects file format
- 5. Fill the upload form
- 6. Go to CLOUD DATA
- 7. Click on MANAGE RAW FILES
- 8. Confirm if your file was successfully uploaded
- 9. Go to MANAGE MAPPINGS
- 10. Fill the mapping form
- 11. Go to MANAGE EXTRACTOR
- 12. Fill the extractor form


© 2025 RebelMouse. All rights reserved.
Comments Moderation Tools