


If you rely on ad revenue, the article page is your cash cow. It generates the views and keeps audiences on your site. RebelMouse's Ad Manager dashboard enables you to easily swap out ads, change placement, and experiment as much as you want without relying on tech resources. Enjoy incredible control over your revenue.
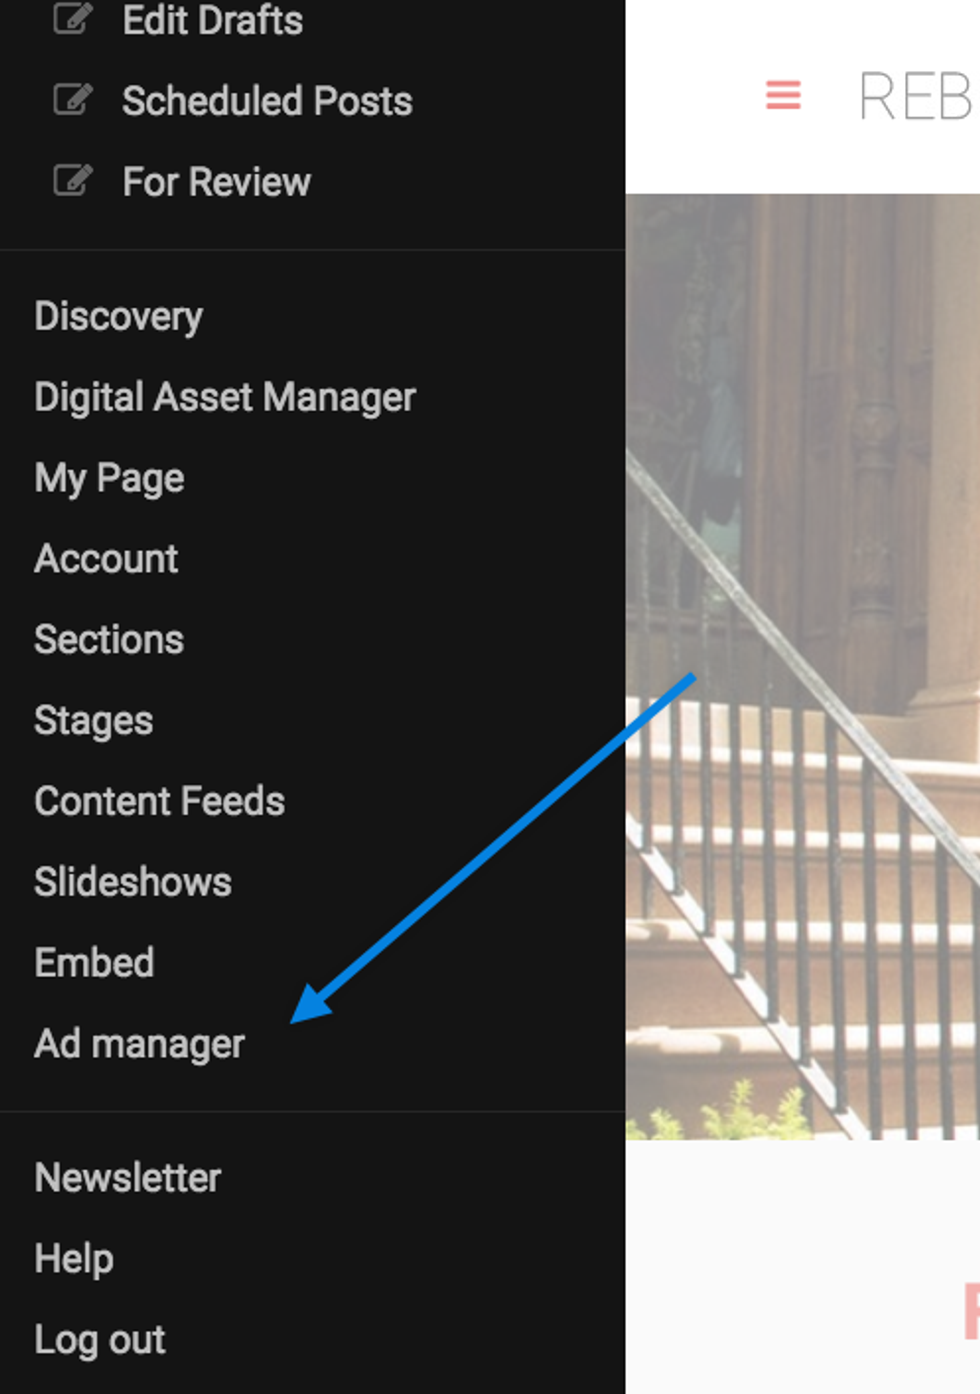
Access the Ad Manager Dashboard
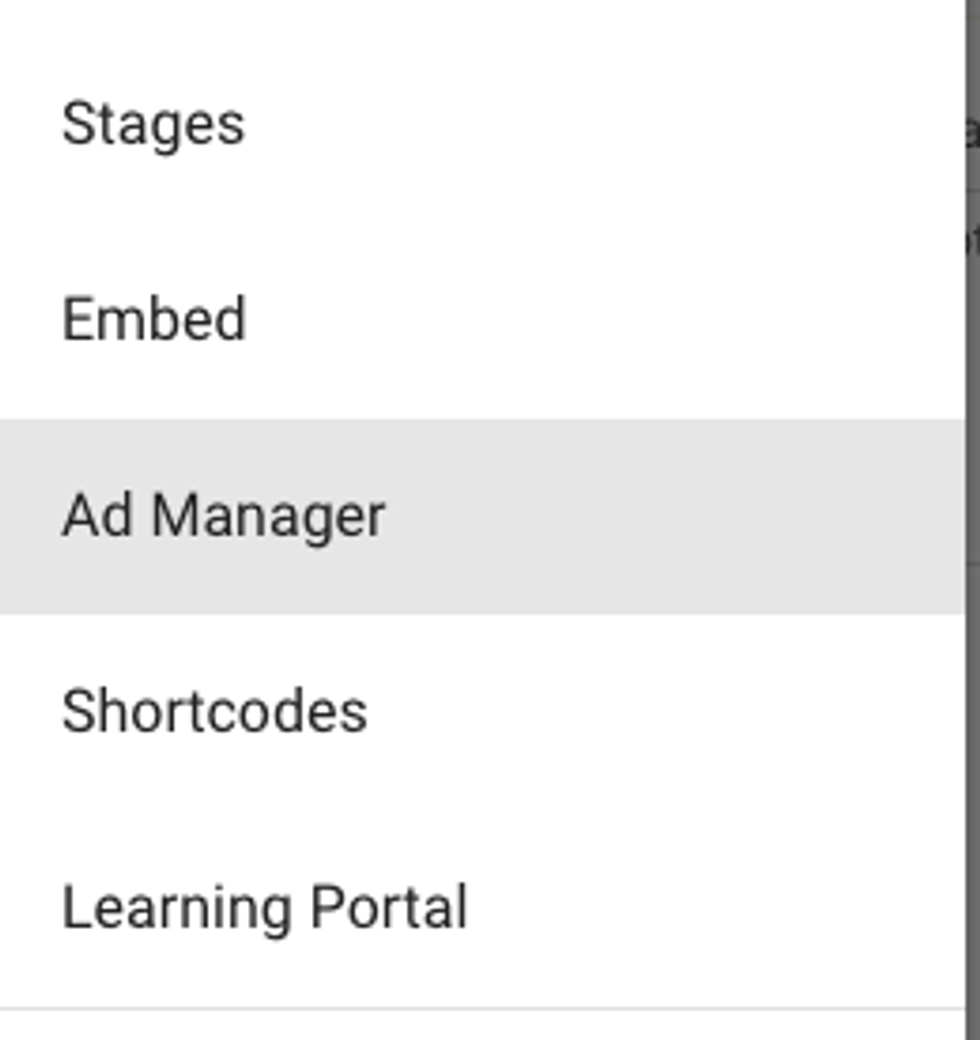
Go to Ad Manager in the left-hand hamburger menu (☰). Alternatively, you can type "{YourDomain}/core/dashboard/a_manager" in your browser's address bar.
How Ad Manager Is Divided
There are several different placements for your ads:
Header Code
We don't recommend using the Header Ad function in Ad Manager for your header code. Instead, we recommend using Layout & Design Tool to insert an Ad Header Code element. Your ad network will provide you with a header code that needs to be placed in a tag on your site to run your ads. You should put that code here:
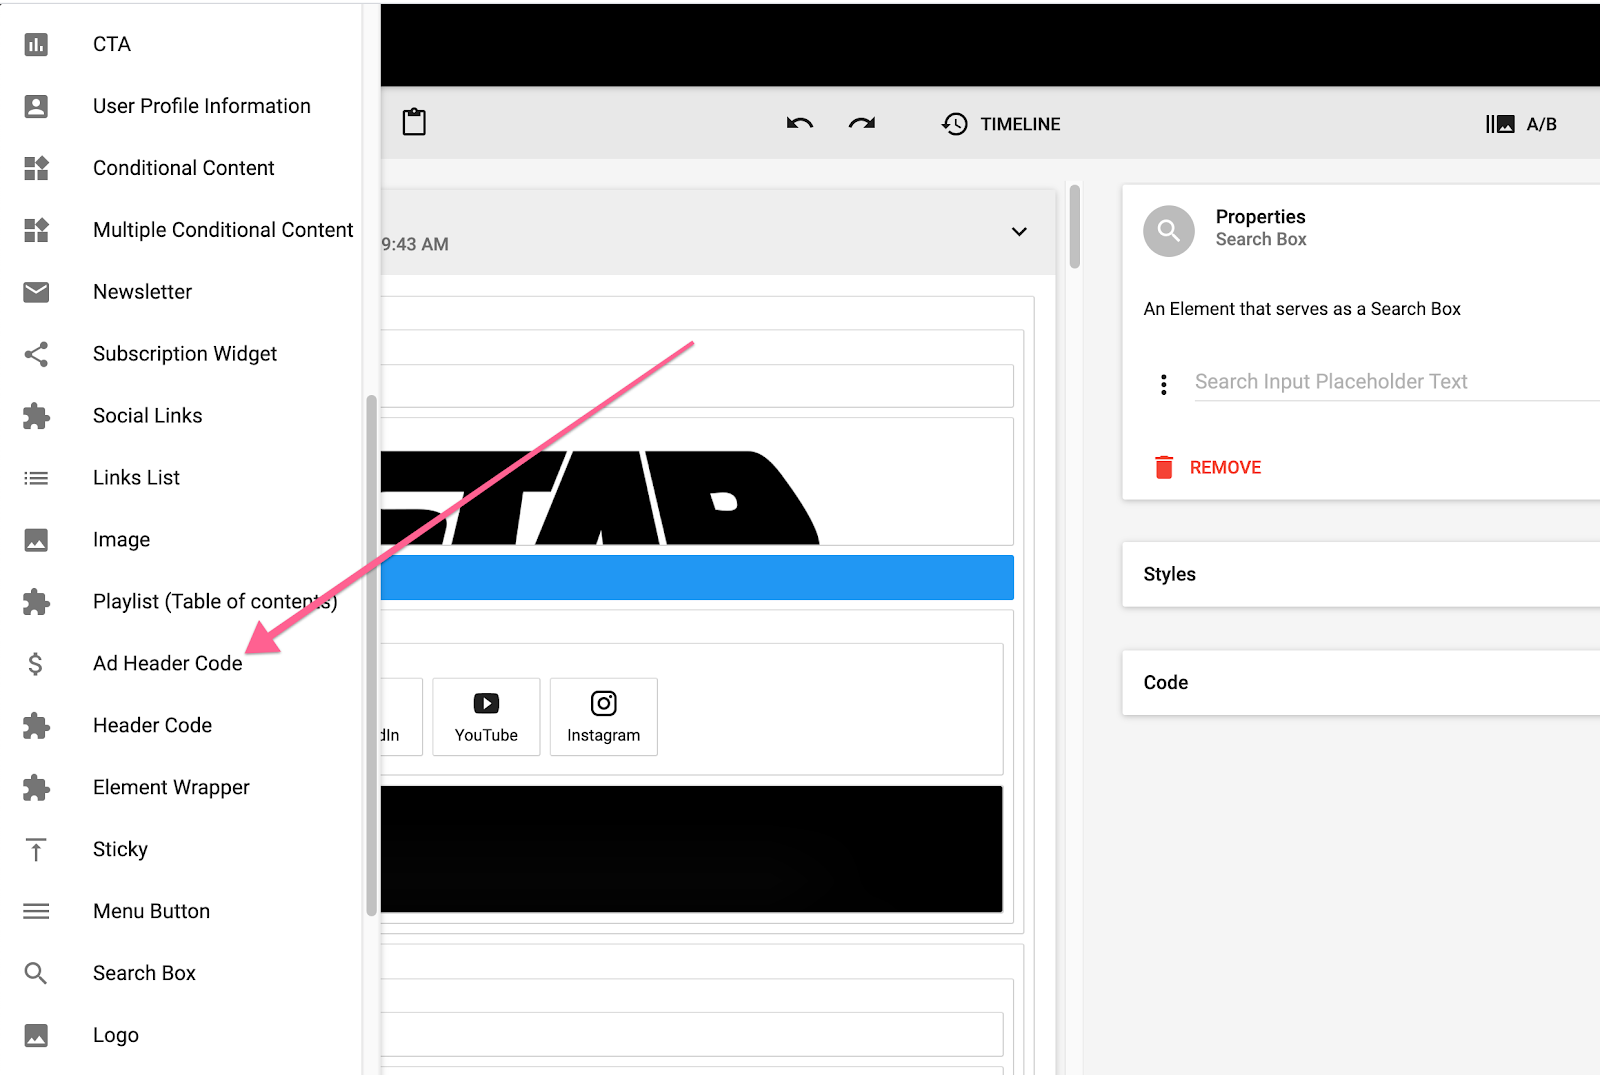
The best place for an Ad Header Code element is typically your Top Bar, which allows the code to run across all of the pages on your site.
Using Layout & Design Tool instead of Ad Manager for header code has a couple of distinct advantages. First, Layout & Design Tool allows you to create B tests for your header codes, which you can easily manage using URL query parameters. This enables you to have various ad templates, share a specific ad setup to social, and have a different default ad configuration. Layout & Design Tool is incredibly flexible and gives you full control over your monetization strategy.
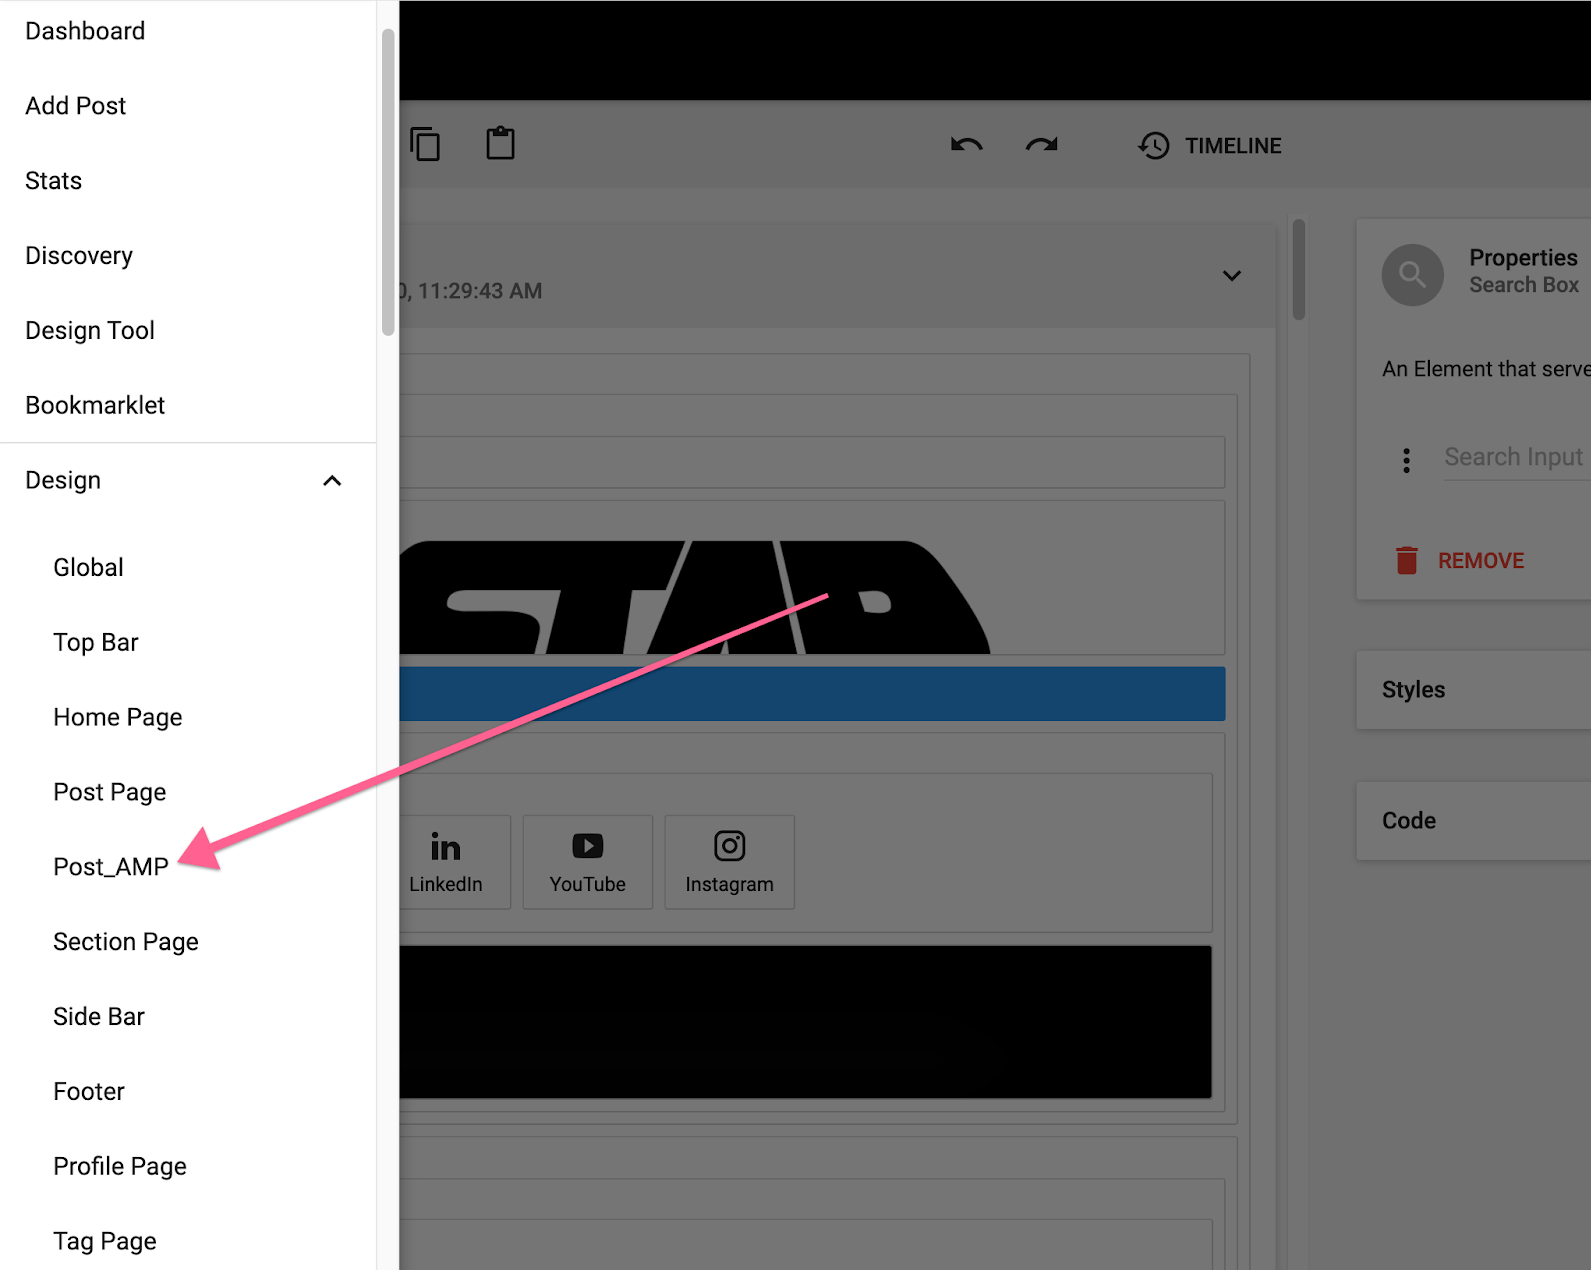
Second, the Layout & Design Tool is fully optimized for AMP. This gives you the ability to implement header code that's compatible with AMP when available.
You can find a separate page to control your output to AMP in Layout & Design Tool here:
Inserting your header code in Ad Manager only allows you to have one code setup that's applied to all of your pages — including AMP — which can cause errors. Because of this, we will be activating a warning prompt to users when Ad Manager is used for header code.
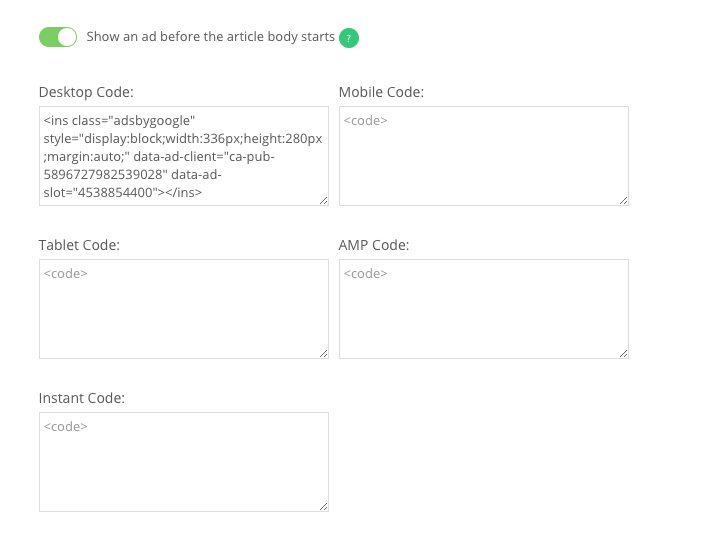
Article Before Body
The Article Before Body section is where you want to add an ad tag in order to serve ads at the beginning of your articles, before the start of any content. This is a common ad placement because it's visible upon first load. You can toggle this ad option on or off.
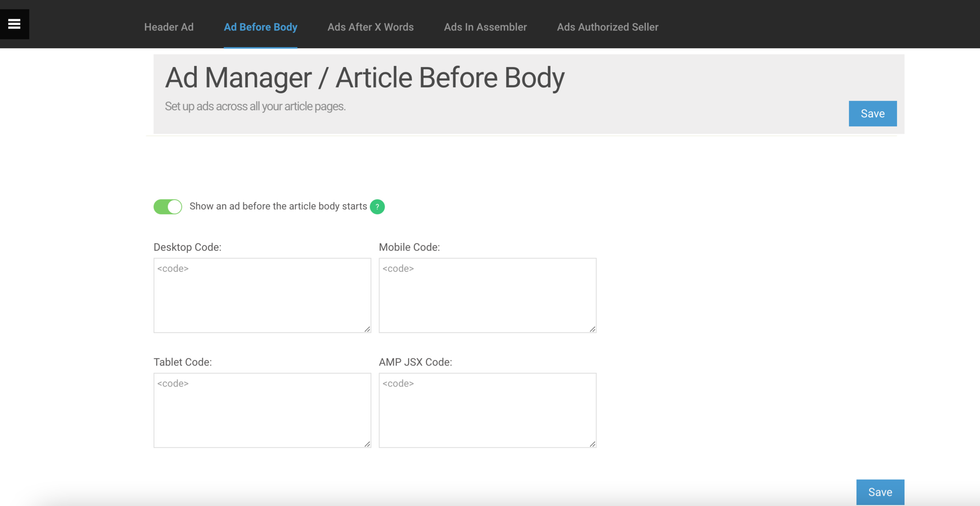
Here's an example of how it looks on site:

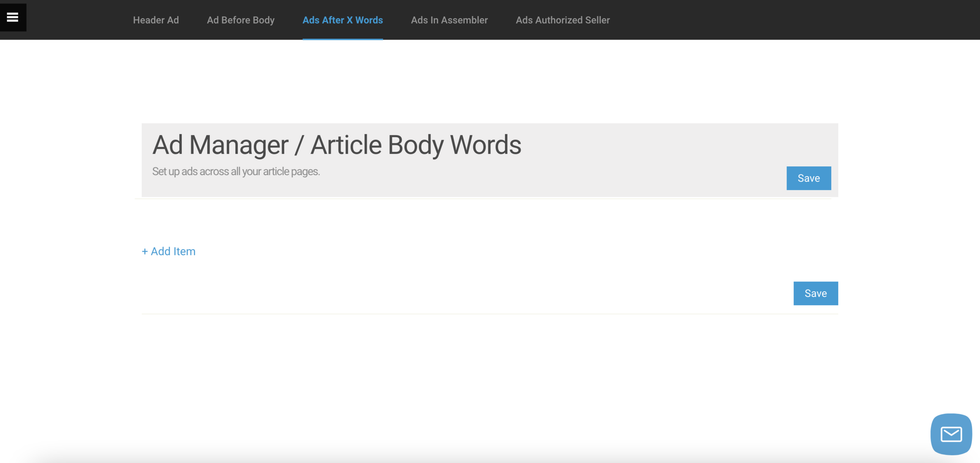
Ads After X Words
Ads after X words allows you to set ads to automatically appear after a certain number of words in your article. This helps ensure that ads appear throughout your article, but not too closely together.
Note: RebelMouse will not cut off a paragraph midway through to place an ad. If you select 150 words as the break point, for instance, RebelMouse will find the closest end of a paragraph after 150 words before placing the ad.
Just like with the Article Before Body section, you can toggle any ad placements on, off, or even delete them if necessary.

You can keep adding as many ads as you want with the + Add Item button at the bottom of the page:
For example, this is how an ad after 60 words looks in an article:

We encourage you to add multiple ad placements this way. You might want ads to appear after 150 words, 500 words, and 1,000 words. The key is to experiment. Also, if an article is shorter than the number of words selected, that ad will not appear.
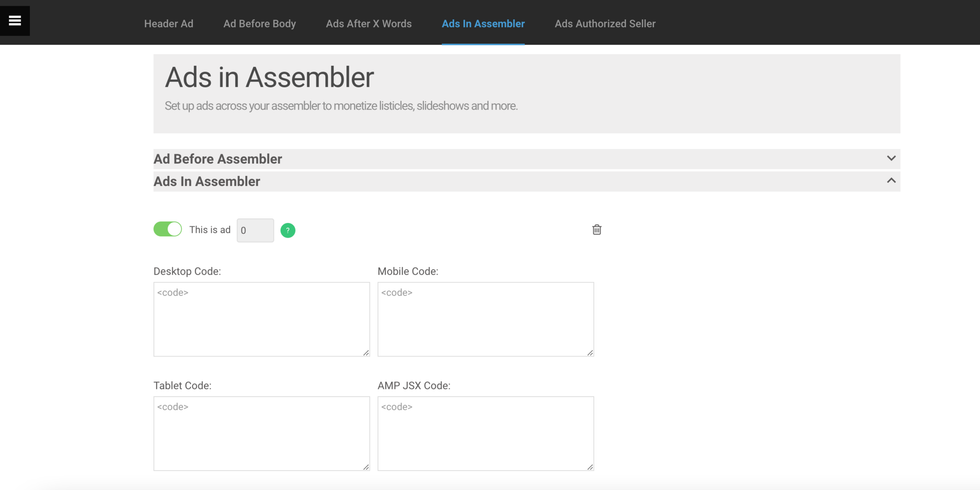
Ads in Assembler
The Ads in Assembler option is where you can set ads that will automatically appear after a certain number of Assembler items in your article. This number can be set globally in our Layout & Design tool, or on a per-post basis in Assembler's settings. After navigating to the "Ads In Assembler" tab, you'll find expandable and collapsible sections containing different ad placement options in Assembler.
If there is one ad entered into Ad Manager, the ad will be repeated. Example: You have an Assembler with 15 items and you choose to show an ad after every five items. The one ad you have in Ad Manager will be shown three times.
If there is more than one ad entered into Ad Manager, the ads will be displayed in the order they're listed in. Example: You place two ads into Ad Manager, have an Assembler with 20 items, and you choose to show an ad after every five items. The first ad shown will be ad #1 in Ad Manager. The second ad shown will be ad #2. The third and fourth ads shown will be ad #2 again because we repeat the last ad that was entered into Ad Manager instead of cycling through the ads again.
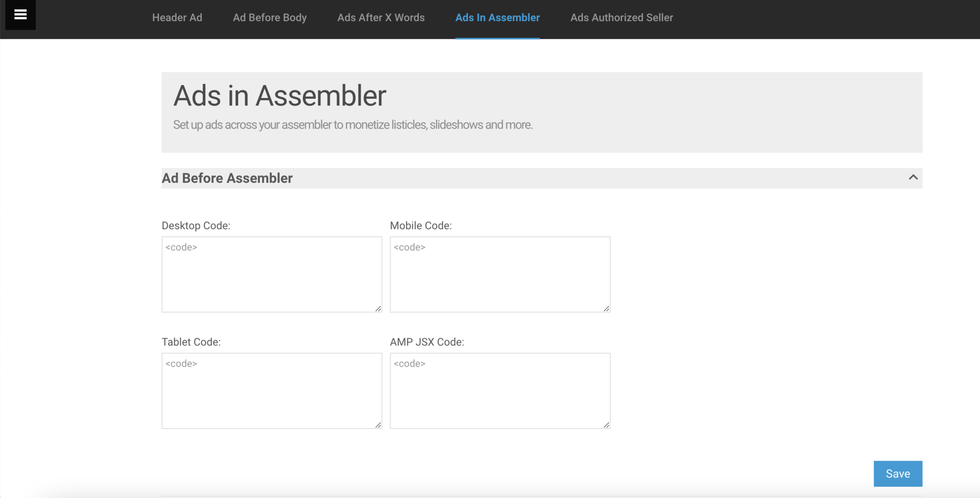
Ads Before Assembler
This option displays an ad before the start of an Assembler.
Ads in Assembler
With this option, ads can be placed between Assembler items if it's in listicle mode, or below an Assembler slideshow if it's in slideshow mode.

Ads in Fullscreen Slideshows
We understand how vital it is to monetize your articles, so we provide you with the tools that will allow you to both make them look beautiful and bring in revenue. When it comes to full-screen slideshows, we have two fixed placements where you can insert ad tags: At the top of the slideshow and on the right rail.
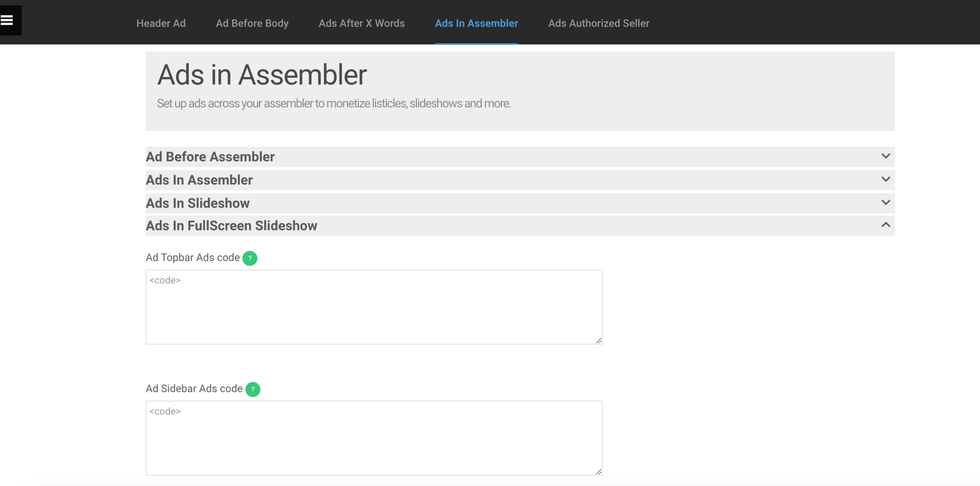
Here's an example of how it looks on site:

Customize Ad Codes by Device
You can add separate ad codes for desktop, mobile, and tablet devices to ensure that your ad placements fit each type of screen correctly. You can also enter your ad code specifically for Facebook Instant Articles.
Note: You can also add Google AMP-compatible ad code for each placement. Learn more about Google AMP + RebelMouse.
Your Ads in Facebook Instant Articles
As you saw above, you have the option of implementing ads into Instant Articles using both the Body Words (an ad every X words) and Ads in Assembler (an ad between X number of Assembler items) methods.
Here are a couple of best practice recommendations:
- Facebook Instant Articles doesn't support using an ad before the body of a post, so don't place the ad in the Header or Body sections.
- When using Body Words, we recommend setting up the ad so it displays after no less than 100 words. Otherwise, it could be rejected by Facebook.
How to Add Ads.txt and App-Ads.txt to Your Site
Ads.txt stands for "Authorized Digital Sellers," and is a simple, flexible, and secure method that publishers and distributors can use to publicly declare the companies they authorize to sell their digital inventory. The mission of the ads.txt project is straightforward: increase transparency in the programmatic advertising ecosystem. You can find more information on ads.txt here.
We also manage app-ads.txt. By implementing app-ads.txt, you can broaden compatibility to include advertisements displayed in mobile applications. This ensures that your app's ad inventory is exclusively sold through authorized channels designated by you. Click here to learn more.
In our Ad Manager dashboard, you can add content from any .txt file that digital sellers have sent to you. It's a simple process that we've outlined below:
1. Open the left-hand navigation menu ( ☰) and click on Ad Manager.
2. Click on the Ads Authorized Seller tab and copy-paste the Ads.txt or App-ads.txt content of the .txt file(s) you've received from your ad provider(s) in the respective fields.
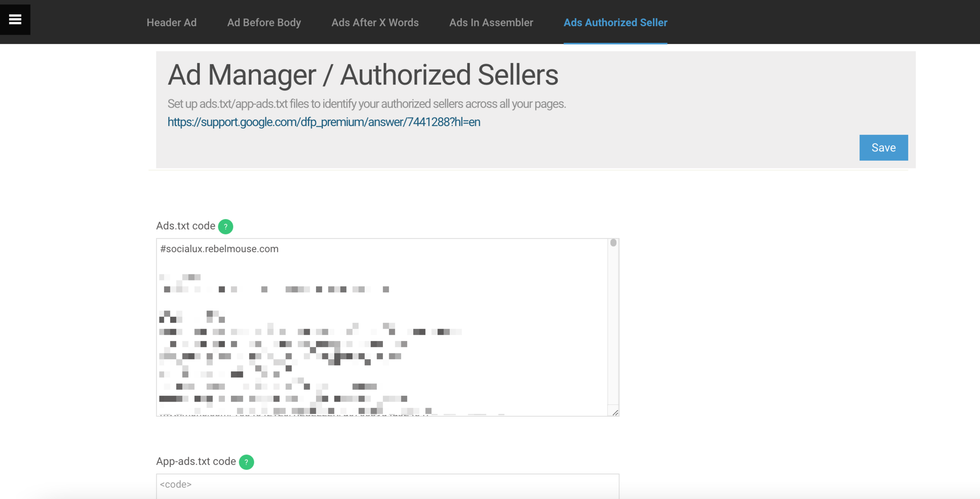
3. Click Save.
4. RebelMouse will generate a URL ending in /ads.txt where you can see the list of your authorized digital sellers. Here's an example: https://www.narcity/ads.txt.
How to Redirect Your Ads.Txt File to an External URL
If you would like to redirect an ads.txt file to an external URL, copy any code that's within the ads.txt and save it as a backup text file somewhere in case the update needs to be reverted.
First, delete the code from the ad manager ads.txt file and click Save. Then, visit yoursite.com/ads.txt to make sure that your ads.txt is delivering a 404 redirect notice:

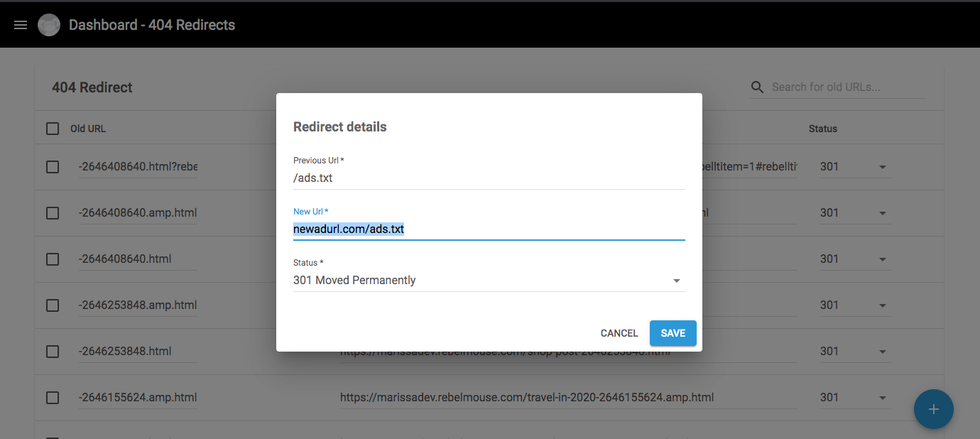
Navigate to your to your 404 Dashboard. You can do this through the hamburger menu (☰), or by appending the following to your site's URL: /r/dashboard/404_redirects?site=
Then, set the redirect from /ads.txt to the site where your new ads.txt file will be hosted: newadurl.com/ads.txt. Click Save.
To confirm the redirect is set correctly, visit your site's domain and check yoursite.com/ads.txt. If implemented properly, it should redirect to the new ads.txt file.
If you have any questions about the Ad Manager dashboard, email support@rebelmouse.com or talk to your account manager today.


