

RebelMouse has many ways that we can help to simplify your newsletter campaign workflow. Our integration with Mailchimp allows you to automate your daily or weekly newsletter (using an algorithm to select the top-performing posts of either period) or to use our Entry Editor to create a post, which can then be sent to Mailchimp and distributed to your appropriate lists. You are also able to simply select the correct template for any post you send as a newsletter (or your automated newsletters).
Here we will describe how to use the Mustache template syntax with data to render posts in your newsletters. This is a method that we created to make it easy to augment your newsletters by using Mustache templates. You can learn more about the Mustache template here: https://mustache.github.io/mustache.5.html
To tell an HTML block to render as a Mustache template, we need to create an HTML tag with the "mc:edit" attribute, and have it contain the value "_mustache" as a postfix. For example:
<div mc:edit="posts_list_mustache"></div>
Then, during rendering of the newsletter, the Mustache syntax will be replaced with variables from our posts.
The minimal code needed would be, for example, this code snippet:
<div mc:edit="posts_list_mustache">
 {{#posts_list}}
  {{#image600x}}
  <a href="{{ post_url }}"><img src="{{image600x}}"></a>
  {{/image600x}}
  {{#header}}
   <a href="{{ post_url }}" target="_blank">{{ header }}</a>
  {{/header}}
 {{/posts_list}}
</div>
List of Variables
For the "posts_list" List:
Name | Description |
header | Header/Headline of a post |
subheader | Subheader/Subheadline of a post |
post_url | Post URL |
image600x | Lead image 600x |
image300x | Lead image 300x |
image980x | Lead image 980x |
image | Image (this displays an image and works in Gmail correctly) |
before_listicle | Body text before listicle/particle |
after_listicle | Body text after listicle/particle |
authors_names | Author names list |
author_name0, author_name1, author_name2, author_name{} | Author names |
author_avatars | Author avatars list |
author_avatar0, author_avatar1, author_avatar2, author_avatar{} | Author avatars |
created_date | Created date |
keep_reading_enabled | Is keep reading enabled for the post |
tags | Tags list |
listicle_items_list | A list of listicles/particles |
related_posts_list | A list of related posts |
Note: Sometimes you may have multiple authors that you want to attribute a newsletter to. Such as, instead of saying "By Author 1" in the newsletter, you want to say "By Author 1 and Author 2." This simply requires a tweak to the code, as seen below:
<code>{{#author_name1}} //Checking if we have the second author
By {{ author_name0}} and {{ author_name1 }}
{{/author_name1}}
{{^author_name1}} //If we don't have the second author we print only one
By {{ author_name0}}
{{/author_name1}}
For the "listicle_items_list" List:
Name | Description |
is_image | Check if the image is set for a given listicle/particle |
image600x | Listicle/Particle 600x px image |
image | image (this displays an image and works in Gmail correctly) |
media_html | Sometimes instead of the lead image, media HTML might be defined |
headline | Listicle/Particle headline |
body | Listicle/Particle body |
item_permalink | Particle URL |
has_brief | True if the post has brief parameter filled (used to determine Keep Reading) |
brief | Brief parameter (used to show the first part of Keep Reading) |
For the "listicle_items_by_groups" List:
(In case you are dealing with multicolumn listicles.)
Name | Description |
is_multicolumn | Marks if a given particle is multicolumn |
is_layout_two_columns | Is this a two-column layout |
is_layout_three_columns | Is this a three-column layout |
parallax | Is this a parallax layout |
ecommerce | Is this an e-commerce layout |
item0 | First item of a particle |
item1 | Second item of a particle |
item{} | Where {} is a number, it will render information about a given item. So in case we are dealing with a three-column layout, we will have item0, item1 and item2. For a two-layout column, it's item0 and item1. And for single-column layout, only item0 will be available. |
has_sponsored_slug | A Boolean that determines if slug of particle is starting with sponsored content or a sponsored response. Used to determine if the post is sponsored. |
has_brief | True if the post has a brief parameter filled (used to determine Keep Reading) |
brief | Brief parameter (used to show the first part of Keep Reading) |
For the Item object for the "listicle_items_by_groups" List:
Name | Description |
basename | Item base name |
images | Please refer to the "image choices" section |
is_first | Is it the first particle |
is_last | Is it the last particle |
is_image | Does the particle contain an image |
headline | Particle headline |
media_html | Sometimes instead of the lead image, media HTML might be defined |
href | A URL to a given particle |
id | ID of a particle |
index | Index of a particle |
item_permalink | Link to a given particle |
body | Particle body (not parsed) |
description | Particle description (parsed) |
Image Choices:
Name | Description |
is_image | Checks if an image is set for a given listicle/particle |
image600x | Listicle/Particle 600x px image |
image | Image (this displays an image and works in Gmail correctly) |
imageorigin | Same as image |
image210x | Image 210x |
image300x | Image 300x |
image600x | Image 600x |
image980x | Image 980x |
image35x35 | Image 35x35 |
image300x300 | Image 300x300 |
image600x200 | Image 600x200 |
image600x300 | Image 600x300 |
image600x400 | Image 600x400 |
image600x600 | Image 600x600 |
image750x1000 | Image 750x1000 |
image700x1245 | Image 700x1245 |
image1000x750 | Image 1000x750 |
image1200x400 | Image 1200x400 |
image1200x600 | Image 1200x600 |
image1200x800 | Image 1200x800 |
image1245x700 | Image 1245x700 |
image1500x2000 | Image 1500x2000 |
image2000x1500 | Image 2000x1500 |
Here is an example of a simple HTML template with Mustache syntax used: https://gist.github.com/kkszysiu/0dca4715dd55b66e4c7e23478411727c
Creating a Template in Mailchimp
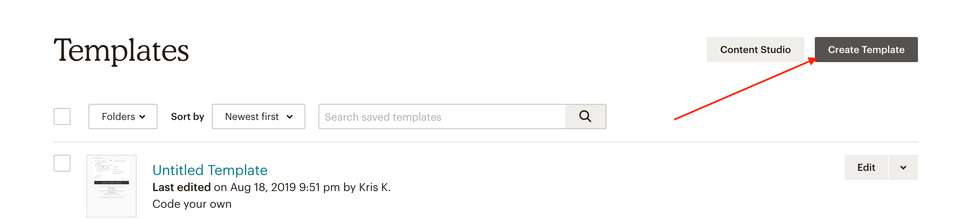
To create a template in Mailchimp, we need to log in to the Mailchimp dashboard, then go to the Templates view and create a new template:
Then select the "Paste in code" option in the next step:
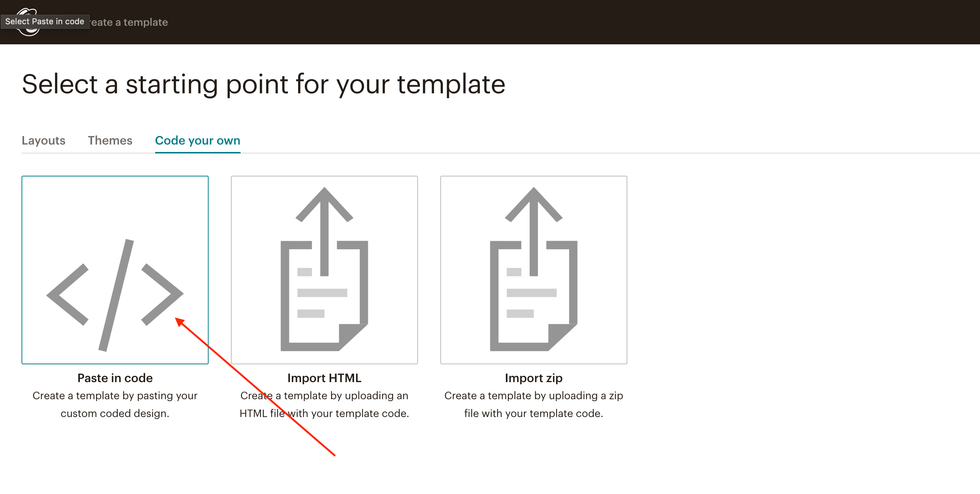
Now you can copy-paste the sample template from the GitHub link above.
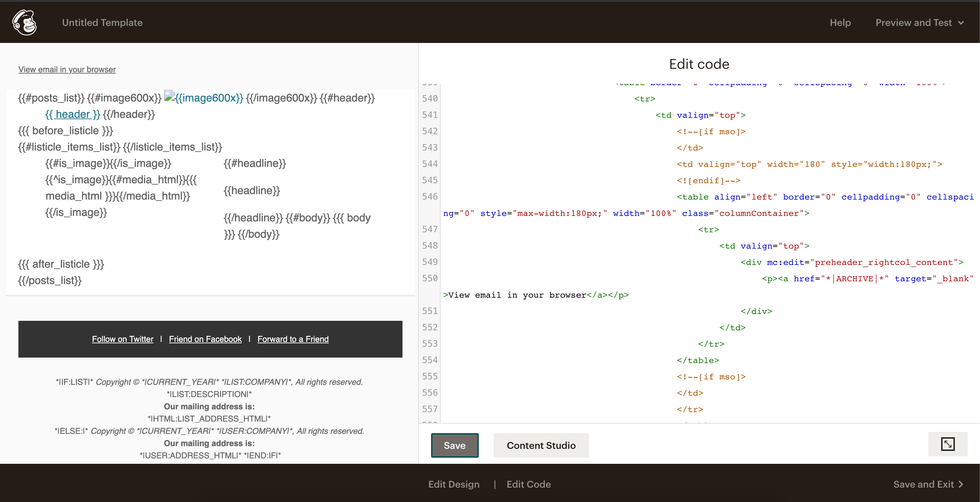
Once that's been entered, you simply click Save and Exit in the bottom-left corner of the screen. Then you'll be prompted for a name for the template. Enter a familiar name for your template that helps keep you organized and you're through this part! You can continue to edit the template to make it fully your own, too.
Testing the Template
To test your template, the easiest way would be to create a new "Audience" or "List" in your Mailchimp dashboard, and then add test emails to your newly created audience.
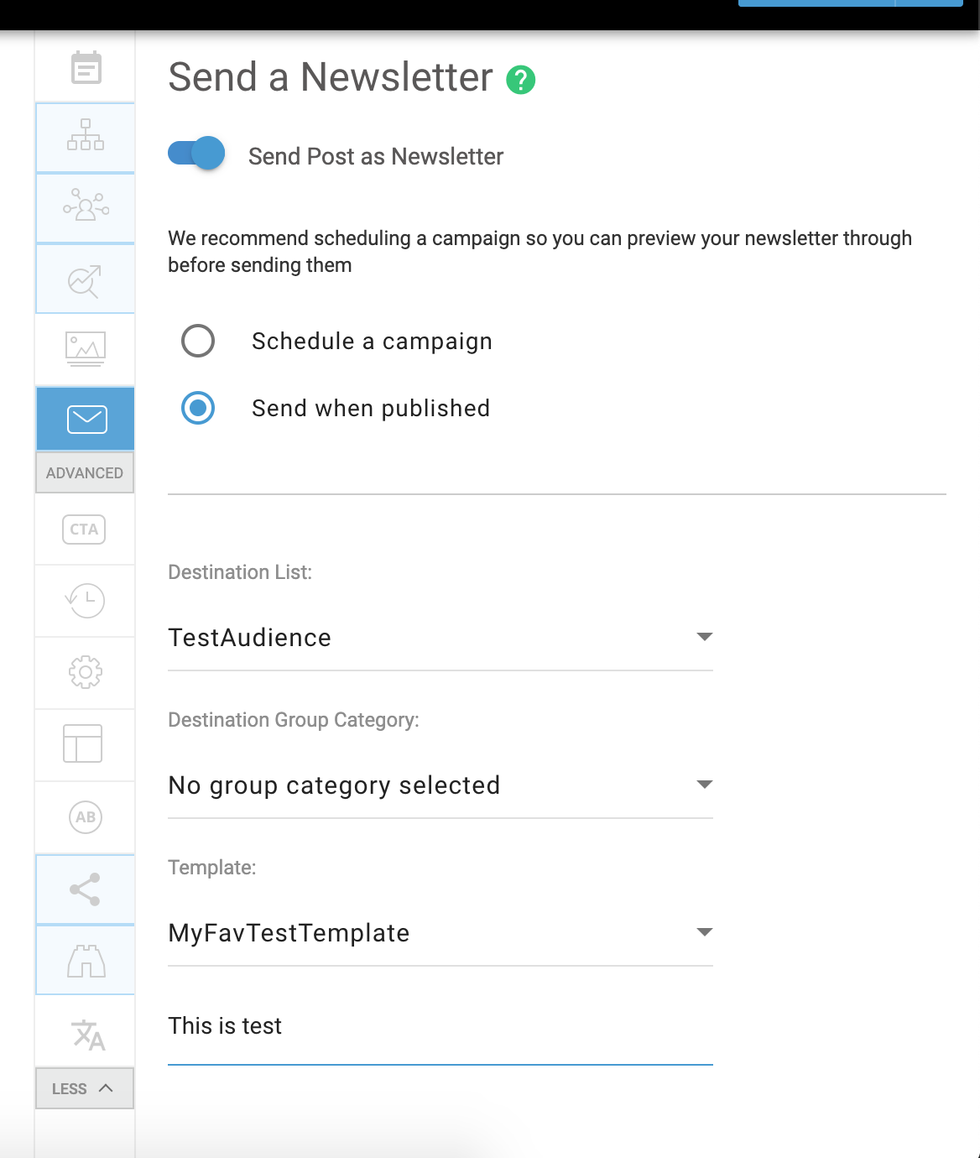
From our Entry Editor, go to the Send a Newsletter tab and select your newly created audience and test template:
After publishing a post, you should receive a test email that uses the test template. Note that if you have any errors in the code in the template, Mailchimp may not receive the newsletter. If you notice that the draft isn't appearing in your Campaigns tab in Mailchimp when you send to Mailchimp, you'll want to check your code to be sure that there are no errors.
You can repeat this flow by changing something in your template, saving it, and then editing this post in Entry Editor and checking the changes in the emails you will receive.
If you have any questions, please contact your account manager or support@rebelmouse.com.


