


In 2017, Facebook began taking drastic measures to reduce the spreading of fake news. But it's been no easy feat, and the company has since devoted its time toward "fixing" Facebook and sorting through all the backlash that resulted from the fake news fallout. We saw this unfold after Facebook eliminated users' ability to edit preview links, header text, and images associated with content shared on the platform. We touched on our solution to this here.
Today, there's more you can do to fully reclaim your content freedom and prove you're not posting fake news. You must verify your domain. Facebook's domain verification process provides a way for you to claim ownership of your domain in Business Manager. This ownership allows you to control editing privileges of your links and content to prevent both misuse of your domain and the spreading of misinformation.
Here are the steps you need to take to get this done:
1. Add Your Domain to Your Facebook Business Manager
Please follow Facebook's instructions (steps 1–5) located here. Once you've completed the first five steps, Facebook offers two different options to complete the domain verification process. We suggest using the first approach, which we've outlined in the following step.
2. Confirm Domain Ownership
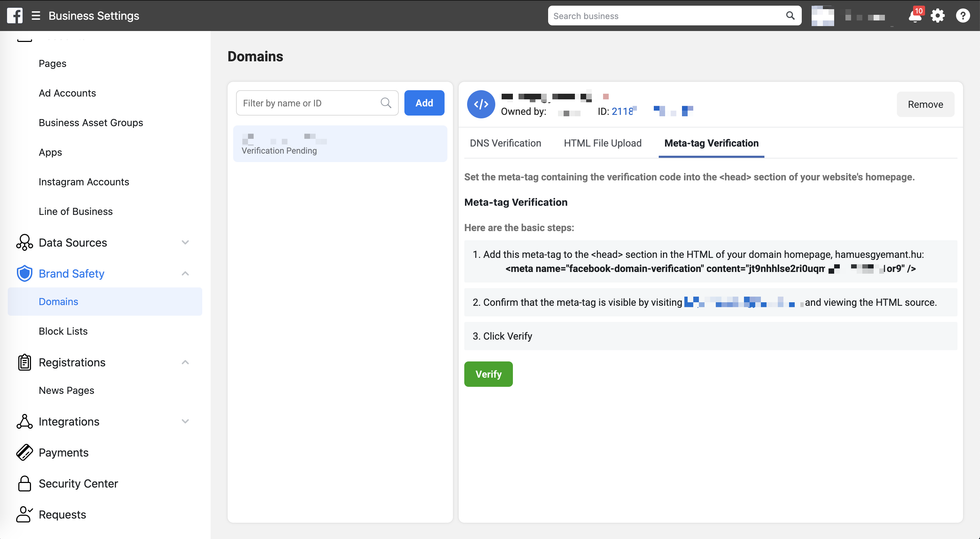
To confirm your domain ownership in Facebook Business Manager, head to the Brand Safety menu and click Domains. Then, click the Meta-tag verification tab. From there, you will see instructions to add a meta tag to the <head> section of your website. In RebelMouse's Layout & Design Tool, you can do this by inserting the tag in the Top Bar inside of a Header Code element.
You can also complete the step through the DNS Verification tab if your selected domain provides the TXT information you will need to add to your DNS record.
- Navigate to the DNS record section of your domain host.
- Add the TXT entry to your DNS record.
- Add @ to the Host field (if it is required by your domain host).
- Once the changes have propagated across your domain's web servers, click the Verify button at the bottom of the DNS Verification tab for the selected domain. Note: Typically, this change takes only minutes to occur, however there are cases where it may take up to 72 hours to complete.
- Leave the TXT entry in your DNS record as it may be checked periodically for verification purposes.
3. Associate Facebook Pages With a Verified Domain
Once your domain is verified, return to Facebook's domain verification instructions located here, and continue on from where it says "Associate Facebook Pages with a Verified Domain" to complete the process.


