
Search
AI Powered
The Members section lets you control who has access to your RebelBoost organization and what they can do. You can invite new teammates, assign permission levels, update roles at any time, and export your full member list — all from one central page.
What's Covered
- Viewing your current team members and their roles
- Inviting a new member to your organization
- Changing a member's permission level
- Understanding the available roles
- Exporting your member list
How to View Your Members
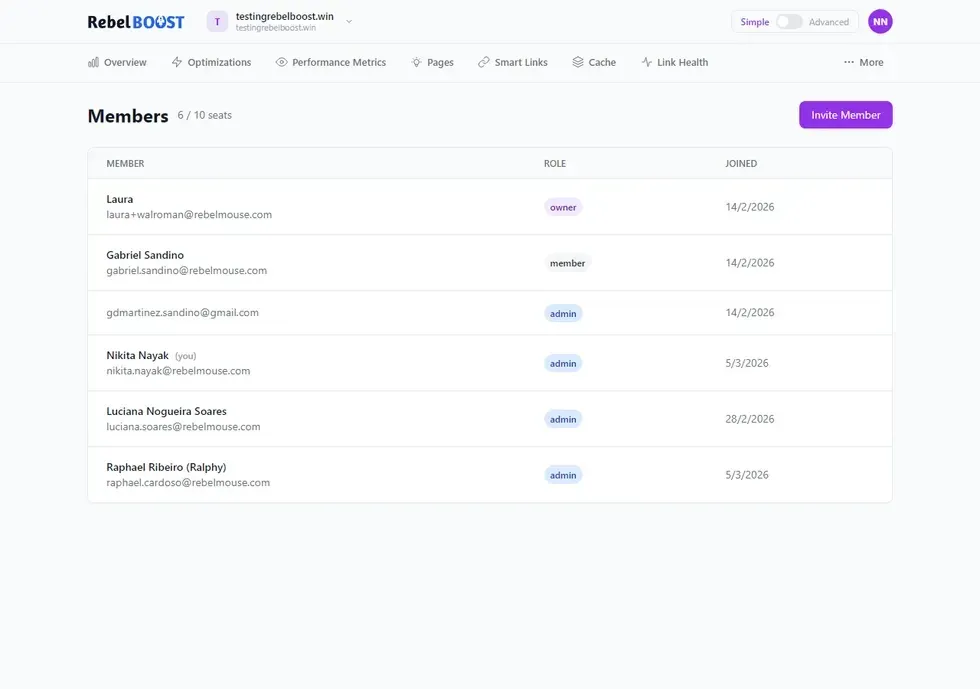
The Members page gives you a full overview of everyone in your organization and the role they've been assigned.
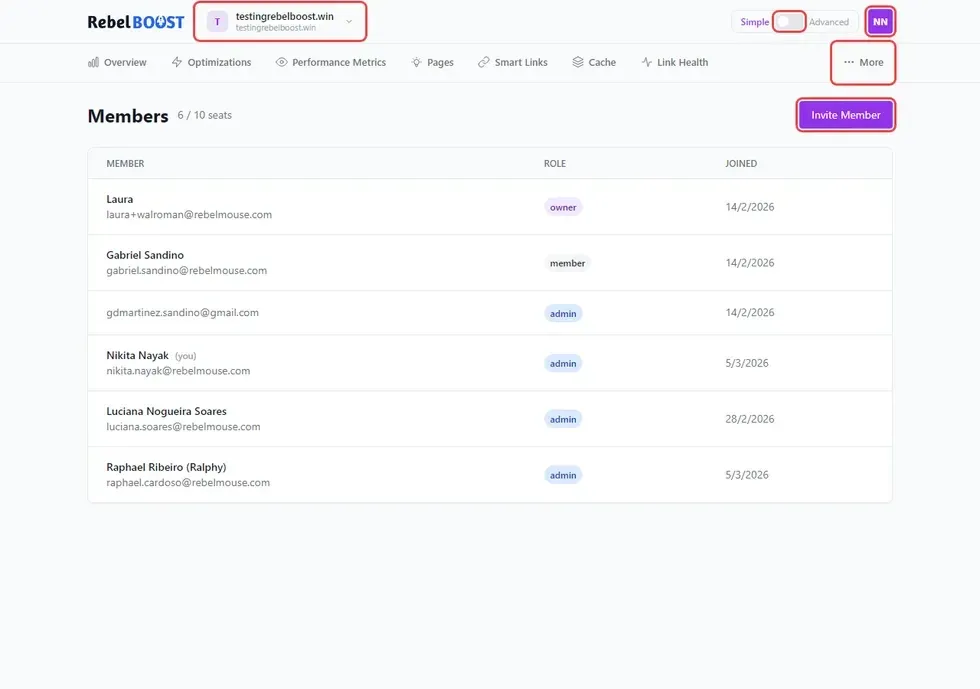
- From your RebelBoost dashboard, click your organization name in the top navigation, then select Members from the sidebar.
- You'll see a list of all active members alongside their current permission level.
How to Invite a New Member
Inviting someone to your organization takes just a few seconds. They'll receive an email with instructions to get started.
- On the Members page, click the Invite Member button in the upper area of the page.
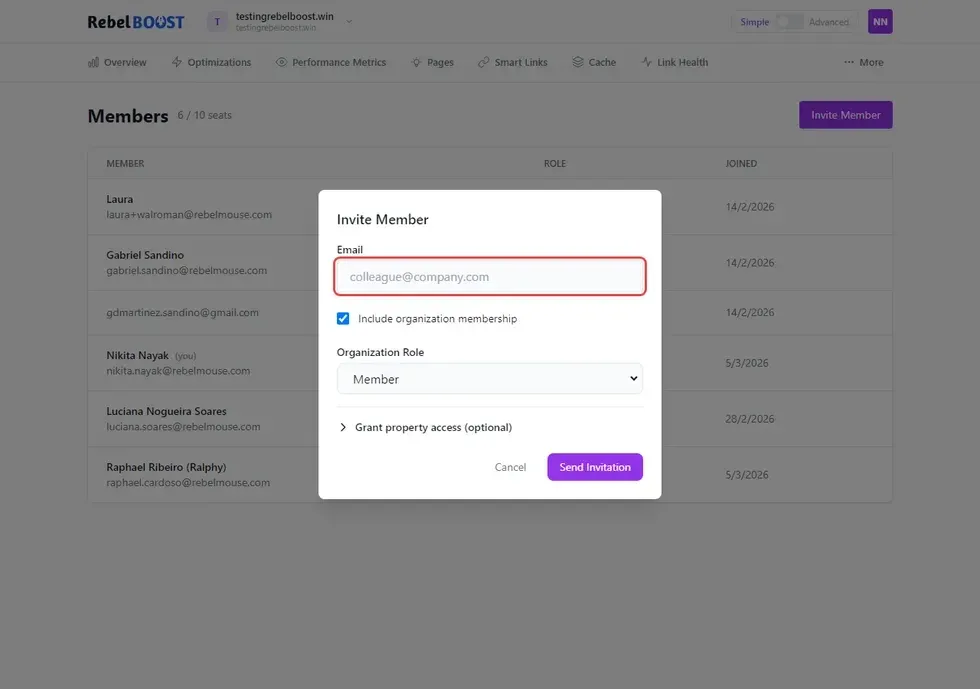
- An invitation panel will appear. Enter the new member's email address in the Email field.
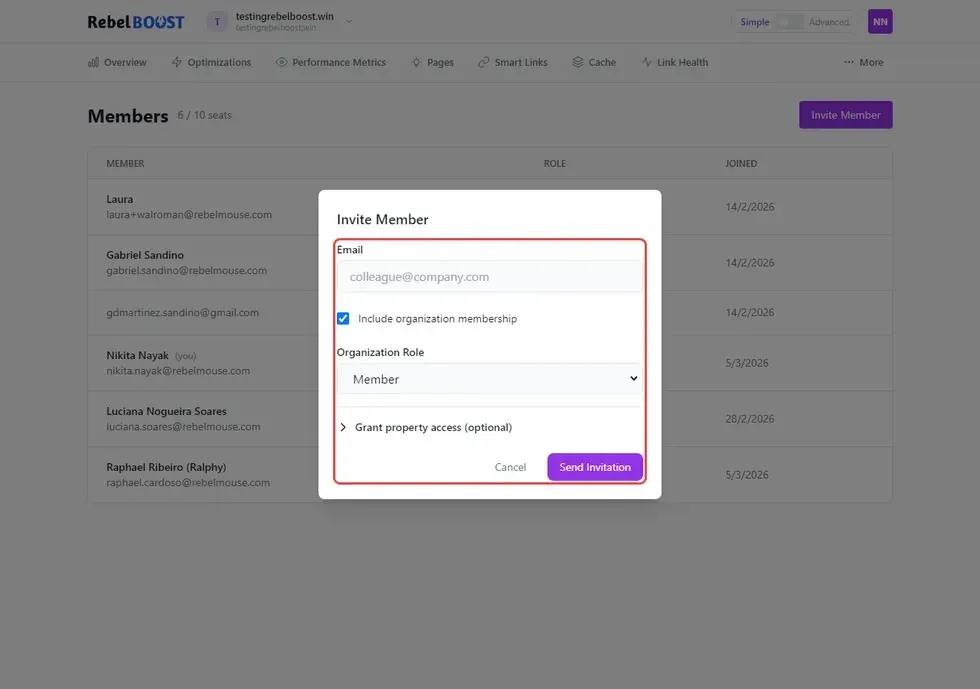
- Use the Role dropdown to select the appropriate permission level for this person.
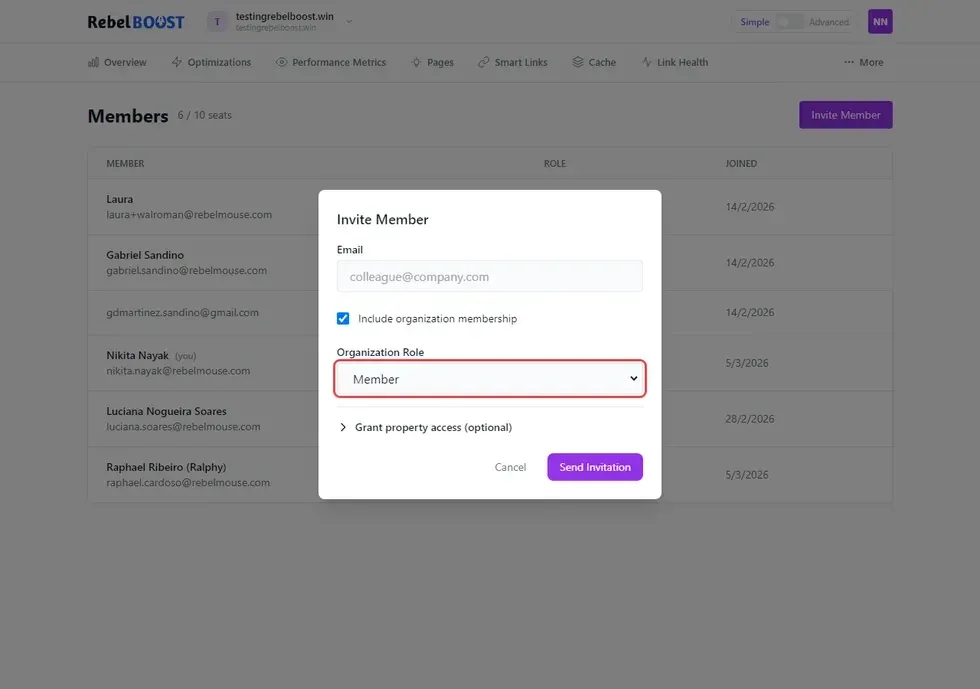
- Click Send Invitation. The new member will receive an email with a link to join your organization.
How to Change a Member's Role
You can update any member's permission level at any time directly from the Members list.
- Find the member in the list on the Members page.
- Click the role shown next to their name to open the dropdown.
- Select the new role. The change takes effect immediately — no save step is needed.
Permission Levels
Each role gives a team member a different level of access. Here's what each one means:
| Role | What They Can Do |
|---|---|
| Administrator | Full access across the entire organization — can manage members, properties, settings, and all content. |
| Content Strategist | Manages users and content across all areas of the organization. Works closely with content creators. |
| Community Manager | Oversees content flow and contributors within a specific community or property. |
| Creator / Contributor | Creates and submits content. Can be set as trusted to publish directly, or required to submit for review. |
How to Export Your Member List
- On the Members page, look for the export icon in the upper-right corner of the list.
- Click the icon, then select Export to CSV.
- A file containing your full member list will download to your computer.
Tips & Things to Know
- Invitations are sent by email. New members will receive a link to join your organization. Make sure the email address you enter is correct before sending.
- Role changes are instant. As soon as you update a member's role, their access level changes. There's no confirmation step.
- Administrators have the most access. Only assign the Administrator role to people who need full control over the organization.
- You can adjust roles at any time. If someone's responsibilities change, update their role from the Members page whenever needed.
- The CSV export includes all active members. Use it to keep records of your team or review access levels in bulk.
Table of Contents


© 2026 RebelMouse. All rights reserved.