Subscribe to Our Newsletter

x

How to Set up Footer Links + Static Pages

99.9% of sites need to comply with a few legal requirements and/or have a link to disclaimers. These are usually known as Footer Links:


You can set up Footer Links in RebelMouse by going into the Layout & Design tool in the left-hand navigation menu. Then, choose your Footer page, click on + ADD ELEMENT in the toolbar, and choose the Links List element:

You can add as many links as you like to the Links List element by clicking on the secondary + ADD ELEMENT button in the Properties card:

This lets you link an article or static page so your footer links link out to the proper information.

If you want your Footer links to go to articles, click on Add Post in the hamburger menu (☰) and add a piece of content like you normally do to populate your site. Once published, you can take the new URL and paste it into the Footer item that requires it:

If you want your Footer links to go to static pages, you need to create them and then link back to them.

Static Pages have many advantages:

  • You have the ability to fully customize the layout for a particular Footer link. I.e., "Terms of Use" can have a 100% different layout from pages for "About," "Contact," and so on.
  • You can update the layout anytime you want without fear of it affecting your general layout for posts.
  • You can A/B test different layouts to see which one you like best. Click here for more information on how to do that.

To create a static page, click on + Create Page at the bottom of the Layout & Design tool's menu:

Next, you'll be prompted to enter the following information:

  • Static Page Name: You can choose any name you want to use for your static page. Bear in mind that this will determine what shows up in the page's URL.
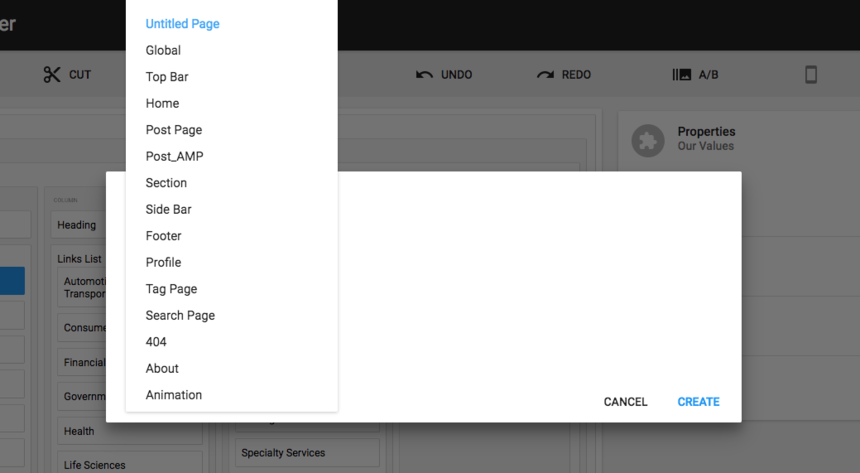
  • Static Page Source: You can either choose to start from a blank layout, like this:

Or you can copy one of the pages you already have built out (Post page, Section page, Home Page, etc.):

If you choose to start with a blank layout, it will only have elements for a Top Bar, Footer, and one Row with a Column inside of it:

In the Page Settings menu, you'll be able to:

Particle Assembler: Ads in Slideshows Now Supported

You can now insert ads between slides in a slideshow!

Monetizing users' engagement and page views is pivotal to most digital businesses, and our Particle Assembler has been an invaluable tool in helping RebelMouse clients to insert native ads seamlessly into their content. Now we've taken this functionality one step further by introducing support for ads between slides in Assembler's slideshow layout.

Keep reading... Show less

Inside RebelMouse’s Quality Assurance Operations

How We've Perfected Stress-Free Publishing

At RebelMouse, we like to refer to our enterprise publishing platform as "lean tech." Most publishers have a natural inclination to start doubling down on teams of developers who try to build unique experiences to help stand out above the noise. But they should actually be doing the opposite: Lean tech is the preferred way to cut through content saturation. By allowing RebelMouse to obsess over your product, content producers, editors, managers, and everyone in between can focus on creating quality content and taking advantage of opportunities to leverage distributive publishing strategies that create real revenue growth.

One of the major reasons we're able to maintain a lean tech environment is thanks to our approach to quality assurance (QA). We make updates to our platform daily to ensure our clients always have access to the most robust, high-performing, and secure version of our platform. Behind the scenes, this means having a solid QA structure that's efficient, creates less bugs, and catches the ones that do pop up before they go live. It's a system of checks and balances that's hard and costly to replicate on a custom CMS. Here's a glimpse into how it works.

Our Tech Stack Toolbox

  • Cucumber
  • Java
  • Junit
  • Maven
  • Selenium WebDriver
  • TeamCity
  • Zalenium (Selenium Grid)

Our Checks and Balances Workflow

Automated Regression Testing Cycle

The Lifecycle of a Product Update

When an update is first made to RebelMouse, TeamCity immediately triggers the start of automated tests to review integrity.

TeamCity Build

TeamCity Agent

The tests run in parallel on TeamCity's Build Agent. Next, Zalenium creates docker containers with browsers that matches the count of parallel threads. An Allure report is then generated from the test results, which shows the state of the application after the update.

Allure Report Pass

If a test doesn't complete successfully, the testing framework receives a video with a failed test and attaches it to the Allure report.

Allure Report Issue

Based on the report analysis, a QA specialist will create a "bug" ticket in our product management software to address the issue if needed. Then, information about the bug is immediately sent to the project manager and we begin the process of correcting the problem.

The media powerhouses we power can publish with confidence knowing that any product issues that arise are met with a tried-and-true process to fix the problem with little-to-no disturbance to their workflow. If you have any questions about this process, please email support@rebelmouse.com.

Related Articles

Related Posts vs. Posts in Assembler

Here's the difference between Related Posts and Posts in Assembler.

By using Related Posts and Posts in Assembler, you can help your audience stay engaged with your site's content and generate more traffic. Both of these features can be added to any post through Entry Editor.

When creating or editing a post, you can add a Related Posts section to the bottom of it that consists of a selection of existing posts on your site that you choose to surface. Only the main image and content headline are pulled, along with a link to the original post. This is similar to the Around the Web section that also shows up at the end of your post when you enable it from the SEO tab of Entry Editor.

Keep reading... Show less
Subscribe to Our Newsletter