

A/B testing allows you to create different page versions to see which resonates most with your visitors without risking any design or marketing mishaps on your live site. In A/B testing, A is your live site, and B is your test site.
Creating a New A/B Testing Layout
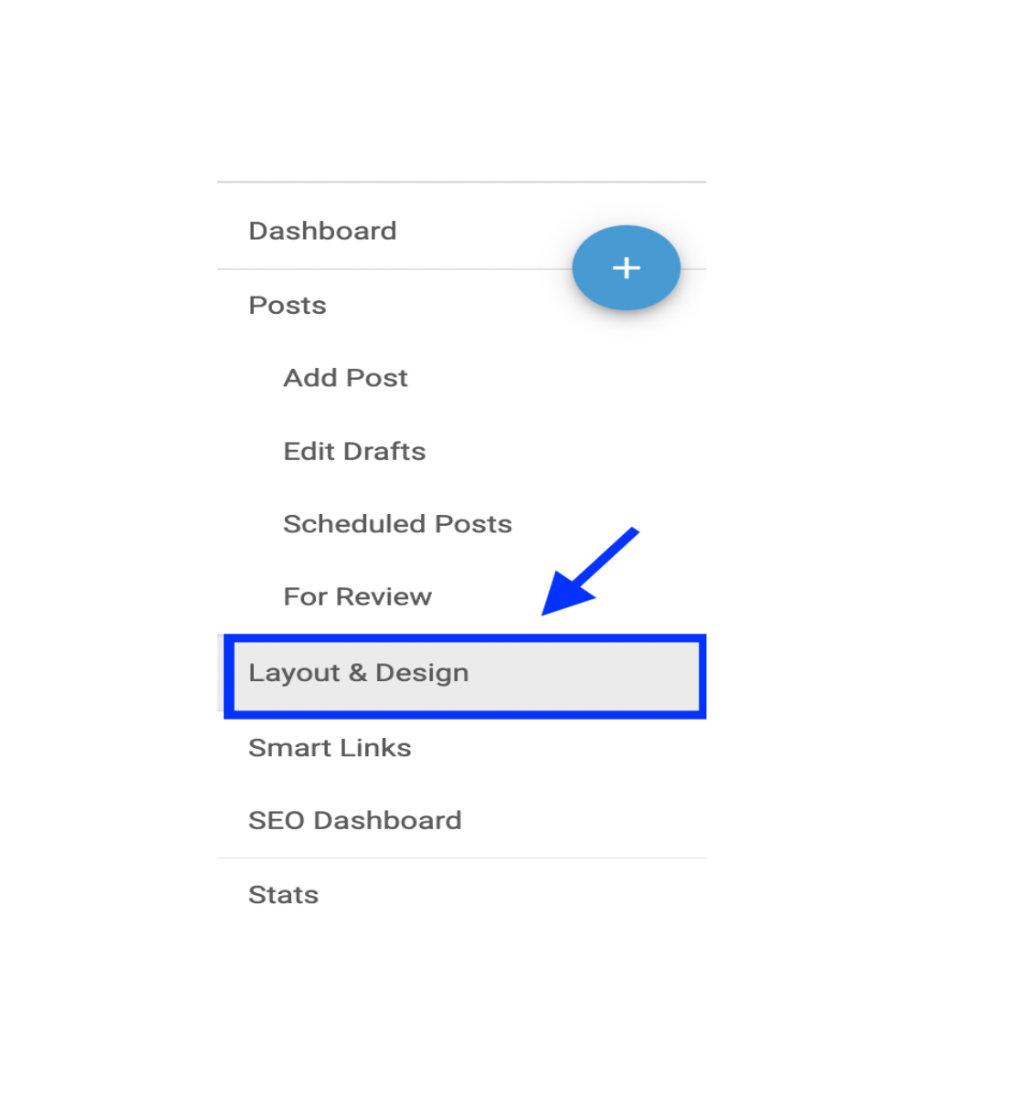
Let's get started. Go to the Layout & Design tab in the left-hand navigation menu.
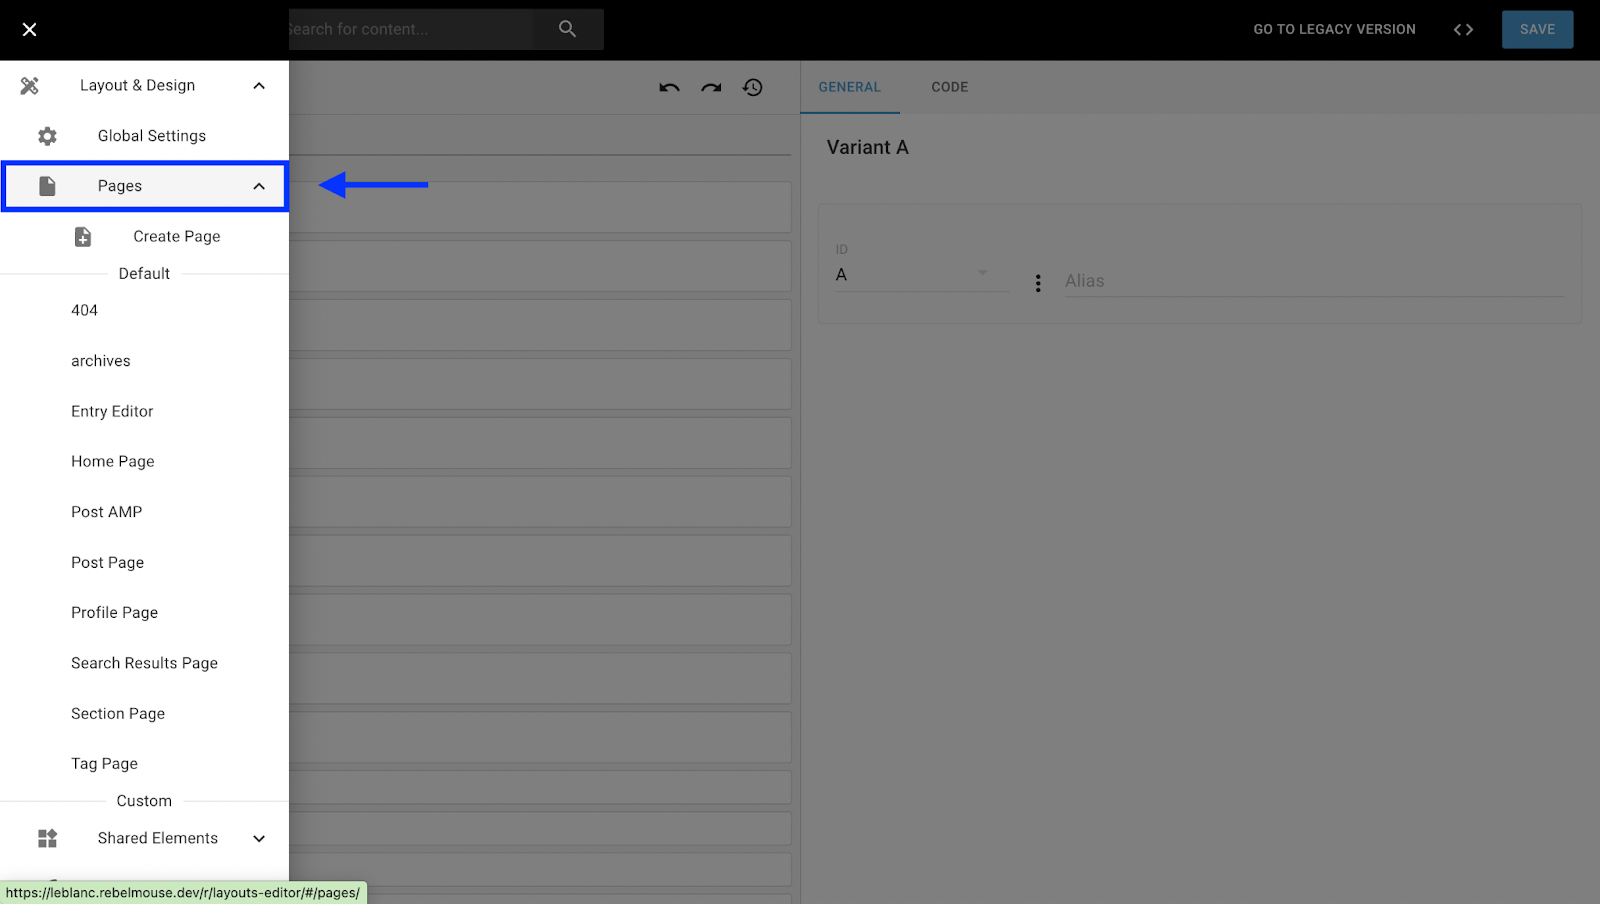
After selecting the Layout & Design tab, you will come to the main dashboard. Select the left-hand navigation menu next to the Global Settings header. You'll find that all sections under the Pages tab (Post, Home Page, Section, etc.) have an A/B action button in the toolbar.
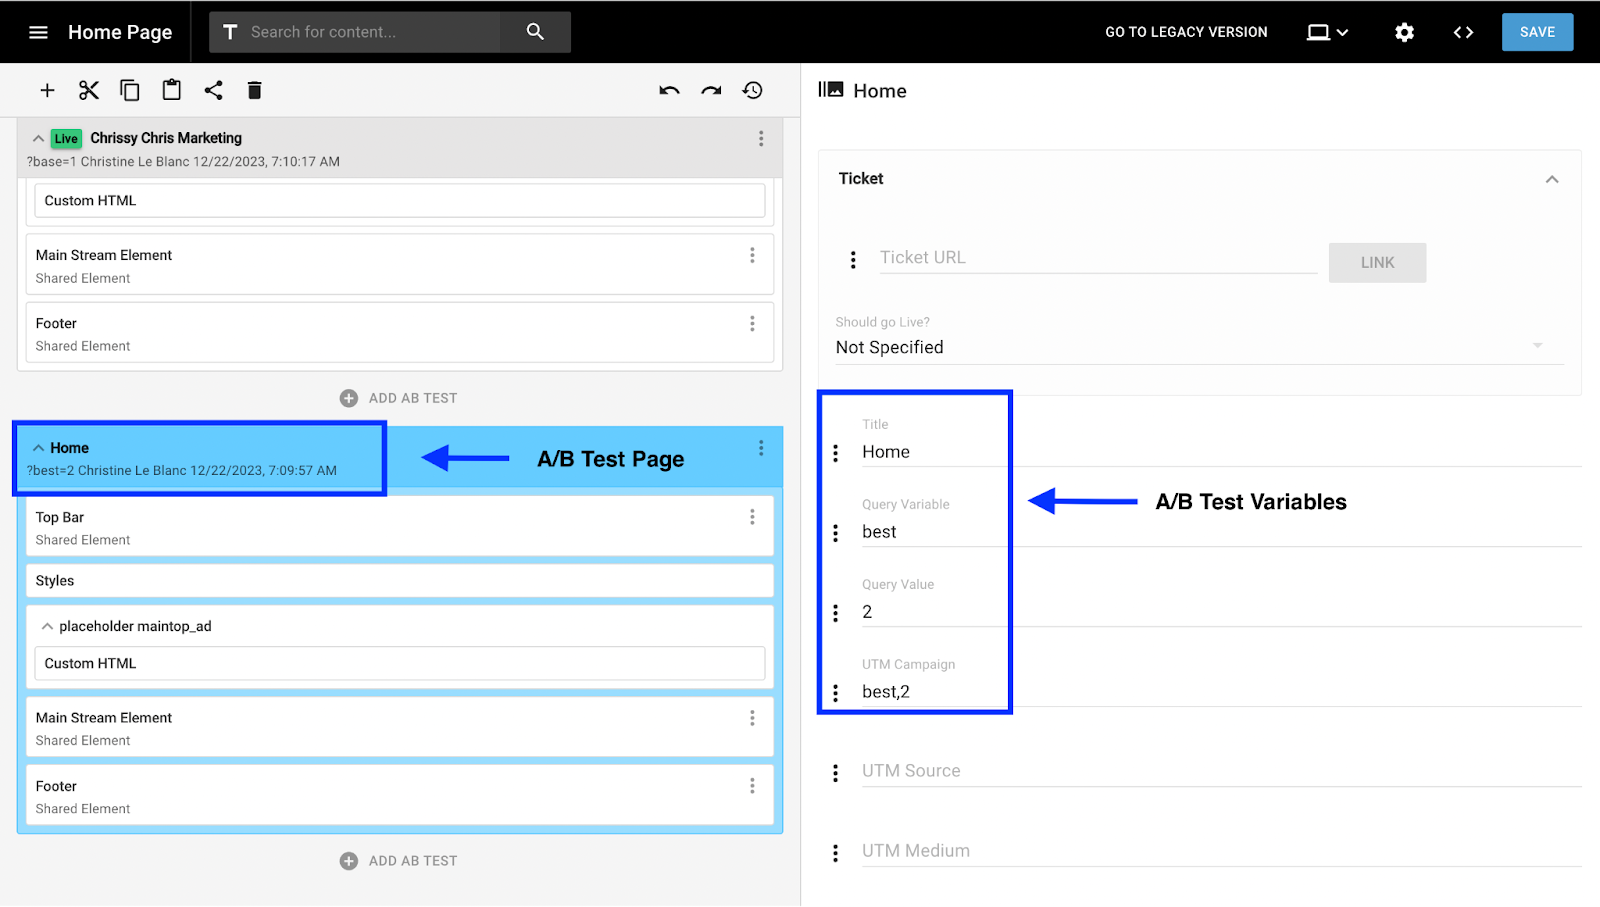
Once you select your page, click the + ADD AB TEST button to create a duplicate page layout. Your current site will have a live green icon in the top left corner. You can title your test layout to differentiate the two.

Setting Parameters and Testing Variables
Your B test site will appear under Untitled Test. Different A/B testing templates are identified in the URL of a page via a query parameter. On the right-hand side, you can change your title and specify your changes under the section's query variable and query valve.
These sections help you label your testing sites. Fill in those sections with whatever makes sense to you, and it'll also show up in the website address bar. That'll help you keep track of everything when comparing the results.

Please note that we have selective filtering in our WAF that will block any query variable/value that uses the following pattern: ?on*=*
This just means that, in your naming convention, you need to avoid variables that begin with "on." So a B test such as https://www.example.com/?only=content or https://www.example.com/?one=ad will not render and will lead to a 429 error.
Our A/B testing query parameter lets you, for example, share the same article with two different layouts on social media:
- Article 1 with Layout A goes to Facebook
- Article 2 with Layout B goes to X (formerly known as Twitter)
CRUD Operations for Your Layouts
By selecting the Actions Menu, you can compare, duplicate, archive, remove, or set your test site live.
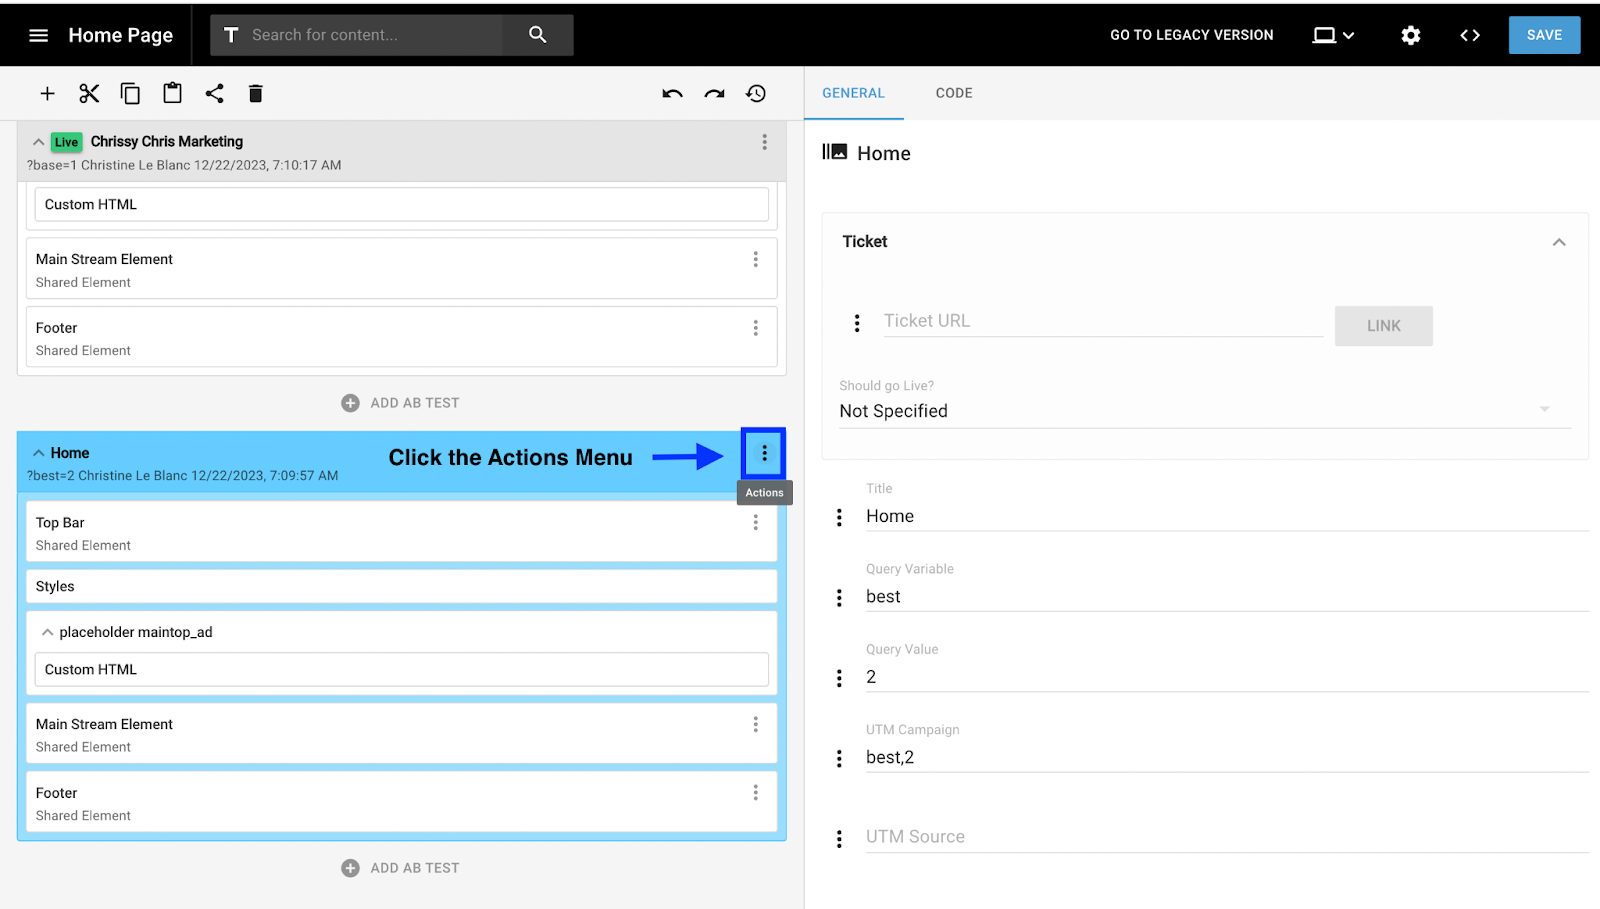
There will be a drop-down menu with all of the following options available.
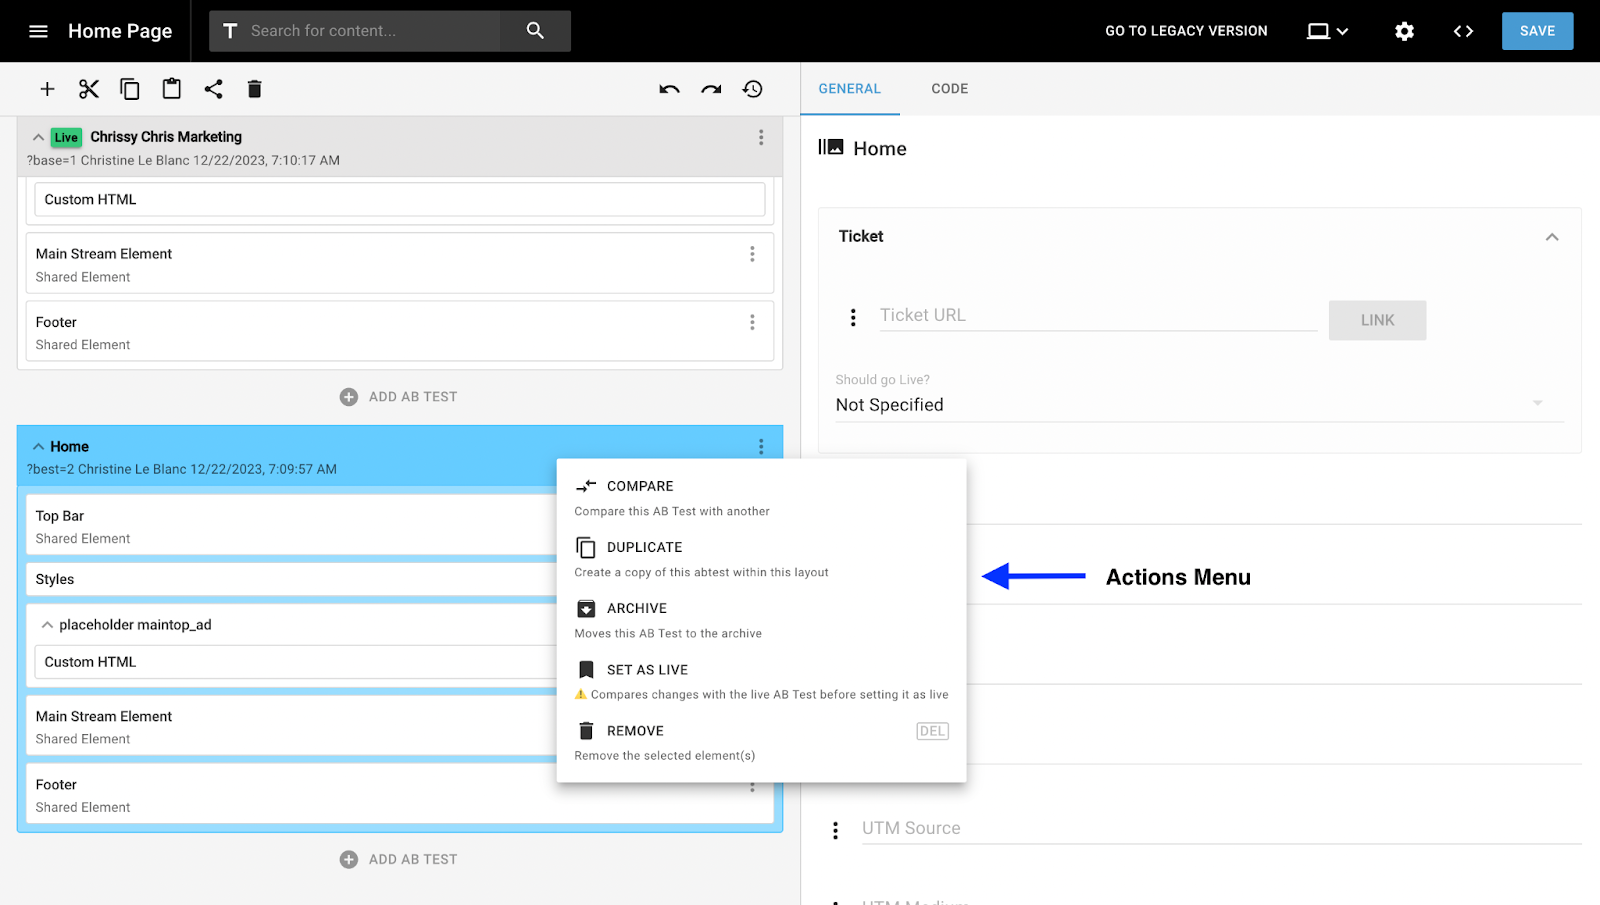
Button Operations
Learn more about each button operation for your beta and live websites:
- Compare: You can compare your A/B test results with your current live website or one of your testing sites
- Duplicate: Create a copy of any site or layout using this function
- Archive: You can archive your site when you no longer need it or want to reference it later
- Set As Live: Set your beta site live when you are ready to test your changes
- Remove: When testing is complete, you can remove the page or website
Google Analytics Tracking with UTM Campaigns
We can also track the performance of each layout with our Google Analytics integration. There is a default setup, but it is easy to customize your parameters.
![]()
Below the query parameter fields, you'll find all the usual UTM variables that can be set up to match your tracking.
Please ensure that if you're testing a section page, article page, or any page other than the home page, you open the page first and then add the query parameter. So click on any Section/Article page on your site and then add the query parameter to the end of the URL. Otherwise, the site will think you're trying to load a different layout for the home page.
If you have any questions about how to A/B test layouts on RebelMouse, email support@rebelmouse.com or talk to your account manager today.

