Subscribe to Our Newsletter

x

Social UX for Media Layout: How to Monetize It

You can easily implement ads between posts in your Social UX layout.

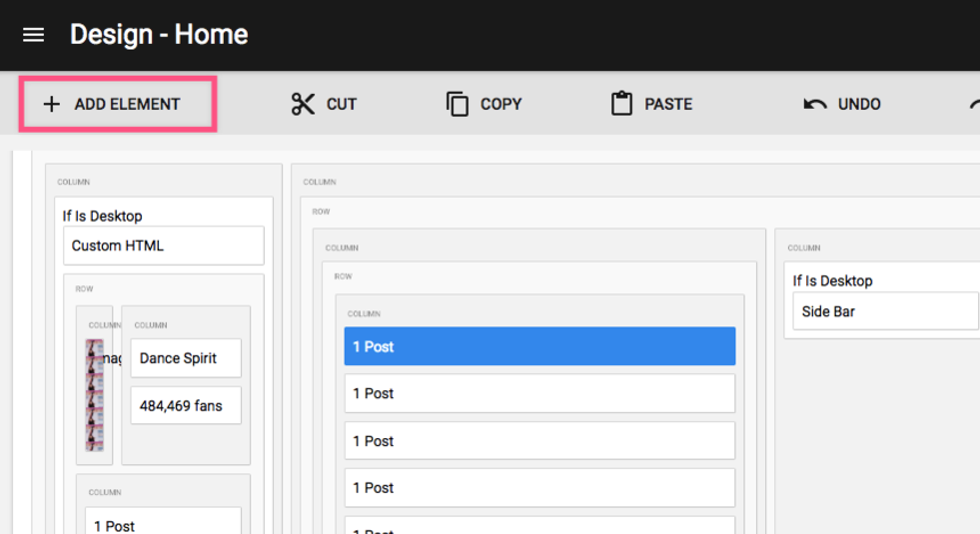
First, go to the Layout & Design tool in the left-hand navigation menu.

In our example, we'll take a look at our Home Page's Social UX setup.


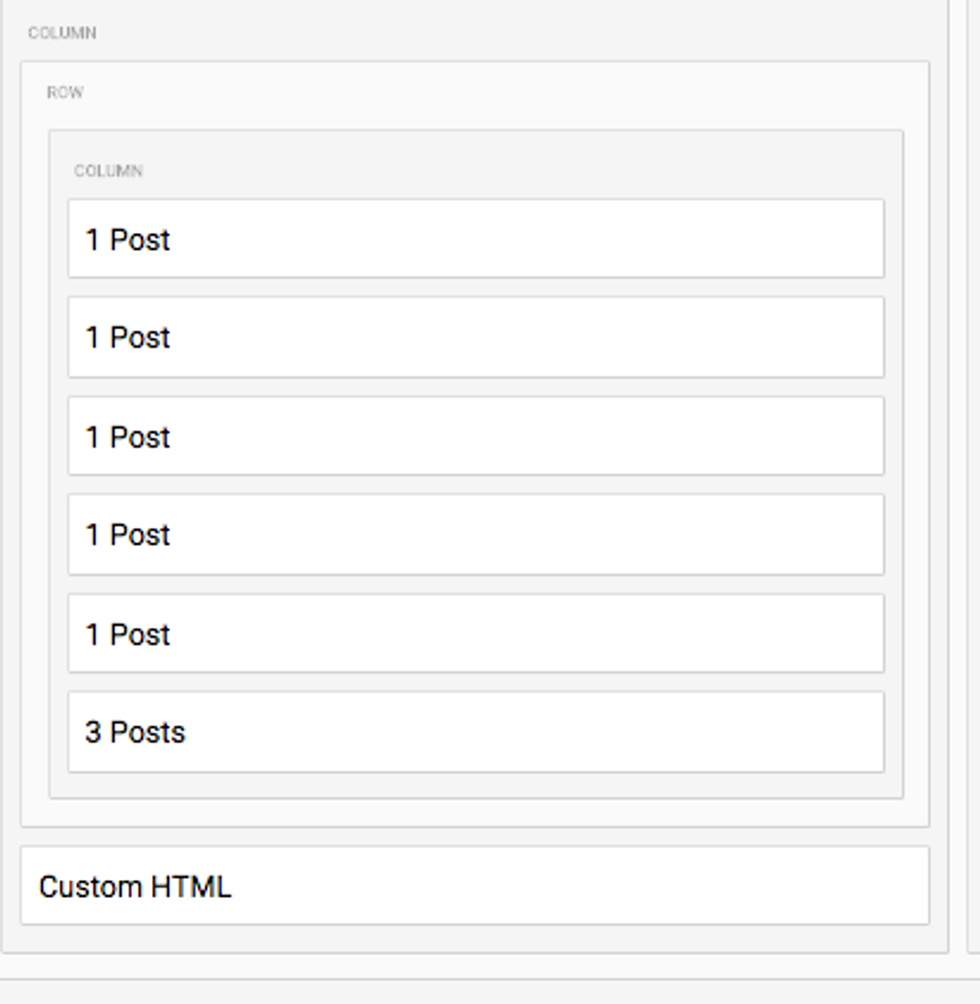
Above is how our Home Page layout looks with no ads implemented. Let's change that.

We'll select the first post element in this column, and then click on + ADD ELEMENT in the toolbar.

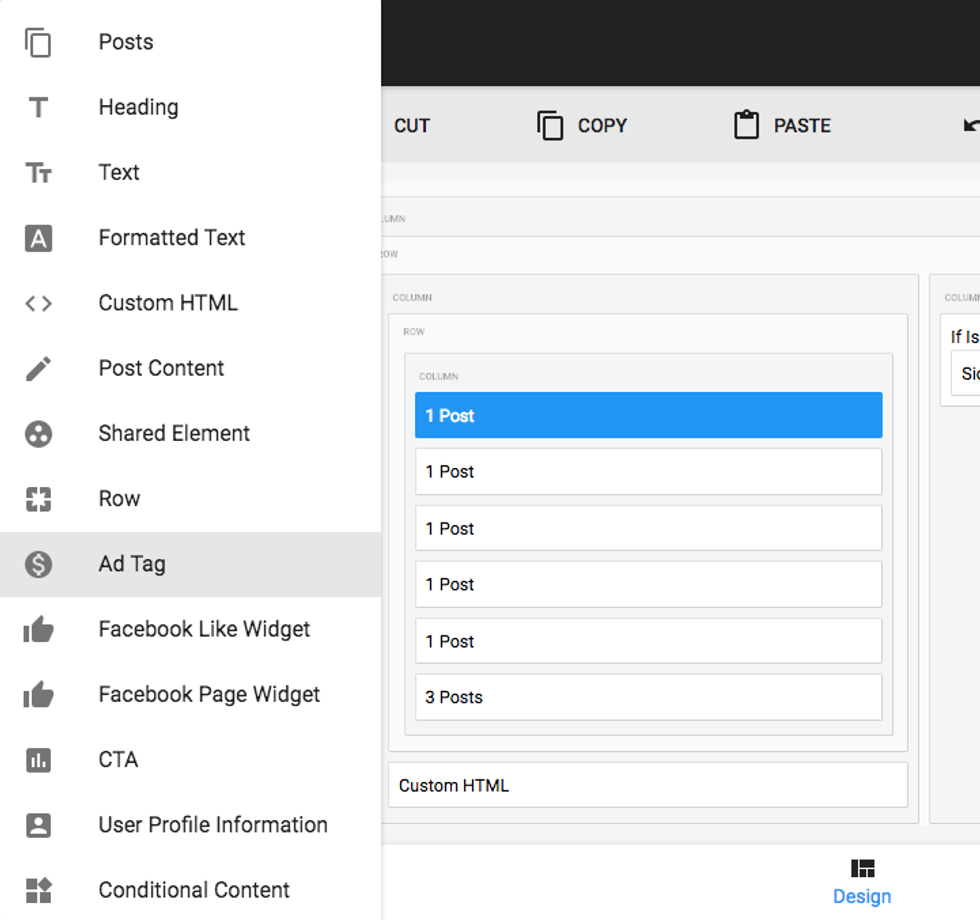
This opens up a menu to the left with all of the elements we can add. In this case, we want to choose Ad Tag.

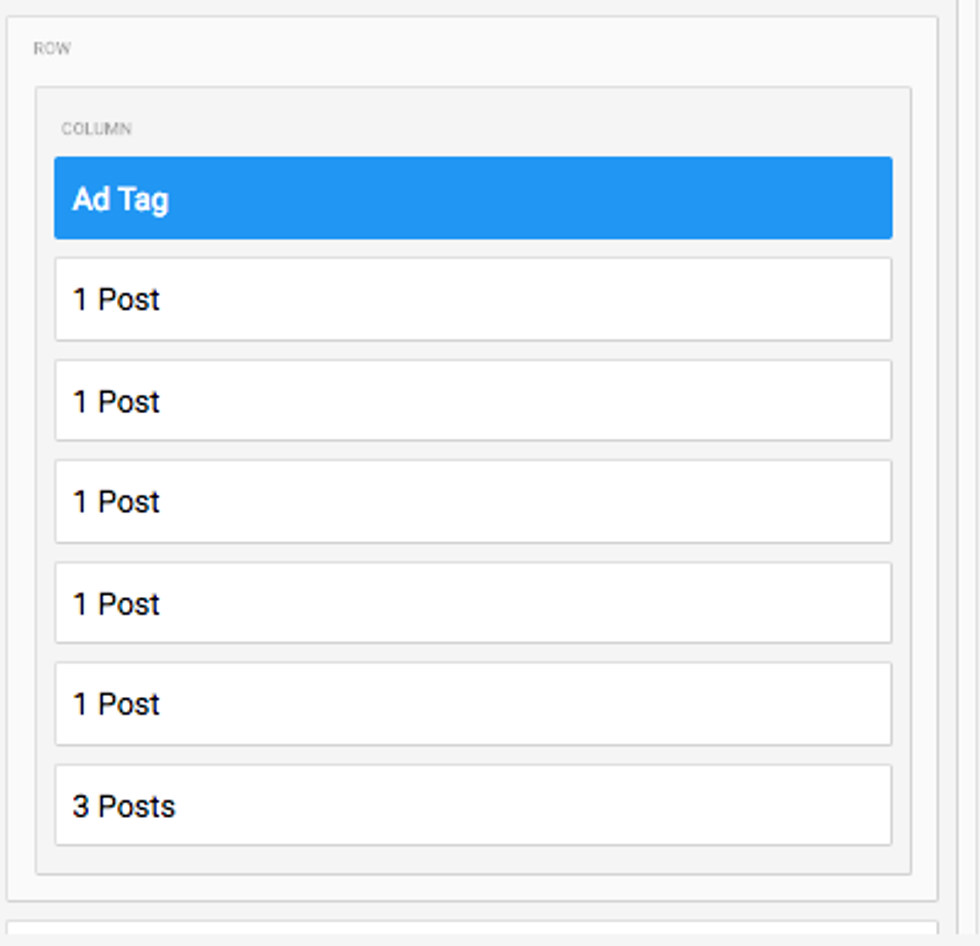
The newly added Ad Tag element will initially be positioned at the end of the list of elements in the column, but you can easily move it to the top by dragging and dropping.

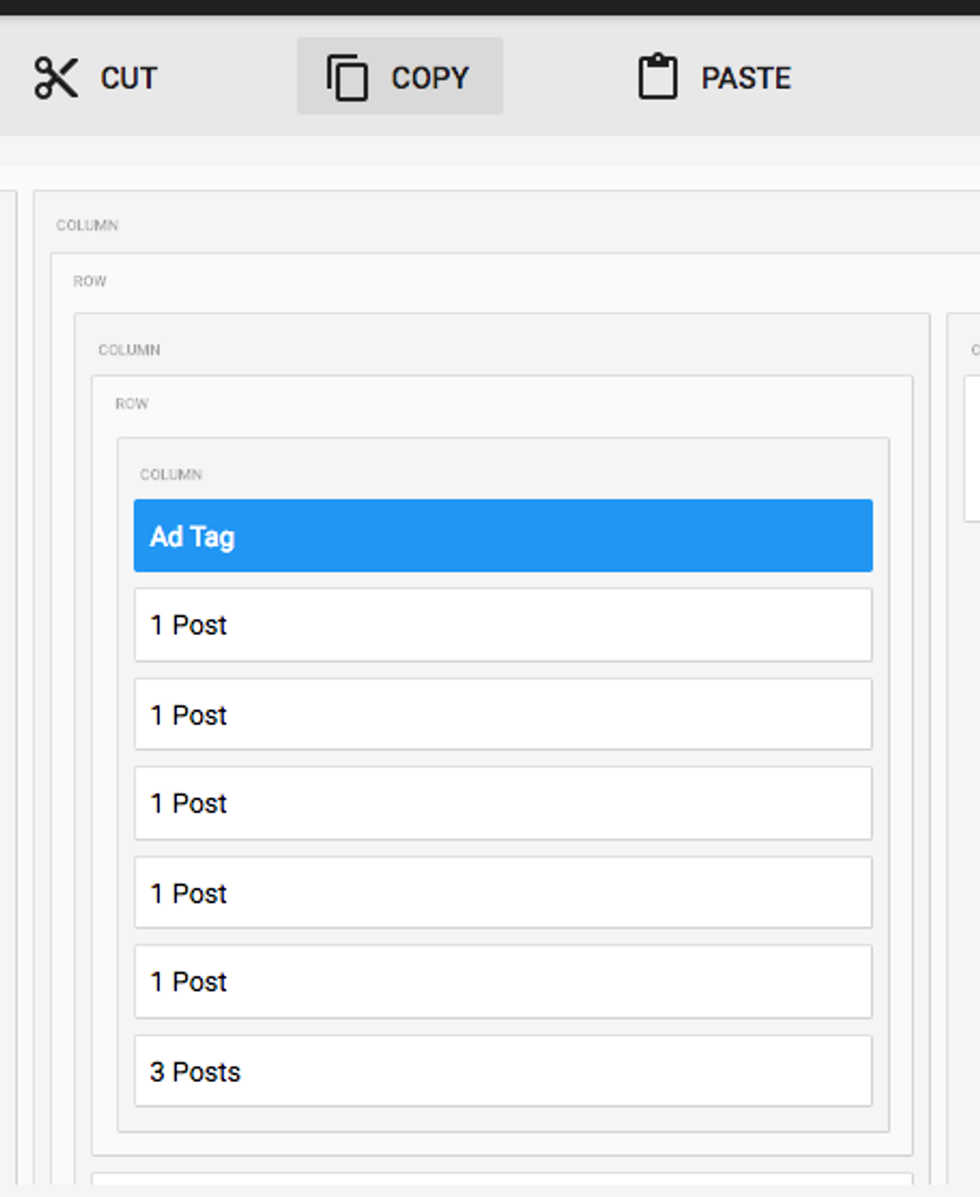
Here's the Ad Tag after it's been repositioned.

You can then easily copy the Ad Tag element you've implemented by highlighting it and clicking COPY in the toolbar. (You can do this with any element, for that matter — including entire posts!)

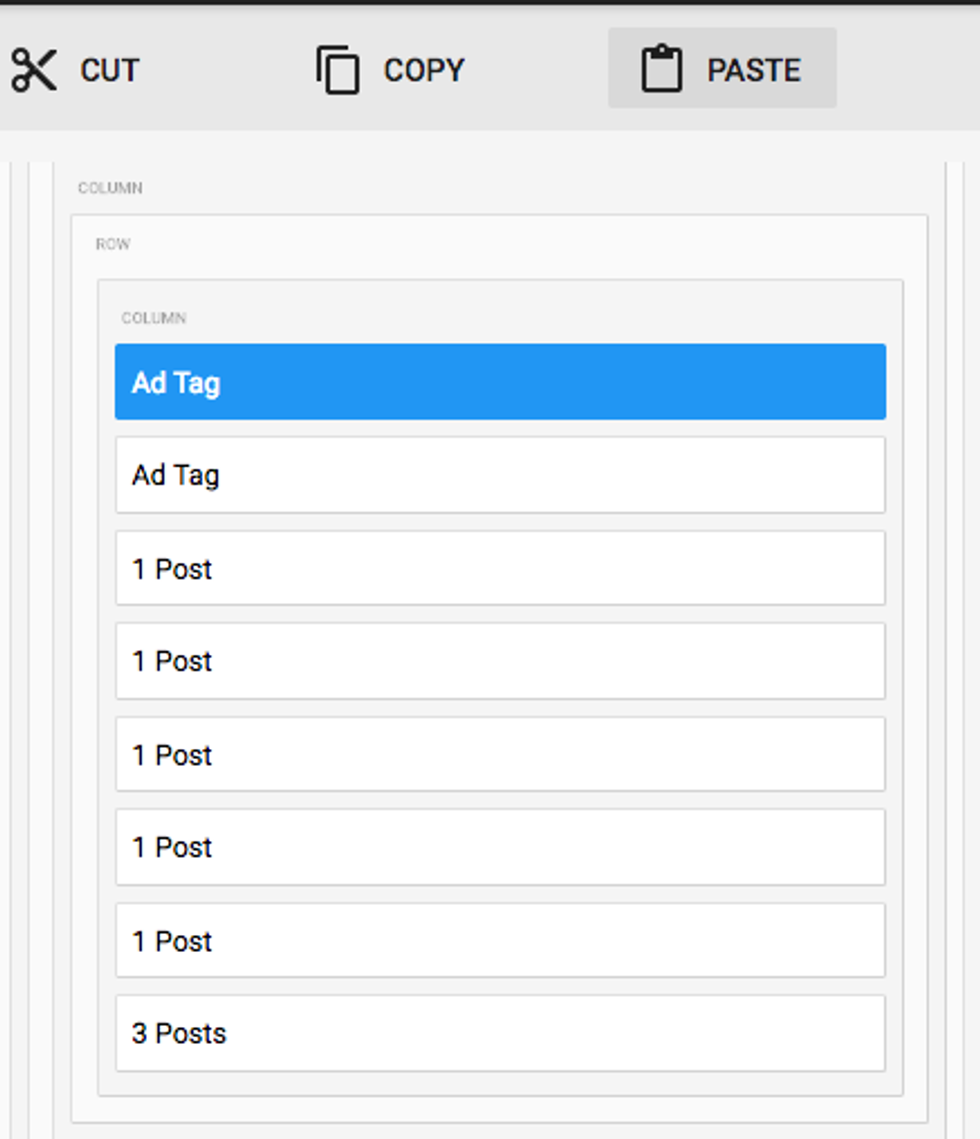
If we want to duplicate the new Ad Tag element after copying it, we simply click PASTE in the toolbar. The copy of the element will be placed above the original and ready to move if necessary.

By using our powerful copy and paste tools with the Ad Tag element, you can quickly and easily monetize your stream of content in the Social UX layout.

Particle Assembler: Ads in Slideshows Now Supported

You can now insert ads between slides in a slideshow!

Monetizing users' engagement and page views is pivotal to most digital businesses, and our Particle Assembler has been an invaluable tool in helping RebelMouse clients to insert native ads seamlessly into their content. Now we've taken this functionality one step further by introducing support for ads between slides in Assembler's slideshow layout.

Keep reading... Show less

Inside RebelMouse’s Quality Assurance Operations

How We've Perfected Stress-Free Publishing

At RebelMouse, we like to refer to our enterprise publishing platform as "lean tech." Most publishers have a natural inclination to start doubling down on teams of developers who try to build unique experiences to help stand out above the noise. But they should actually be doing the opposite: Lean tech is the preferred way to cut through content saturation. By allowing RebelMouse to obsess over your product, content producers, editors, managers, and everyone in between can focus on creating quality content and taking advantage of opportunities to leverage distributive publishing strategies that create real revenue growth.

One of the major reasons we're able to maintain a lean tech environment is thanks to our approach to quality assurance (QA). We make updates to our platform daily to ensure our clients always have access to the most robust, high-performing, and secure version of our platform. Behind the scenes, this means having a solid QA structure that's efficient, creates less bugs, and catches the ones that do pop up before they go live. It's a system of checks and balances that's hard and costly to replicate on a custom CMS. Here's a glimpse into how it works.

Our Tech Stack Toolbox

  • Cucumber
  • Java
  • Junit
  • Maven
  • Selenium WebDriver
  • TeamCity
  • Zalenium (Selenium Grid)

Our Checks and Balances Workflow

Automated Regression Testing Cycle

The Lifecycle of a Product Update

When an update is first made to RebelMouse, TeamCity immediately triggers the start of automated tests to review integrity.

TeamCity Build

TeamCity Agent

The tests run in parallel on TeamCity's Build Agent. Next, Zalenium creates docker containers with browsers that matches the count of parallel threads. An Allure report is then generated from the test results, which shows the state of the application after the update.

Allure Report Pass

If a test doesn't complete successfully, the testing framework receives a video with a failed test and attaches it to the Allure report.

Allure Report Issue

Based on the report analysis, a QA specialist will create a "bug" ticket in our product management software to address the issue if needed. Then, information about the bug is immediately sent to the project manager and we begin the process of correcting the problem.

The media powerhouses we power can publish with confidence knowing that any product issues that arise are met with a tried-and-true process to fix the problem with little-to-no disturbance to their workflow. If you have any questions about this process, please email support@rebelmouse.com.

Related Articles

Related Posts vs. Posts in Assembler

Here's the difference between Related Posts and Posts in Assembler.

By using Related Posts and Posts in Assembler, you can help your audience stay engaged with your site's content and generate more traffic. Both of these features can be added to any post through Entry Editor.

When creating or editing a post, you can add a Related Posts section to the bottom of it that consists of a selection of existing posts on your site that you choose to surface. Only the main image and content headline are pulled, along with a link to the original post. This is similar to the Around the Web section that also shows up at the end of your post when you enable it from the SEO tab of Entry Editor.

Keep reading... Show less
Subscribe to Our Newsletter