


Adding the Google Webmaster's verification meta tag to your site is easily done with the Layout & Design tool.
Google's instructs us to do the following:
Copy the meta tag below, and paste it into your site's home page. It should go in the <head> section, before the first <body> section. To stay verified, don't remove the meta tag, even after verification succeeds.
And then they provide a meta tag like this example below:
<meta name="google-site-verification" content="fGBeZPfzbeHfcug7kdVRU0MRGBO8AasaTeK-bk_dH_M" />
You can add your code (the one above is just an example) to the <head> section of your RebelMouse site in three easy steps:
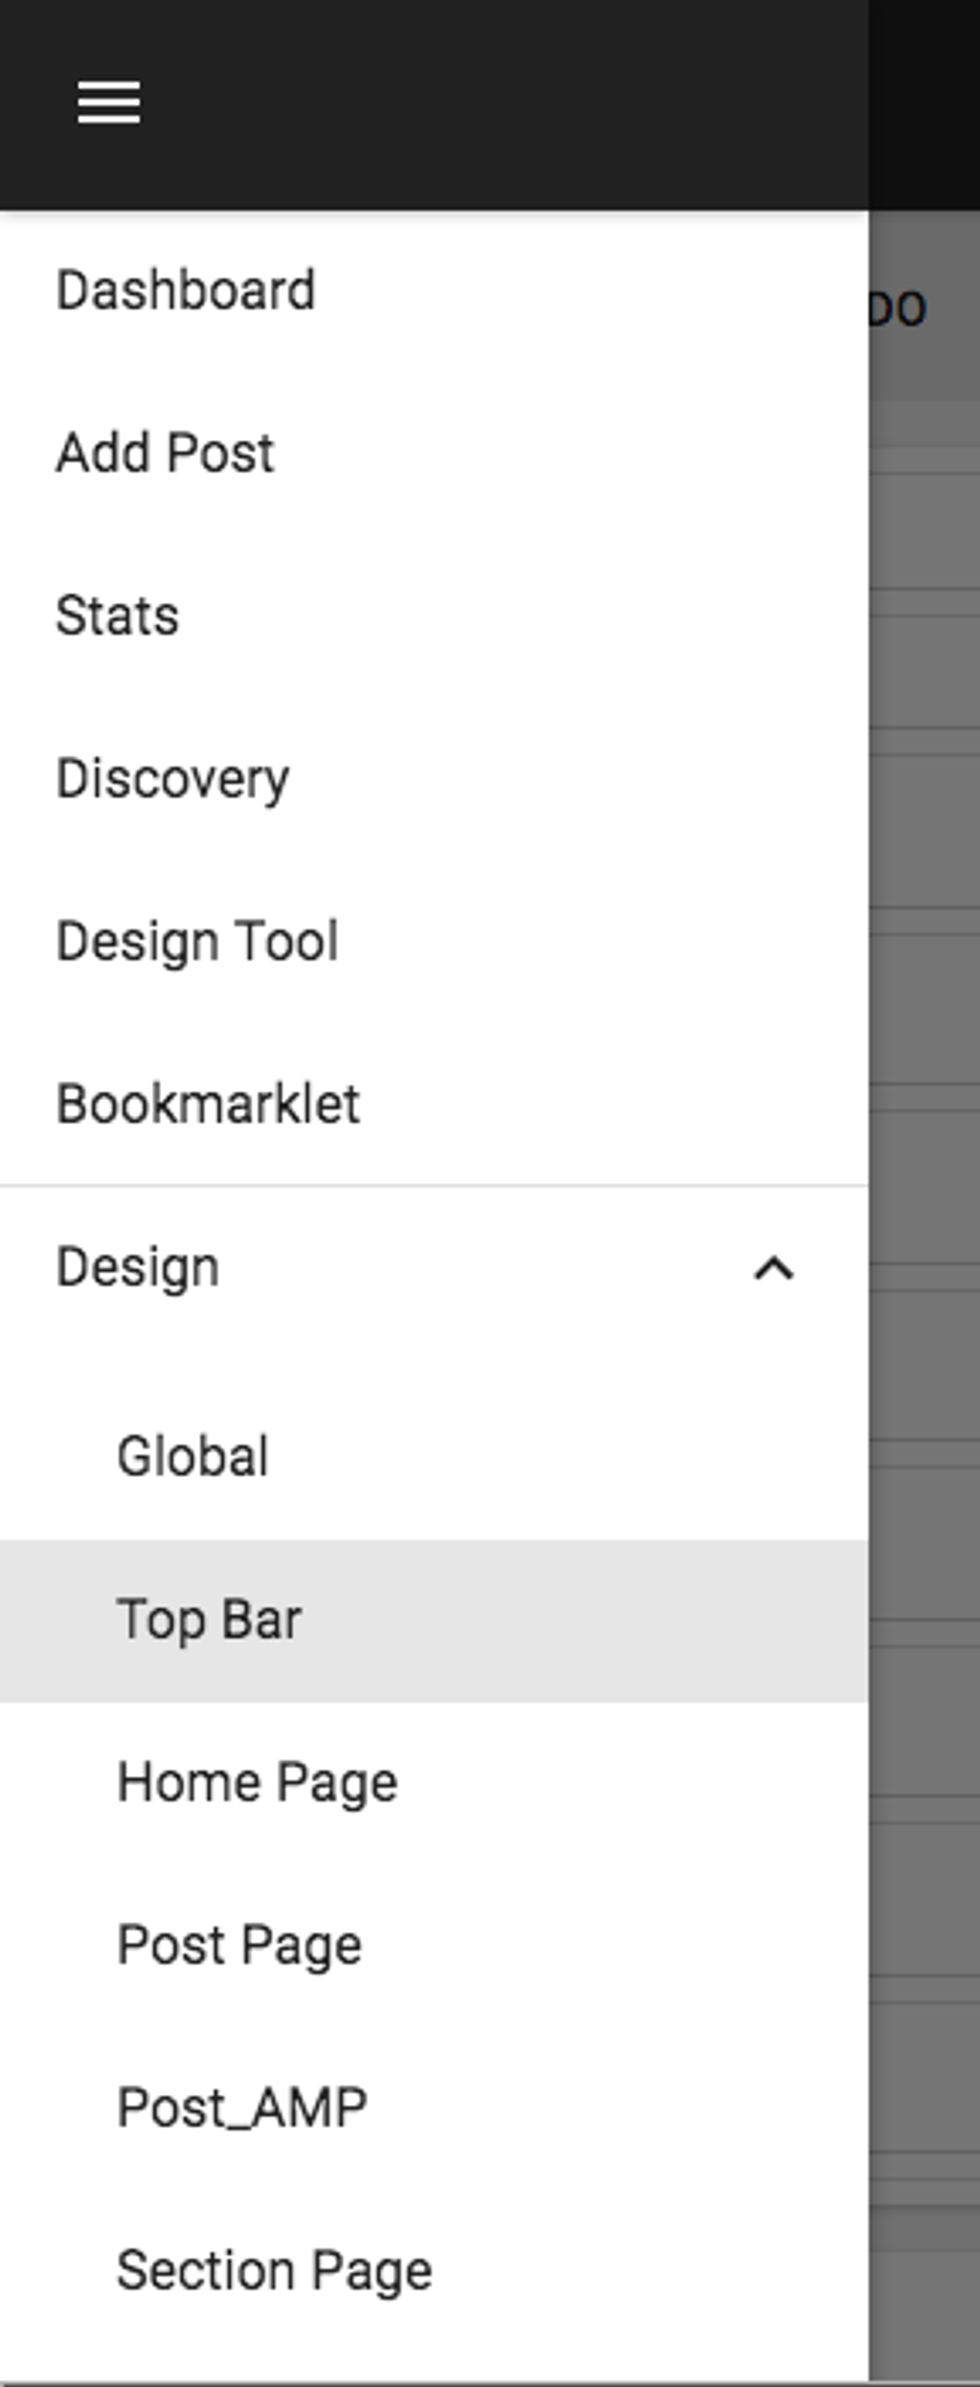
1. In the Layout & Design tool, click on the Top Bar page.
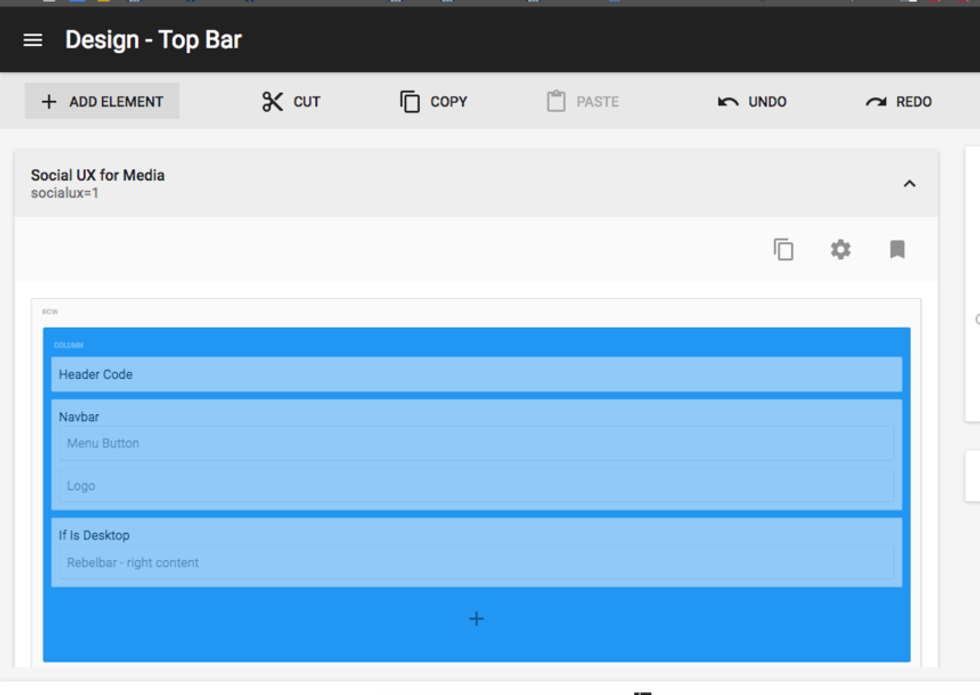
2. Once loaded, select the main column and click on the + ADD ELEMENT button in the toolbar.
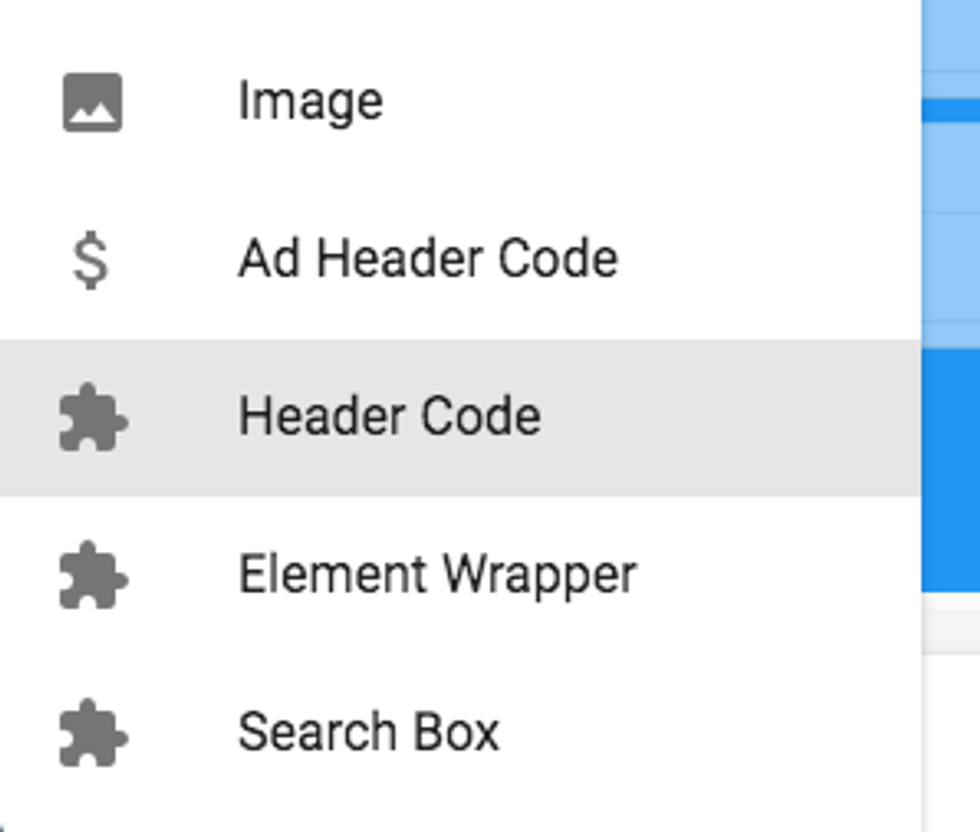
3. From the elements list, select Header Code.
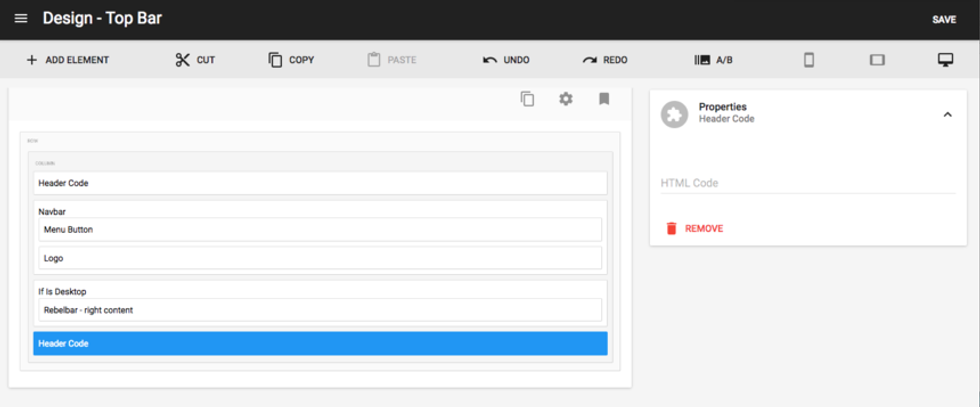
4. Once the Header Code element is placed into your layout, click on it. A Properties card will appear to the right where you can paste the meta tag Google provided to you.
Remember to click Save and voilà — you're done!


