Subscribe to Our Newsletter

x

The Layout Tab: Choose Different Layouts for Each Post

It's important to have a healthy mix of content on your site. From video posts to listicles to ad-oriented posts, there's a need for various layouts to exploit these divergent content types to their maximum potential. That's where our Layout tab comes into play.


Inside the Layout tab, you can select any of the layouts previously created in the Layout & Design tool as A/B tests. Here's how to get started:

1. Click Edit on any post you've already created, or create an entirely new post by clicking Add Post.

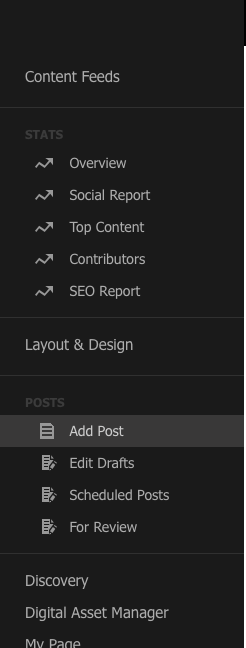
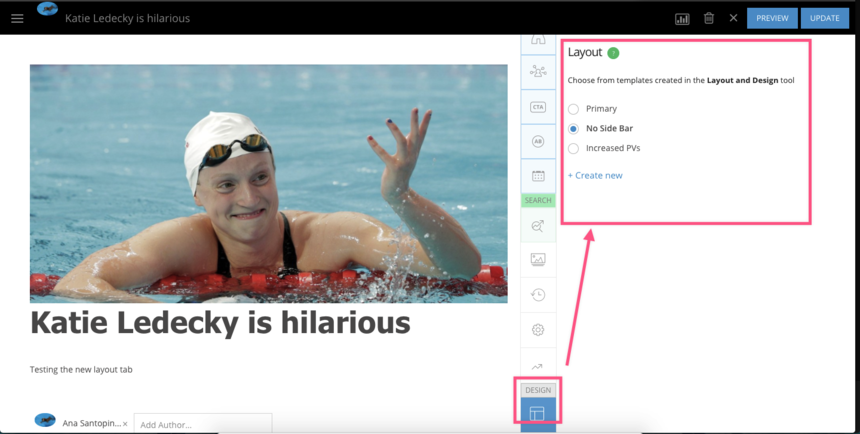
Within the Entry Editor, hover over the righthand menu rail to explore all of your editing options. At the bottom, you'll find the Design section. This is where the Layout tab is located.

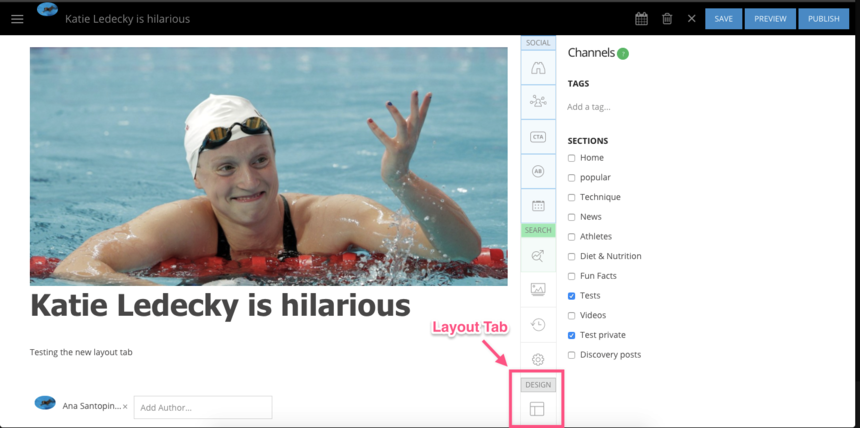
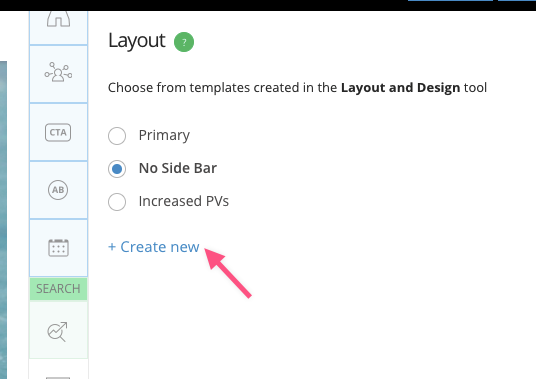
Click on the Layout tab, and you'll be presented with all of the layouts you can choose from.

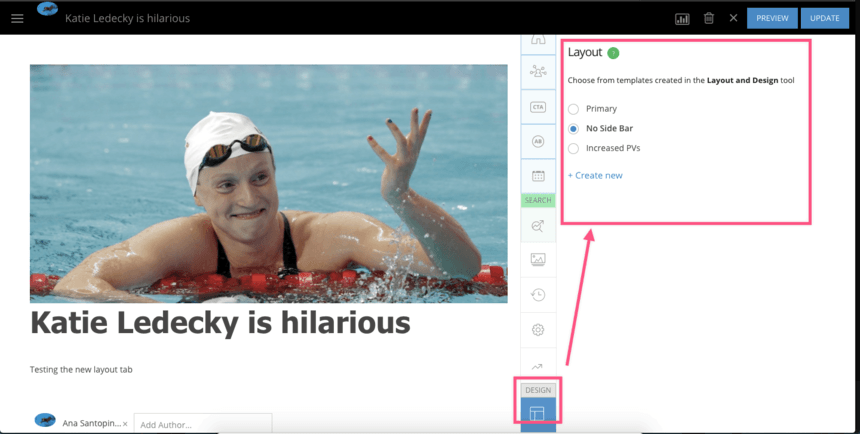
The layouts displayed are the A/B/C/D/etc. tests that you've created in the Post Page section of the Layout & Design tool. In the example below, you'll find a three-A/B-test layout setup:

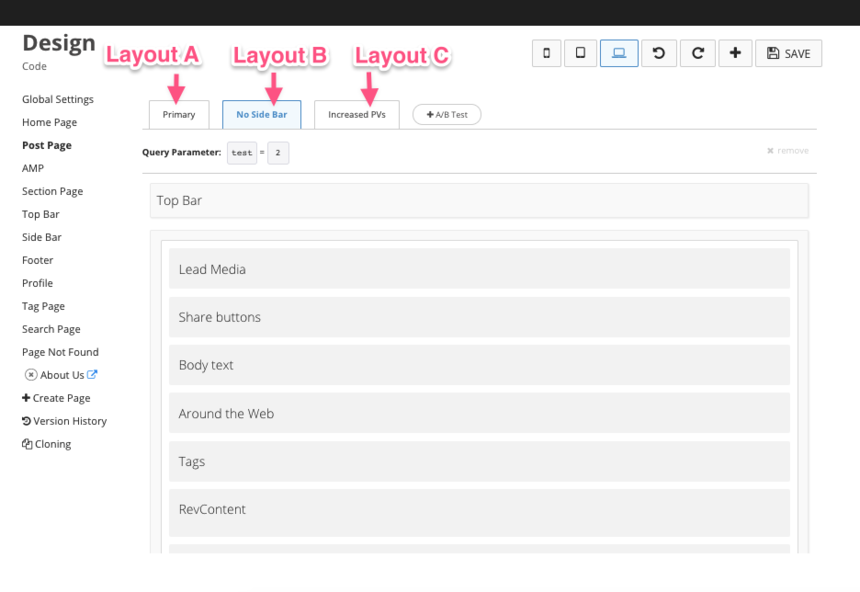
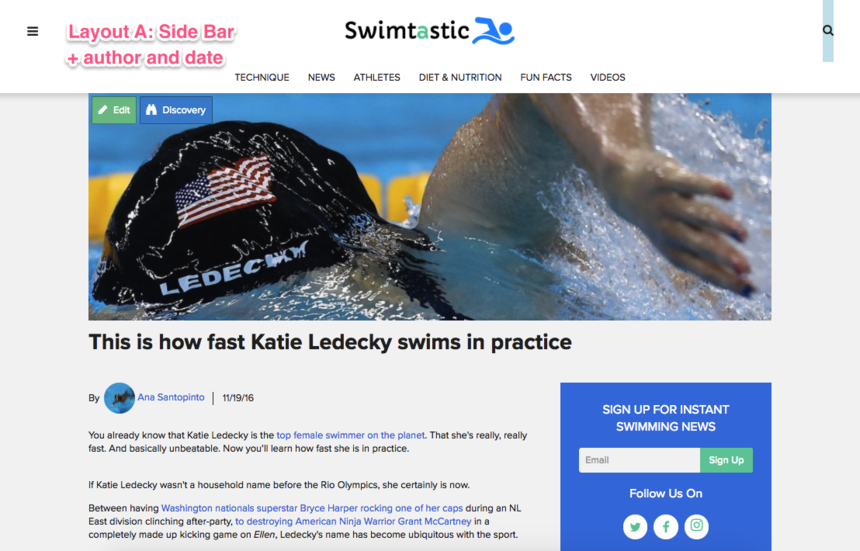
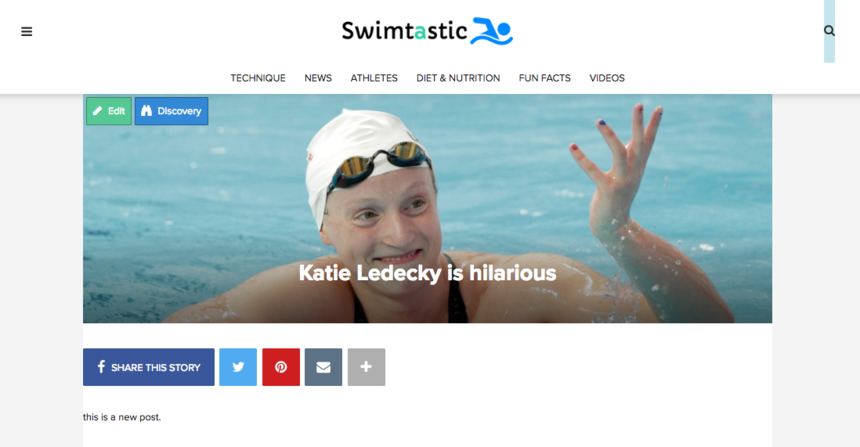
The Primary layout (which is the default one you'll see on your site) will appear as follows:

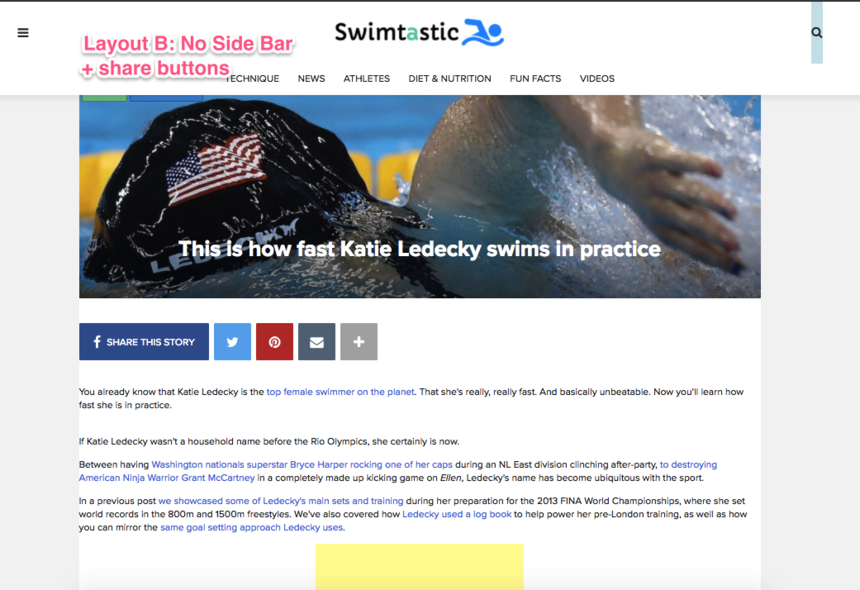
The B layout we chose in the Entry Editor for our test post looks like this:

No side bar, no author, no date — just share buttons.

Going back to the Layout tab of the Entry Editor, we're going to choose the "No Side Bar" template, which happens to be the B test that we showed you above.

After clicking Publish, the post is updated to use the "No Side Bar" (Layout B) template.

ProTip: If you click on the + Create new option, it will take you directly to the Layout & Design tool so you can start designing a new layout.

The layout feature gives you the ability to create various templates and use them according to your content needs.

Note: If you change the name of a template or delete it, it's not automatically updated — so the posts that used it will revert back to using the Primary layout. The Primary layout is always your default template.

Particle Assembler: Ads in Slideshows Now Supported

You can now insert ads between slides in a slideshow!

Monetizing users' engagement and page views is pivotal to most digital businesses, and our Particle Assembler has been an invaluable tool in helping RebelMouse clients to insert native ads seamlessly into their content. Now we've taken this functionality one step further by introducing support for ads between slides in Assembler's slideshow layout.

Keep reading... Show less

Inside RebelMouse’s Quality Assurance Operations

How We've Perfected Stress-Free Publishing

At RebelMouse, we like to refer to our enterprise publishing platform as "lean tech." Most publishers have a natural inclination to start doubling down on teams of developers who try to build unique experiences to help stand out above the noise. But they should actually be doing the opposite: Lean tech is the preferred way to cut through content saturation. By allowing RebelMouse to obsess over your product, content producers, editors, managers, and everyone in between can focus on creating quality content and taking advantage of opportunities to leverage distributive publishing strategies that create real revenue growth.

One of the major reasons we're able to maintain a lean tech environment is thanks to our approach to quality assurance (QA). We make updates to our platform daily to ensure our clients always have access to the most robust, high-performing, and secure version of our platform. Behind the scenes, this means having a solid QA structure that's efficient, creates less bugs, and catches the ones that do pop up before they go live. It's a system of checks and balances that's hard and costly to replicate on a custom CMS. Here's a glimpse into how it works.

Our Tech Stack Toolbox

  • Cucumber
  • Java
  • Junit
  • Maven
  • Selenium WebDriver
  • TeamCity
  • Zalenium (Selenium Grid)

Our Checks and Balances Workflow

Automated Regression Testing Cycle

The Lifecycle of a Product Update

When an update is first made to RebelMouse, TeamCity immediately triggers the start of automated tests to review integrity.

TeamCity Build

TeamCity Agent

The tests run in parallel on TeamCity's Build Agent. Next, Zalenium creates docker containers with browsers that matches the count of parallel threads. An Allure report is then generated from the test results, which shows the state of the application after the update.

Allure Report Pass

If a test doesn't complete successfully, the testing framework receives a video with a failed test and attaches it to the Allure report.

Allure Report Issue

Based on the report analysis, a QA specialist will create a "bug" ticket in our product management software to address the issue if needed. Then, information about the bug is immediately sent to the project manager and we begin the process of correcting the problem.

The media powerhouses we power can publish with confidence knowing that any product issues that arise are met with a tried-and-true process to fix the problem with little-to-no disturbance to their workflow. If you have any questions about this process, please email support@rebelmouse.com.

Related Articles

Related Posts vs. Posts in Assembler

Here's the difference between Related Posts and Posts in Assembler.

By using Related Posts and Posts in Assembler, you can help your audience stay engaged with your site's content and generate more traffic. Both of these features can be added to any post through Entry Editor.

When creating or editing a post, you can add a Related Posts section to the bottom of it that consists of a selection of existing posts on your site that you choose to surface. Only the main image and content headline are pulled, along with a link to the original post. This is similar to the Around the Web section that also shows up at the end of your post when you enable it from the SEO tab of Entry Editor.

Keep reading... Show less
Subscribe to Our Newsletter