1Password is RebelMouse's preferred method to securely store and transfer login credentials. Fundamental to understanding 1Password is the concept of "vaults." RebelMouse will create a new vault for your company. In this vault, you will not only find the logins we want you to have access to, but you'll also use your vault to add credentials you want to share with/transfer to RebelMouse. This way, anytime you need to share a password with us, you can add it to your company vault and vice versa.
To begin, you'll receive an email from your account manager inviting you into our 1Password system. You can ask for invitations for several users on your side if you wish. Follow the instructions provided by your account manager to set up your account. It's important to note that you should write down and keep your master password in a secure location as this will be important to have for future logins.
Once you have successfully created your account, we will receive a notification and need to approve it. After our approval, we will receive another email and you will be ready to use your 1Password account.
If you want to add the 1Password app to your device, you can download and install it using the "Get the Apps" option within 1Password.
How to Set up 1Password
You can use 1Password entirely in your browser if you wish. The directions will be the same. If you don't want to use your browser to access 1Password, here's how to download and install 1Password's app:
- Click on your name in the upper right-hand corner of your 1Password account.
- Select Get the Apps.
- Choose the appropriate download for your system.
- Install the downloaded file and follow the instruction prompts to complete the setup process.
Adding Details and Passwords to 1Password
Click on [Your Company Vault] to access the system. This is where you'll see all of the project's relevant credentials stored. This is also where you'll add your own credentials if necessary.
To add a new entry, click the + button at the bottom (or top) of the screen.

A pop-up window will appear with many different options for the types of things you can store, including logins, passwords, and secure notes.
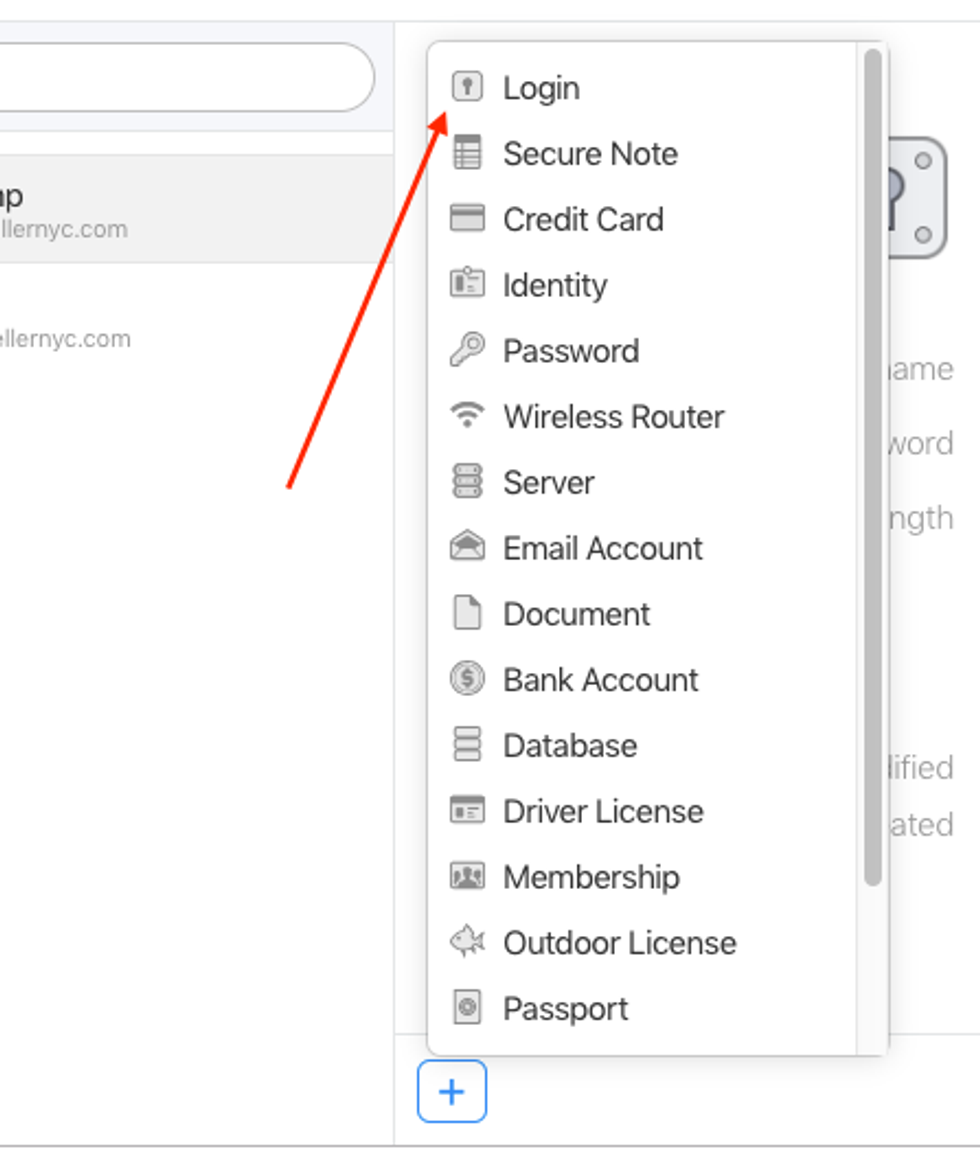
Typically, you will select Login. You can now enter the relevant information into 1Password. The most relevant will be username, password, website (URL of where you log in), and, if applicable, notes.
You can now view, add, edit, or delete credentials in your company vault. Please keep in mind that we only give temporary access to vaults during the time frame in which we need to share credentials with each other.
If you have any questions about 1Password, please contact support@rebelmouse.com.

![Best CMS for News Websites and Large-Scale Publishing [2024]](https://www.rebelmouse.com/media-library/image.png?id=51952819&width=600&height=600&quality=85&coordinates=350%2C0%2C350%2C0)


